5/3/1: The Simplest and Most Effective Training System for Raw Strength (2nd Edition) (3 page)
Read 5/3/1: The Simplest and Most Effective Training System for Raw Strength (2nd Edition) Online
Authors: Jim Wendler

Once the bar passes your knees, push your hips through to complete the lift. At this point you should be standing erect (not back), and your knees should be locked.
You can either lower the bar slowly to the starting position or drop it. This depends on how quickly you want to get yourself kicked out of a public gym.
There are two options for doing multiple reps with the deadlift. You can either
touch-and-go
the reps (slight bounce off the floor), or you can do
dead stop
deadlifts. For these, you’l reset for each rep. I’ve done both, and both work. The downside to touch-and-go is that when you build up momentum, you can bounce too hard and lose your tightness. If you’re strong enough to hold your position and you have the control to do it, this option will work for you. The dead stop option is good for most people, but make sure you reset perfectly each time. The beginning portion of the lift is where most back injuries will occur. In this regard, the touch-and-go style is a little safer.
Training Fashion
I’m not talking about the shirts, shorts or socks you wear, although from what I’ve seen in gyms, maybe I should. Should you wear knee wraps, wrist wraps and belts when you train? To answer this question, here’s a list of things I think can be useful in your training program:
Belt:
This is the tel tale sign that you’re a lifter, as least as far as the general public is concerned. The general public, however, should never see this because you should never wear it in public. If you’re in a gym, people already know you’re a lifter. If you actually have some muscle mass, that might be a dead giveaway, too. Some anti-belt lobbyists believe your abs and lower back wil get weaker if you use a belt, but if you train these areas you’l be fine.
There are generally two kinds of lifting belts. Both are made from either leather or suede. One is a 2” wide Olympic lifting belt, and the other is a 4” wide powerlifting belt. Both are fine. The
type you’ll use is going to be up to you and your comfort level. Many people like squatting in the wider power belt, while deadlifting and bench pressing in the Olympic belt.
Don’t buy a cheap belt. A good belt wil last you a lifetime, and once you have it broken in, you’l consider it the best training partner you’ve ever had. I recommend wearing a belt for your work sets in this program, but if you need to wear it during your warm-ups, that’s fine too.
Shoes:
A good pair of shoes is essential, especially for squatting and deadlifting. I own two pairs of shoes for squatting: a Metal squat shoe and an Olympic squatting shoe. The Metal squat shoe has a hard sole, but it’s flat. The Olympic shoe has a raised heel. I like them both, and I haven’t found much difference between the two. The heels are different in these shoes, but the soles are the same – they’re hard. They’re not soft like a running shoe or a cross trainer – two of the worst shoes in which to squat or deadlift.
I’d rather squat or pul barefoot than in a “regular” shoe, and I’ve done this in a pinch. The cushion of these shoes allows too much foot movement, and it doesn’t give your legs a strong, steady base to pull or push from. Picture squatting on a bed versus doing it on a concrete floor.
I’m not sure whether Metal makes their shoes anymore, but you can find good Olympic shoes on the internet. I have a pair made by Adidas. They’re expensive, but you’l have them for life so don’t skimp.
The second option is a shoe like a Chuck Taylor. The sole is cushioned but very thin and flat.
This is probably the cheapest and easiest option for most lifters.
Chalk:
Use it. If your gym doesn’t al ow it, sneak it in. This is one of the most important things for your strength and safety, so be wary of gyms that don’t al ow it. They don’t want you to be safe or strong.
Wraps:
I like using wrist wraps (not straps) for bench pressing and military pressing. I use a 24”
wrist wrap, applied fairly tight to give my wrists some support. Knee wraps are a good idea, but only when working to a true 1RM. Leave them off otherwise. Knee sleeves can be worn if you feel they offer enough warmth to the area and allow you to squat without pain.
Beginning the Program
First, know your maxes for the four lifts (squat, bench, deadlift and standing military press).
These are not maxes you think you can do, maxes you’ve done, or maxes you think you might be able to do. These are maxes you can do RIGHT NOW. This is not the time to be a braggart lifter. If you overestimate your maxes, you’ll be in for a rude awakening.
If you don’t know your maxes for any of the lifts, you can take a few days and see where you’re at, or you can take a rep max. This is a good way to get an idea of your strength without loading the bar for a maximal attempt. Here’s how to do it:
Estimate your 1RM for the lift. If you can’t even do this, you probably shouldn’t be doing this program.
Take 80% or 85% of your supposed max and perform as many reps as possible.
Plug the reps and the weight into this formula to get your estimated 1RM:
Weight x Reps x .0333 + Weight = Estimated 1RM
Once you have your maxes for each lift (bench, squat, deadlift and standing military press), I want you to take 90% of this number and use this as your “max” for the first 4 weeks of the training cycle. The easiest way to do this is to take your max and multiply it by .9 (that’s “point”
9). For example, let’s say you have a 400 deadlift, 385 squat, 190 military press, and a 295
bench press. Your numbers would look like this:
Deadlift:
400 x .9 = 360
Squat:
385 x .9 = 345
Military:
190 x .9 = 170
Bench Press
: 295 x .9 = 265
You would then begin the 5/3/1 program using the above numbers (360, 345, 170, 265) as your starting “maxes.”
This will allow you to use sub-maximal weights to get stronger, and since you won’t be handling heavy weights al the time, it’l keep your body fresh and you won’t plateau or regress. If you decide you don’t want to do this, don’t do this program. I’ve gotten a lot of questions about why this must be done, and the answer is simple: by starting out at 10% less than your max, you won’t burn out, and you won’t plateau. So, leave your ego at the door and do it correctly. You don’t need to operate at your real max to make gains with this program. Here are some examples:
Monte Sparkman – benched 440 at a meet using a 405 training max.
Jim Wendler – deadlifted 710 using nothing higher than a 650 training max.
Leigh An Jaskiewicz – benched 135x10 and 175x1 using nothing higher than a 140
training max.
Phil Wylie – deadlifted 677 at a meet with a highest training pull of 550x9.
These are extreme examples, but the point is this: you don’t have to train maximal y to get strong. You just have to train optimally. This is the greatest lesson I learned from Louie Simmons. So, the first part of this program entails finding your maxes for the squat, bench, deadlift and standing military press.
Once you have these maxes, make the commitment to
starting your training program at 90% of your max.
There are two options you can use with the 5/3/1 method. The sets and reps are the same. Only the percentages differ. Here is option one:
Week 1
Week 2
Week 3
Week 4
65% x 5 reps
70% x 3 reps
75% x 5 reps
40% x 5 reps
75% x 5 reps
80% x 3 reps
85% x 3 reps
50% x 5 reps
85% x 5 or more reps
90% x 3 or more reps
95% x 1 or more reps
60% x 5 reps
Here is option two:
Week 1
Week 2
Week 3
Week 4
75% x 5 reps
80% x 3 reps
75% x 5 reps
40% x 5 reps
80% x 5 reps
85% x 3 reps
85% x 3 reps
50% x 5 reps
85% x 5 or more reps
90% x 3 or more reps
95% x 1 or more reps
60% x 5 reps
I’ve used both options, and both have worked very wel for me. Right now, I use option one exclusively and would recommend this for just about everyone. Most people prefer doing it this way because it allows you to be fresher for the last big set of the day. The second option is very tiring, especially on squat and deadlift days.
Which one is right for you? I don’t know. Both are effective simply because there’s a logical progression involved, and a logical thought process behind each. You can also mix and match them. Whatever the case may be, pick one and try it out. If you do it correctly, you’l make gains.
The Last Set
Whichever option you choose, you’l notice that the last set of the day reads, “or more reps.”
This is where the fun begins. The last set of the day is the all-out set. You’l be going for as many reps as possible. I hesitate to tel anyone to do anything to failure, because that’s not what I’m after. I wouldn’t prescribe this. This last set should be a ball buster, though, and it’s the one you really need to focus on. This is when you dig in and try to move the world.
Because you’re working off a weight that’s 10% less than your actual max, you should be able to get the prescribed reps for the day fairly easily. This is a foregone conclusion. On the last set, however, you’l have to reach further and grind it out – not to failure so you’re dead and can’t train the rest of the week, but it should take some life out of you.
I highly recommend having a goal in mind for these last sets. Sit down the night before, or the week before, and think of the number of reps you’d like to hit. See yourself doing it. Write it down and visualize the bar in your hands or on your back. When it’s time, let yourself go and attack the weight.
I’ve always thought of doing the prescribed reps as simply testing your strength. Anything over and above that builds strength, muscle and character. Doing the prescribed reps shows you and your body that you’re strong enough for the workout. The extra reps are your way of dominating the workout and getting better.
One word of warning, however: don’t take the lighter sets for granted. These wil set you up mental y for the big sets. If these sets are light and explosive, you’l feel confident and strong for your last set. If you take these lightly, or you take a carefree attitude toward them, your mind will not be right for the last set.
As you progress through this program, the weights will increase and getting more reps will get harder. If you progress slowly and start too light, you’l continue to make progress over a longer period of time, and the last set will continue to be a motivating factor.
Important note: in the 4th week (your deload week), you should NOT be going for max reps. This
is a week to get some light work in and prime yourself for the next month of training.
How to Progress
Because I believe in starting too light and progressing slowly, this program has a very easy system for progressing from month to month. Remember, the first four weeks will start with a “max” that’s 10% less than your actual max. I’ve even had lifters use 15% less than their actual max and get great results. Also, you should make sure this number is based on a training max,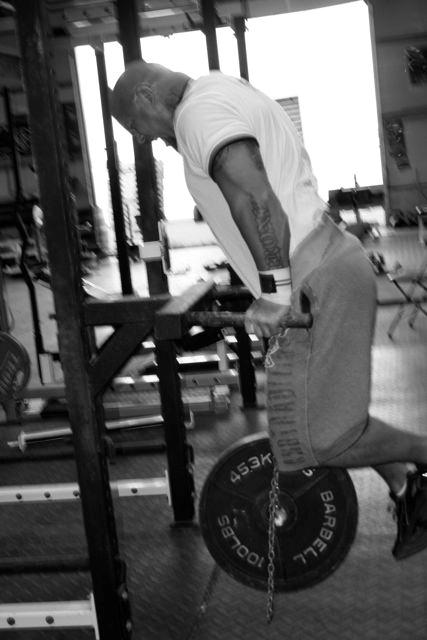
not a competition max. To demonstrate, let’s take a hypothetical lifter whose actual maxes are as follows:
Squat:
315
Bench:
250
Military:
170
Deadlift:
350
The first four weeks will look something like this:
Figure 1: 200lbs Weighted Dips
Week I
Week II
Week III
Week IV
Military
Military
Military
Military
Reps
Weight
Reps
Weight
Reps
Weight