Foundation Game Design with ActionScript 3.0, Second Edition (22 page)
Read Foundation Game Design with ActionScript 3.0, Second Edition Online
Authors: Rex van der Spuy

Click the new layer button in the Layers panel to create a new layer above the hill layers. Give it the name “Box” (
Figure 2-68
).
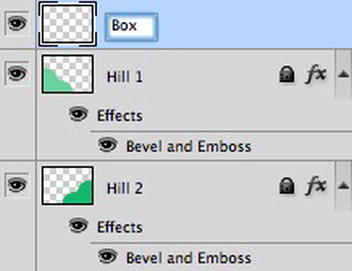
Figure 2-68.
Create a new layer above the previous layers.
Select the Rectangular Marquee Tool from the Tools panel. You're going to use it to make square boxes with the exact dimensions of 50 by 50 pixels. The Option bar lets you create fixed size selection areas. Look for the Style option and select Fixed Size from the menu. Enter a Width of “50 px” and a Height of “50 px.” Adding the “px” (for pixels) is important; otherwise Photoshop might think that you're using dimensions in centimeters if you haven't changed its default units in Photoshop's preferences. Confirm that your Options bar looks like
Figure 2-69
.
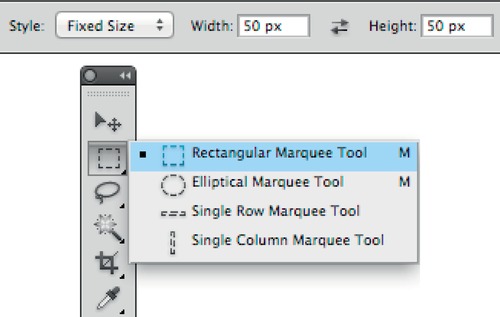
Figure 2-69.
Select the Rectangular Marquee Tool and set it to a fixed size of 50 by 50 pixels.
Photoshop calls these “marquee” selection tools because when you select something with them, the selection area is surrounded by an animation of moving lines that looks a bit like the lights of a flashing movie or theatre marquee sign. Another whimsical name for them is “marching ants.”
Click the canvas. A square, defined by a border of dashed moving lines, will appear on the canvas, as shown in
Figure 2-70
. It's exactly 50 by 50 pixels in size.

Figure 2-70.
Click the canvas to add a 50 by 50 pixel selection square.
This is a selection area. If you were using it in a conventional way, you could use it to copy anything that was under it or you could paste an image into it. Instead, you're going to use it to make a square game box. In the next few steps, you'll give it a black outside border, fill it with color, and give it a bevel effect.
Right-click and choose Stroke from the option menu. When you're making graphics, you can think of “stroke” as Photoshop's term for “the outline.” (In other contexts, however, strokes can be used for much more than just outlining shapes.) A new window will open that allows you to set the border option. Give it a width of 5 px and choose a nice black color. Click OK when you're done and you'll see that the selection area now has a black border.
Figure 2-71
shows what this will look like.

Figure 2-71.
Add a border to the selection area.
Next, add a fill color. Right-click and choose Fill from the option menu. A Fill window will open. Select Color from the menu in the Contents section. The standard Color Picker window will open so that you can choose a color. Choose a bright red, and click OK in the Fill window when you're done. The square selection area is now filled with the color you choose.
Figure 2-72
shows what your square should now look like.
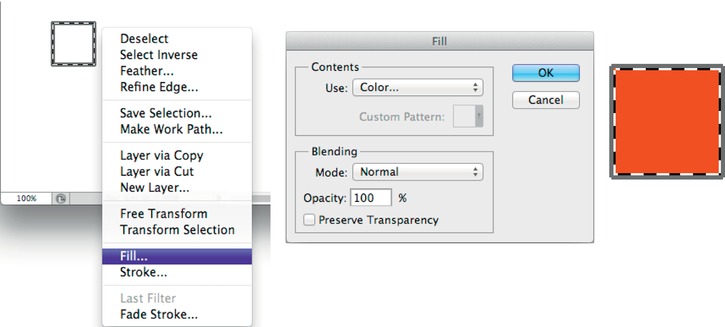
Figure 2-72.
Add a fill color to the selection.
You can also fill a selection by choosing a foreground color and clicking inside the selection with the Paint Bucket Tool.
If you want to fill a selection area with a gradient, use the Gradient Tool. (You'll find it in the same button set as the Paint Bucket.) To use it, click and drag in the selection area, and the selection will be filled with a gradient that uses the foreground and background color. You can edit the gradient by double-clicking the gradient preview in the Options bar.
You've now got a red square with a black border. But notice that the selection is still active. You don't need it anymore, so deselect it. Choose Select Deselect from the main menu or press Ctrl+D (Windows) or Command+D (Mac OS X) to deselect it. The marquee, the animated black lines, will disappear.
Next, give your red square a bevel effect. Click the FX button at the bottom of the Layers panel, and use the techniques you learned in the previous section to apply a bevel to the square. Your square might now look something like
Figure 2-73
.
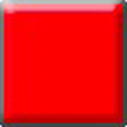
Figure 2-73.
Add a bevel.
You now have a nice, all-purpose game square. Make a few more copies of it to decorate the foreground of your scene.
Select the square with the Move Tool. Hover the mouse over the square and hold down the Alt (Windows) or Option (Mac OS X) Key. You'll see the mouse icon change so that it looks like a double arrow. Hold down the left mouse button and drag. Photoshop will make an exact duplicate of the square on its own
new layer. (You could also duplicate the layer like you did in the previous step, but it's not as much fun!)
Figure 2-74
illustrates this technique.
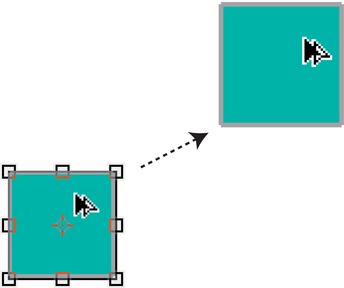
Figure 2-74.
Hold down Alt (Windows) or Option (Mac OS X) and drag to duplicate the square.
Use this same technique to make 10 or 15 more squares like this. Use the Move Tool to organize them along the bottom of the canvas like a stack of children's building blocks. (Make sure that the Move Tool's Auto-Select Layers option is selected in the Options bar. That makes it easy to select each square's layer just by clicking the square on the canvas.) Your final scene will look something like
Figure 2-75
when you're done.

Figure 2-75.
The final background scene
When you're duplicating and moving these little squares around the canvas, be careful not to click the little crosshair section in the squares' very centers. This is what determines the center of the square for rotation. You can actually move this center point if you want to rotate an object off-axis, which is something that's often very useful to do. However, if you accidentally drag from the center crosshair while trying to duplicate a square, the duplicate action will be disabled and instead you'll find yourself dragging this little center crosshair all over the canvas. To reset this so that you can start duplicating again, double-click the square. It's best to start dragging from the inner corners of the squares so that you avoid accidentally resizing them or repositioning their centers.