In Search of the Perfect Loaf: A Home Baker's Odyssey (16 page)
Read In Search of the Perfect Loaf: A Home Baker's Odyssey Online
Authors: Samuel Fromartz

That evening, I began weighing out the flour and hand mixing the dough. I combined the ingredients until the flour and water came together. Then I let the shaggy mass rest so the flour slowly soaked in the water, folding it at steady intervals to develop the gluten. By the end of the process, the dough was elastic and glistening with moisture. If you pull away a small piece and stretch it out with your fingers at this point, you should be able to see through it—the so-called windowpane test that shows when gluten is fully developed.
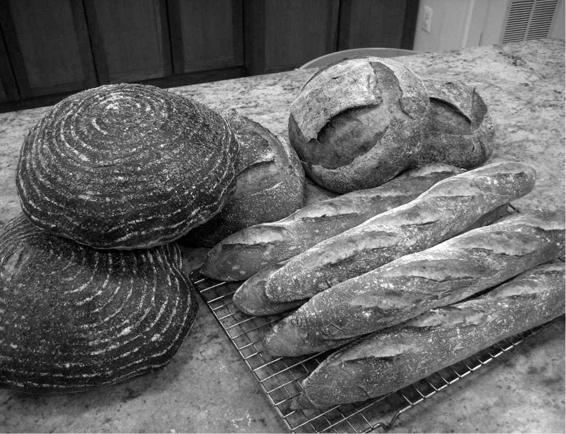
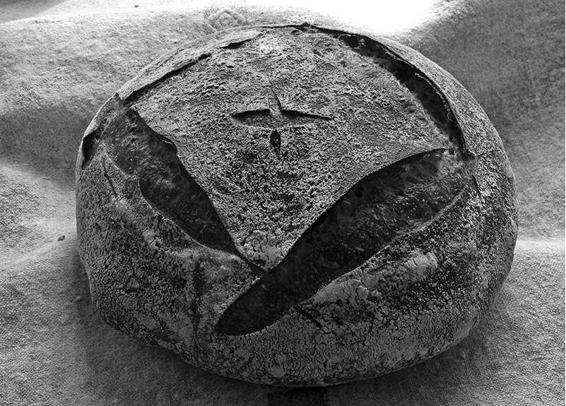
 Loaves for Alice Waters’s charity dinner
Now the magic began—the first rise, the source of flavor—and luckily it was a chilly night. Why was that important? Because when it’s cool out, I often let my sourdough breads rise in an unheated basement storage room that is about 55˚F (13˚C), about the same temperature as Tartine’s walk-in refrigerator. That’s the perfect temperature for a languid fermentation, when the sugars in the bread develop. Bakers buy proofing cabinets that cost thousands of dollars to retard loaves at this temperature. My solution was less precise, but worked fine. The Genzano and baguette doughs rose in the refrigerator, since they contained instant yeast as well as sourdough and I wanted an even slower fermentation. At seven
A.M
. on Sunday, I took the
pain de campagne
dough out of the cool basement closet and let it warm up for about an hour. I shaped three
boules
, letting them rise for two and a half hours, which was longer than usual but, then again, my kitchen was quite cool. In the meantime, I heated up the baking stone in my oven. Then I repeated this with the Genzano dough, and then the baguette, shaping both of those doughs cold. (It’s easier to shape highly hydrated doughs when they are cool.) The rise went well, and when the breads hit the baking stone, they were full of oven spring, rising upward in less than five minutes.
I finished baking at about two
P.M
. and let the breads cool, then delivered them across town to Woodward’s house for dinner. Jean-Pierre Moullé, who was then the executive chef at Chez Panisse, was there to greet me. We talked briefly about the breads and I mentioned I was a home baker, not a professional.
“I know, but you did not bake these at home,” he said.
“Yes, I did,” I countered, and I noticed his eyebrow rise a bit.
For a home baker, there’s always the moment of anticipation when the bread comes out of the oven and you wait for it to cool before tearing into it. With these loaves, I didn’t get a chance to cut into them, to evaluate the flavor and aromas or assess the interior crumb or the density of the crust—all crucial to a decent loaf. But I trust they were fine, influenced as they were by a long lineage of bakers. Later that evening, at a party preceding the dinner, Alice Waters took me aside, bread lover that she is, and thanked me warmly. It was a nice moment and quite telling. I reminded her that I had interviewed her before, for a previous book, but she hadn’t remembered—just another interview with a writer. From this moment on, though, she never forgot my bread. In the proceeding years, she has called me often when she had a charity dinner in Washington. To her, I’m a baker, not a writer. And you know what? That’s just fine.
(
MODERATE
)
Makes 2 loaves
Bakers often think in ratios, with the percentage of each ingredient measured against the flour, which is always 100 percent. They even do this in shorthand, as in, “What hydration level are you using? Oh, seventy percent.” What that means is that the water in the dough amounts to 70 percent of the flour weight, or 700 grams of water per 1 kilo of flour.
But bakers also use devices to remember these ratios, and one that I found especially useful was the 200/400/600 ratio, with 200 grams of natural leaven, 400 grams of water, and 600 grams of flour. With 12 grams of salt, this ends up with two loaves weighing a bit over 600 grams each, which is a decent-size bread when baked.
I often keep this ratio in my head when making a simple loaf, with one caveat. I find the hydration level a bit low. So I start out with 200 grams of starter, and mix it with 400 grams of water and 600 grams of flour. Then, when I add the salt, I also add another 25 grams of water. During the dough-making process, I keep drizzling on water, so it really ends up more like a 200/450/600 ratio. With the extra water, the overall hydration of this loaf goes up to around 73 to 75 percent, but the whole wheat and rye flours tend to absorb copious amounts of water so it’s not a loose, gloppy dough. I encourage you to alter the water slightly so you can see the differing effects on the crumb of the loaf, after it’s baked.
Tools
Bowl
Rimmed baking sheet
Rectangular baking stone
Plastic dough scraper
Colander and kitchen towel, in which the loaf can rise
Baking peel or cutting board, to move the loaves to the oven
Single-edged razor blade,
lame
, or knife
Instant-read thermometer (optional)
Cooling rack
Levain
Ingredients
100 grams unbleached organic all-purpose flour
30 grams organic whole wheat flour
100 grams water
20 grams ripe starter
Final Dough Ingredients
200 grams starter
400 grams water (plus another 50 grams added in increments)
70 grams organic whole wheat flour
70 grams organic whole rye flour
460 grams unbleached organic all-purpose flour
13 grams sea salt
Olive oil, to grease the bowl
Semolina and flour, to dust the baking peel
Morning, First Day
Mix all the
levain
ingredients together and let it ferment for 8 to 10 hours, until the starter has domed but not collapsed. There will be extra starter left over once you remove 200 grams for the dough. Use this remaining starter as a base to refresh your leaven. (To refresh, mix 20 grams of the remaining starter, 75 grams water, 50 grams whole wheat flour, and 50 grams white flour; let it ferment 2 to 4 hours at room temperature and then place it back in the refrigerator.)
Evening, First Day
Mix the dough. In a bowl, mix the starter and 400 grams water until the starter is dissolved, though lumps here and there are fine. Add the whole wheat and rye flours and stir until combined. Then add the white flour and mix for 1 to 2 minutes, until the flour dissolves and forms a shaggy mass.
Make an indentation on top of the dough and add the salt and 25 grams water into this well, so that the salt can begin to dissolve. Cover the bowl and let it sit for 30 to 40 minutes.
Moisten your hands, then shake off the water. Stretch and fold the dough by pulling the dough out from the edges and folding in toward the middle. You want to stretch the dough out to strengthen the gluten but ideally don’t rip the dough. You can also pinch the dough between your thumb and fingers to further incorporate the salt. Stretch and fold the dough in a circular pattern, pulling the dough out, then folding the edges toward the middle 10 to 12 times. Turn the dough over, so that the seams are facedown and the smooth side is on top. This entire process should take about 2 minutes. At this point you can add the remaining water, letting it sit on top of the dough until the next round. Cover and let the dough sit for 30 minutes.
Repeat the stretching and folding for another round. Pinch the dough with your thumb and fingers to help incorporate the additional water. By this time, you should feel some tension in the gluten, but be careful not to rip the dough. Once this process is complete, turn the dough over so the smooth side is on top. Let the dough sit for 30 minutes.
Having completed two rounds of stretching and folding, the dough should be elastic. You may, however, add one more round of stretching and folding to further develop the gluten, after allowing it to rest for 30 minutes.
Remove the dough and clean and lightly oil the bowl, or move the dough to a lightly oiled container. Cover and let sit for another 30 minutes, then place it in the refrigerator or in a cool basement room ideally no warmer than 55˚F (13˚C). Let the dough rise for 8 to 12 hours, though it can rise for as long as 24 hours. However, the longer this first rise lasts, the more sour the flavor will be.
Second Day
Place a rimmed baking sheet on the bottom of the oven and a baking stone on a rack in the middle. Preheat the oven to 500˚F (260˚C).
After letting the dough rise in the cool environment, you should see fermentation bubbles, and the dough should have at least doubled in size. If it hasn’t, let it warm at room temperature for another hour.
Dust the counter lightly with flour and gently remove the dough with a dough scraper, letting the smooth top of the dough fall onto the counter. The sticky underside will now be face up. Cut the dough in half. (You can make two loaves simultaneously if they fit into the oven. Or refrigerate the remaining half the dough, then remove it and shape it into a second loaf after the first loaf is out of the oven.)
Preshape the dough. Stretch the four sides of the dough out and let them fall into the center. They can overlap. Then turn the dough over so that these seams are facedown. Dust with flour, cover with a light cloth or towel, and let the dough rest for 20 minutes.
Dust the counter with flour very lightly, then turn the dough over again so the seams are face up and the smooth side is on the counter. Stretch and then fold the edges in toward the center, so that you have an approximately round shape, which should take 6 to 8 folds. Apply light pressure in the center so the folds seal. Turn the dough over, so the smooth side is now face up, and, cupping your hands around the dough, use the outer edges of your palms and pinkies to stretch the skin of the dough and tuck it under the bottom, moving the dough in a circular motion so that you end up with a round shape. Try not to compress the loaf tightly, though the goal is to have a taut skin. (This last action takes time to master, so don’t worry if it doesn’t come out perfect on your first attempt—there will be many more loaves to come.)
Let the loaf sit while you prepare a colander lined with a floured towel. Then using the dough scraper to loosen the loaf from the counter, pick up the loaf and place the smooth side facedown on the floured towel in the colander. The seams will be face up. Cover with a towel and let the loaf rise for about 90 minutes, or until the loaf springs back slowly when you lightly press it with your finger. If it snaps back into shape quickly and leaves no indentation, it is not done rising, so give it another 20 minutes and try again. This is a judgment call, but it is better to err on slightly underproofing the loaf rather than letting it rise until it collapses on itself.
Dust a peel or cutting board with semolina and flour, or just flour. Turn the loaf out on the peel or board, so that the smooth side, which was on the towel, is now face up. Using a razor blade or bread knife, score the loaf with one cut, or in an
X
pattern, or in a square pattern, about
1
/
4
inch deep. Angle the blade while you slash the loaf with swift, sure cuts. Don’t dawdle, fuss, or repeat the action.
Transfer the loaf to the hot stone and close the oven. Then open the oven and pour
1
/
2
cup water into the baking sheet and close the oven, trapping the steam. Turn the oven down to 460˚F (240˚C) and bake for 30 minutes. Open the door briefly to release the remaining steam. Then turn down the oven to 420˚F (215˚C) and continue baking for another 10 to 15 minutes, or until the crust is dark brown. Turn the oven off and prop open the door slightly with a wooden spoon, leaving the loaf in the oven for another 5 to 7 minutes. Ideally, the loaf will have a hollow knock when you remove it from the oven, signaling that moisture has adequately dissipated in the loaf. Alternatively, stick an instant-read thermometer in the bottom of the loaf. The center of the loaf should read at least 205˚F (96˚C).
Let the loaf cool on a bread rack for at least one hour before cutting into it. Since this loaf is made with sourdough, it will last a long time. For the first two days, I simply keep it wrapped in a towel or in a paper bag, the cut side facedown. If there’s anything left after that point, I keep it at room temperature in a plastic bag.