In Search of the Perfect Loaf: A Home Baker's Odyssey (24 page)
Read In Search of the Perfect Loaf: A Home Baker's Odyssey Online
Authors: Samuel Fromartz

As she said this, she was dropping seeds into small plastic envelopes that she planned to distribute at a farm conference in Maine. She encouraged me to take some home and plant them in my community garden plot in Washington. She riffled through her collection of boxes on a desk, choosing seeds that she thought might do well in the mid-Atlantic. She gave me seeds grown by biodynamic German farmers; another selection from Ukraine; a French variety, known as Rouge Bordeaux, and another from France known as Mélange; and Canaan Rouge, a Maine variety bred from the Rouge Bordeaux and adapted to the Northeast. I thought she would charge me, since these small packets are quite pricey on her Web site. But she refused. “I’m happy to share my seeds with you,” she said. “We’re all looking for artisan bread, but the artisan grains are this enormous missing link that no one person can renew and restore.” She hoped I would join the movement.
• • •
S
o on a warm fall morning in late October, I visited my garden, located just south of a freeway in Washington, D.C., about a mile from the U.S. Capitol, and sowed the landrace winter wheat that Rogosa had provided. I might have been the only one growing wheat in the nation’s capital. I seeded two twenty-five-foot rows of Canaan Rouge. Then I planted two more rows of the French varieties she passed on to me, the Rouge Bordeaux and Mélange. I spaced the seed about six inches apart, which is quite wide, but Rogosa assured me that wider spacing would mean more vigorous growth. I returned every week as the weather turned cooler, and was disappointed. Only a handful of seeds had managed to germinate. Was it a problem with the seed or were animals eating it? Over the years we’d had a visible urban rat population in the park, plus it was filled with birds.
After an e-mail exchange with Rogosa, I went back and planted more, this time after soaking the seeds in water so they might have a better chance of germination. By November, it was getting colder at night. Of the seeds that did take root, the plants were now about three inches high. Once they grew a bit more I’d mulch them with hay for the winter in order to keep the weeds at bay. The next summer, I thought, I’d be harvesting wheat, though of what quality I did not know. I had dazzling visions of my Capital Wheat. If I did well, I’d have around ten pounds of grain, which could make several loaves.
By the next spring, the wheat was growing vigorously, and by May the plants had sent up tillers, the strong stalks on which the seed head forms. They were three to five feet tall and quite beautiful, especially the French Mélange. They had huge green husks of grain on an ear that was seven or eight inches long, pushing upward from red-tinged vegetative grass. It looked like the wheat harvest would arrive in a month, and though I had only about fifteen to twenty plants, I would definitely yield enough grain to make bread. The true urban farmer, I felt proud. Along the way, I reconnected with Klaas and Mary-Howell Martens of Lakeview Organic Grain in upstate New York. They estimated the harvest date from the pictures I posted on Facebook. All was going well.
Then one day I arrived at the garden after about a week’s absence and those beautiful French varieties that I had so patiently nurtured looked as if they had been attacked. Instead of standing erect, the stalks were bent to the ground. The seed heads were denuded of any grain. I felt a little panic—this was my wheat!—and I wondered if these landrace varieties were defective in some way. I had just spent the week reading about the shattering traits in ancient wheat, and these looked like they had matured and then split open, the seed scattered on the ground, near the base of the plant. Would I now, like a Neolithic hunter and gatherer, scoop up the grain? I bent down and took a few of the grains in my hand, but on closer inspection it was clear there were no grains. All I could see were the split-open hulls. I could not find one seed in that handful, or in another. They had all been eaten!
I looked around the now empty garden. A few sparrows flew by, a blue jay, and then I noticed the massive amount of bird life around me. This was surely a welcome sight in an urban garden, but they, too, had to eat. Maybe my wheat was their dinner. Or perhaps it was rats, climbing up the stalks from the ground. A few people in the garden who had grown corn had faced similar trials. Beautiful, bursting ears of corn one day; the next, the cob denuded. The pests had good taste and knew exactly when to strike.
The next day I returned and found still more damage and realized I had lost well over half of my wheat crop. The animals were targeting the largest seed ears from the most vigorous plants. Desperate, I tied reflective metallic tape, which shimmers in the sunlight, around the stalks to scare away birds. I had found that this works well, especially with tomatoes, which also can be a frequent object of avian desire.
Once again, I posted pictures on Facebook of the loss. Klaas thought it might be mice as well as birds. Mary-Howell recounted how they once lost one hundred acres of organic soybeans a week before harvest in a hailstorm and were forced to plow under the crop. “We can’t begin to convey the devastation, the horror, the disbelief, the loss,” she wrote. “However, for years afterwards, the nitrogen level in that field was great!” (That’s because soybeans fix nitrogen—an essential plant nutrient—from the air to the soil.) When I told another farmer friend about my loss, he simply paused and said, “Welcome to the world of farming.”
So much for my grandiose plans of growing Capital Wheat. Now it was clear that I would not have my ten pounds of grain to bake with, only a handful or two that I could grind, or perhaps soak overnight and then mix into a dough. The loss made me think of those prehistoric farmers. Had they lost half their crop to birds, they might have faced food shortages and been forced to return to the wild grasslands to gather more seed. Or what about those farmers throughout the ages who faced successive famines? I had lost my crop, but luckily I didn’t have to depend on it for food. I could go to the supermarket and buy flour, or begin making a dent in the large mason jars of grains sitting in my kitchen—the emmer, einkorn, spelt, rye, barley, red wheat, white wheat—all of which, in my particular place in the world, was accessible. Measured against humanity’s relationship with grain, I was an outlier, for this staple was plentiful in my pantry. That toll I faced in the garden was far more often the norm in the past ten thousand years—scarcity.
• • •
T
he impetus to prevent such shortages and breed ever more productive varieties led the world away from crop diversity. But aside from the agronomic consequences of these decisions, there were culinary ones, too, in the qualities of flour itself. Airy white bread was the marker for every important decision along the way, from seed to milling to fabrication. And while “whole grain” breads have recently grown more popular, they often try to approximate white bread in look, taste, and feel, at least at the supermarket.
It is not even clear how much whole grain
these “whole grain” breads contain, for this has never been regulated by the Food and Drug Administration. But why use whole grains to approximate white flour? Why not bring true diversity back to our cereal diet? I had an inkling of these possibilities growing up with the breads of New York, but to explore this question further I knew I had to visit a place where whole grains weren’t a novelty, or a health choice, or masquerading as white bread. I had to visit a place where whole grain bread was simply bread. And that’s what took me to Berlin in the winter of 2011.
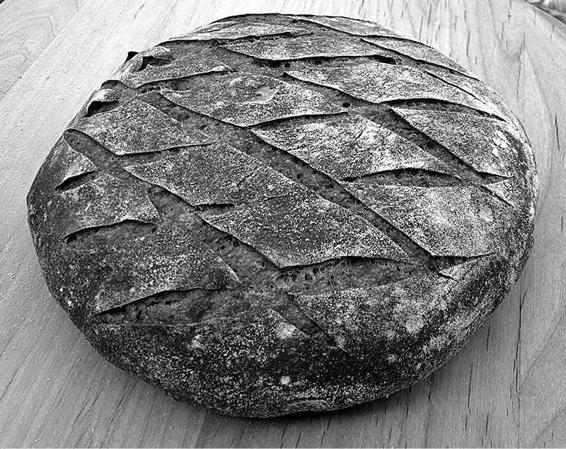
Miche
(
MODERATE
)
Makes 2 loaves
I actually learned about the history of Turkey Red wheat before I tried it, which underscores the oft-stated trope that the story makes the food. It wasn’t until I returned home from my visit to Heartland Mill that I bought Turkey Red wheat, choosing the stone ground bolted version in which the coarsest bran is removed.
This recipe reflected the particular batch of Turkey Red I received in the fall of 2012. When I order the flour again, the quality will probably differ, so I’ll end up adjusting the amount of water and
levain
. That’s the challenge—and joy—of working with identity-preserved grains. The batches vary from year to year, which means you need to keep adjusting.
This recipe closely follows the
pain de campagne
at the end of chapter 3, the main difference being that it has a higher percentage of whole grain flour. In the absence of Turkey Red flour, you can use whole wheat flour, but try sifting out the bran through a sieve. The result will be more dense, and you may have to add a bit more water. Plus it won’t quite taste the same. Turkey Red is quite hardy and rather assertive, reminiscent of the tough life the early settlers faced on the Great Plains.
Tools
Bowl
Plastic dough scraper
A bowl or colander lined with a kitchen towel, in which the loaf can rise
Rimmed baking sheet
Rectangular baking stone
Baking peel or cutting board, to move the loaves to the oven
Single-edged razor blade,
lame
, or knife
Cooling rack
Levain
Ingredients
120 grams bolted Turkey Red flour
80 grams water
20 grams ripe starter
Final Dough Ingredients
120 grams unbleached all-purpose organic flour, plus more for the counter
480 grams bolted Turkey Red wheat flour
200 grams starter
425 grams water (plus another 25 grams added in increments)
13 grams sea salt
Evening, First Day
Mix the
levain
ingredients together, cover, and let sit for 8 to 10 hours, until the starter has domed but not collapsed. There will be extra starter left over once you remove 200 grams for the dough, which you can use to refresh the remaining starter, as described in the
pain de campagne
recipe.
Morning, Second Day
In a bowl, blend the white flour and Turkey Red flour together. Add golf-ball-size bits of starter to the flour and 425 grams of water. Mix with your lightly moistened hand until combined, 1 to 2 minutes. Make an indentation on top of this shaggy dough, and into this well add the salt and 25 grams of water so that the salt can dissolve in this pool of water. Cover the bowl and let it sit for 30 minutes.
Moisten your mixing hand again, then shake off the water. Then stretch and fold the dough in the bowl by pulling the dough out from the edges and folding in toward the middle, circling around the dough as you do so. You can also pinch the dough between your thumb and fingers to further diffuse the salt. Stretch and fold the dough 10 to 12 times. Turn the dough over, so that the seams are facedown, and the smooth side is on top. This entire process should take about 2 minutes. Cover and let the dough sit for 30 minutes.
Repeat the stretching and folding for another two rounds, always ending with the smooth side on top and resting for 30 minutes between rounds. I usually do three or four sets of folding, depending on the needs of the dough. Let it rise for about another hour—I find that this first rise, including the time it takes to complete the folds, should take 3 to 4 hours.
Afternoon, Second Day
Dust the counter lightly with flour and gently remove the dough with a dough scraper, letting the smooth top of the dough fall onto the counter. The sticky underside will now be face up. Cut the dough in half. You can make both loaves at once if they fit into the oven, or refrigerate half the dough to bake it later.
Stretch out the four sides of the dough and let them fall into the center. They can overlap. Then turn the dough over so that these seams are facedown. Dust with flour, cover with a light cloth or towel, and let the dough rest for 20 minutes.
Dust the counter with flour very lightly, then turn the dough over again so the seams are face up and the smooth side is on the counter. Stretch and then fold the edges in toward the center, so that you have an approximately round shape, which should take 6 to 8 folds. Apply light pressure in the center so the folds seal. Turn the dough over, so the smooth side is now face up, and cupping your hands around the dough, use the outer edges of your palms and pinkies to stretch the skin of the dough and tuck it under the bottom, moving the dough in a circular motion so that you end up with a round shape. Try not to compress the loaf tightly, though; the goal is to have a taut skin.
Prepare a bowl or colander lined with a floured towel. Using the dough scraper to loosen the loaf from the counter, pick up the loaf and place the smooth side facedown on the floured towel in the bowl or colander. The seam side will be face up. Cover with a towel and let the loaf rise for 60 to 90 minutes, or until the loaf springs back slowly when you press it lightly with a finger.
One hour before you are ready to begin baking, place a rimmed baking sheet on the bottom of the oven and a baking stone on a rack in the middle. Preheat the oven to 500˚F (260˚C).
Place
1
/
2
cup hot water in a measuring cup.
When you’re ready to bake, dust a baking peel or cutting board with flour, and turn the loaf out onto the surface, so that the smooth side, which was on the towel, is now face up. Using a single-edged razor blade,
lame
, or knife, score the loaf four times to make a square on the top of the loaf. Angle the blade while you slash the loaf in a swift, sure cut about
1
/
4
inch deep.
Transfer the loaf to the hot stone and close the oven door. Open the oven again and pour
1
/
2
cup of water into the baking sheet. Immediately close the oven, trapping the steam. Turn down the oven to 460˚F (238˚C) and bake for 20 minutes. Then turn down the oven to 440˚F (227˚C) and continue baking for another 15 to 20 minutes, or until the crust is dark brown. Turn the oven off and prop open the door slightly with a wooden spoon, leaving the loaf in the oven for another 5 to 7 minutes. Ideally, the loaves will have a hollow knock when you remove them from the oven. Alternatively, stick an instant-read thermometer in the bottom of a loaf. The center of the loaf should read at least 205˚F (96˚C).
Let the loaf cool on a rack for at least 1 hour before cutting into it. Store it in a paper bag or wrapped in a towel for up to two days, cut side down, and then move it to a plastic bag. You can also freeze the loaf in a plastic bag. When ready to use, let it defrost, then crisp the crust in a 400˚F (205˚C) oven for 5 minutes.