Read iOS Programming: The Big Nerd Ranch Guide, 3/e (Big Nerd Ranch Guides) Online
Authors: Aaron Hillegass,Joe Conway
Tags: #COM051370, #Big Nerd Ranch Guides, #iPhone / iPad Programming
iOS Programming: The Big Nerd Ranch Guide, 3/e (Big Nerd Ranch Guides) (5 page)

Open
Xcode
and, from the
File
menu, select
New
and then
New Project...
.
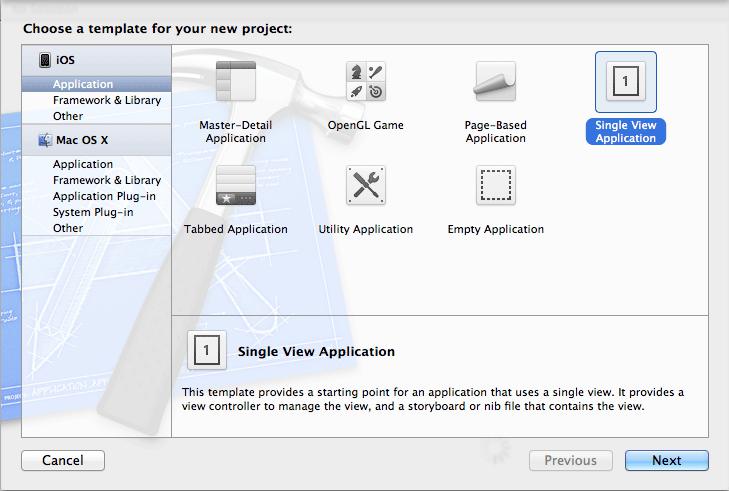
A new workspace window will appear, and a sheet will slide from its toolbar with several application templates to choose from. On the lefthand side, select
Application
from the
iOS
section. From the choices that appear, select
Single View Application
and press the
Next
button (
Figure 1.2
). (Apple changes these templates and their names often. If you do not see the same options for selecting a template, either now or later in the book, check our forums at
http://forums.bignerdranch.com
for instructions on how to proceed.)
Figure 1.2 Creating a new project
On the next pane, enter
Quiz
for the
Product Name
and
com.bignerdranch
as the
Company Identifier
. (Or replace
bignerdranch
with your company name). Enter
Quiz
in the
Class Prefix
field, and from the pop-up menu labeled
Device Family
, select
iPhone
. We only want the box labeled
Use Automatic Reference Counting
checked, so uncheck the others. Once your screen looks like
Figure 1.3
, press
Next
.
Figure 1.3 Naming a new project

We chose
iPhone
for this application’s device family, but
Quiz
will run on the iPad, too. It will run in an iPhone-sized window that does not make the most of the iPad screen, but that’s okay for now. For the applications in the first part of this book, we will stick with the iPhone device family template. In these chapters, you’ll be focused on learning the fundamentals of the iOS SDK, and these are the same across devices. Later, we will look at some iPad-only options and how to make applications run natively on both iOS device families.
Now another sheet will appear asking you to save the project. Save the project in the directory where you plan to store all of the exercises in this book. You can uncheck the box that creates a local git repository, but keeping it checked doesn’t hurt anything.)
Once the project is created, it will open in the
Xcode
workspace window (
Figure 1.4
).
Figure 1.4 Xcode workspace window
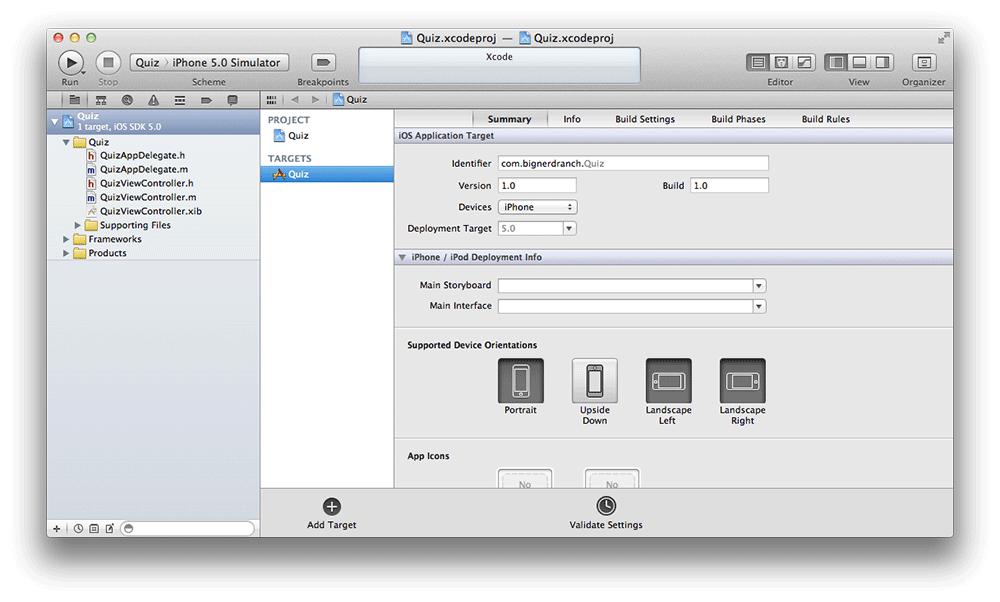
(Feeling overwhelmed by the number of buttons, views, and gadgets in the workspace? Don’t worry – in this chapter, we’ll cover a few in detail, and we’ll cover others later as they are needed. In the meantime, you can mouse over any of the buttons for a brief description of what it does.)
Take a look at the lefthand side of the workspace window. This area is called the navigator area, and it displays different
navigators
– tools that show you different pieces of your project. You can choose which navigator to use by selecting one of the icons in the navigator selector, which is the bar just above the navigator area.
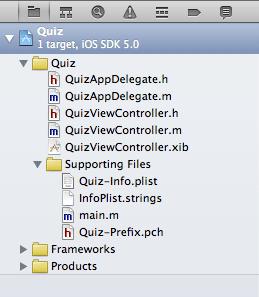
The navigator currently open is the
project navigator
. (If the project navigator is not visible, click the icon in the navigator selector.) The project navigator shows you the files that make up your project (
Figure 1.5
). These files can be grouped into folders to help you organize your project. A few groups have been created by the template for you; you can rename them whatever you want or add new ones. The groups are purely for the organization of files and do not correlate to the filesystem in any way.
Figure 1.5 Quiz application’s files in the project navigator
Now you’re going to create the user interface for
Quiz
using
Xcode
’s visual tool for building interfaces. In many GUI builders on other platforms, you describe what you want an application to look like and then press a button to generate a bunch of code.
Xcode
’s interface builder is different. It is an object editor: you create and configure view objects and then save them into an archive. The archive is a XIB (pronounced
“
zib
”
) file.
A XIB file is an XML representation of the archived objects. When you build a project, the XIB file is compiled into a NIB file. Developers work with XIB files (they’re easier to edit), and applications use NIB files (they’re smaller and easier to parse). However, most iOS developers use the words XIB and NIB interchangeably.
When you build an application, the compiled NIB file is copied into the application’s
bundle
. The bundle is a directory containing the application’s executable and any resources the executable uses.
When your application reads in, or loads, the NIB file from the bundle at runtime, the objects in the archive are brought to life. Your first application will have only one NIB file, and it will be loaded when the application first launches. A complex application, however, can have many NIB files that are loaded as they are needed.
In the project navigator, find and select the file named
QuizViewController.xib
. When you open this (or any) XIB file from the project navigator, the editor area displays a dock view and a canvas. The dock view is on the lefthand side of the editor area, and it shows the objects in the XIB file. You can expand the dock view into an outline by clicking the disclosure button in the bottom left corner of the canvas (
Figure 1.6
). The dock shows fewer details and is useful when screen real estate is running low. However, for learning purposes, it is easier to see what is going on in the outline view.
Figure 1.6 Editing a XIB file in Xcode
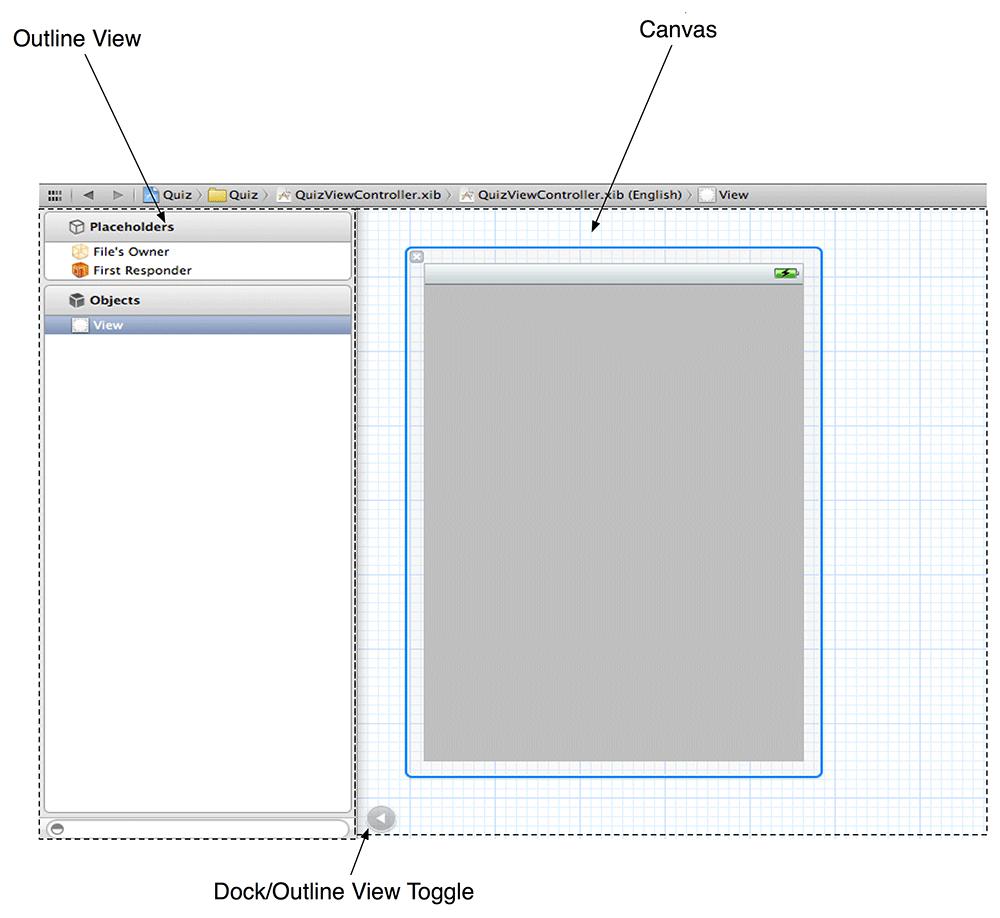
Right now, the outline view shows that
QuizViewController.xib
contains three objects:
File's Owner
First ResponderThis is the object that will have access to the objects archived in the XIB file. It will be an instance of
QuizViewController
, which is the object responsible for managing events that occur on this interface.
ViewThis object doesn’t have much use in iOS right now; it is a relic from Desktop Cocoa. You can ignore it.
An instance of
UIView
that represents the application interface.
The canvas portion of the editor area is for viewing and manipulating the layout of your interface. Click on the
View
object in the outline view to display it on the canvas. You can move the view by dragging in the blue-shaded area around it. Note that moving the view doesn’t change anything about the actual object; it just re-organizes the canvas. You can also close the view by clicking on the
x
in its top left corner. Again, this doesn’t delete the view; it just removes it from the canvas. You can get it back by selecting it again in the outline view.
The view object in
Figure 1.6
is the foundation of your user interface and appears exactly as it will in your application. Flip back to
Figure 1.1
, and you’ll see that
Quiz
needs four additional interface elements: two text labels and two buttons.
To add these elements, you need to get to the
utilities area
. In the top-right corner of
Xcode
’s toolbar, find the buttons labeled
View
. These buttons toggle the navigator, debug area, and utilities area. Click the right button to reveal the utilities area (
Figure 1.4
).
The utilities area appears to the right of the editor area and has two sections: the
inspector
and the
library
. The top section is the inspector, which contains settings for the file that is currently displayed in the editor area. The bottom section is the library, which lists items you can add to a file or project. You can change the relative sizes of these sections by dragging the line between them.
At the top of each section is a selector for different types of inspectors and libraries (
Figure 1.7
). From the library selector, select the icon to reveal the
object library
. This library contains the objects you can add to a XIB file.
Figure 1.7 Xcode utilities area

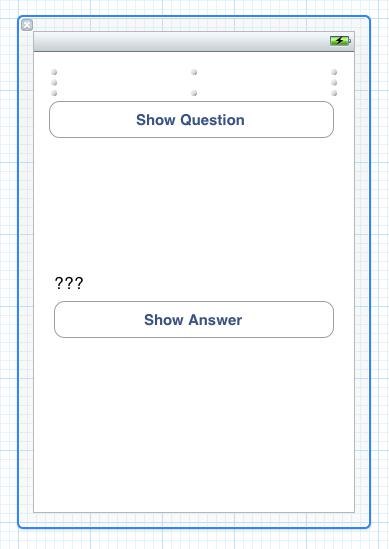
In the library, find the
Label
object. (It may be right at the top; if not, scroll down the list or use the search bar at the bottom of the library.) Then select the label in the library and drag it onto the view object that is already on the canvas. Position this label in the center of the view, near the top. Your interface now includes a label, and in the outline view, notice that there is now a
Label
underneath the
View
.
Next, drag another label onto the view and position it in the center closer to the bottom. Then, find
Round Rect Button
in the library and drag two buttons onto the view. Position one below each label. You can resize an object by selecting it and then dragging its corners and edges. Make all four objects wide enough that they span most of the window.
Now let’s give the buttons helpful titles. You can edit the title of a button simply by double-clicking it. Change the top button to
Show Question
and the bottom button to
Show Answer
. You can edit the text of a label the same way; delete the text in the top label so that it is blank and have the bottom label display
???
. Your interface should look like the one in
Figure 1.8
.
Figure 1.8 Adding buttons and labels to the view
The labels and buttons are objects (of type
UILabel
and
UIButton
), and objects have instance variables that specify their behavior and appearance. For example, when you entered a title for the top button, you set that button’s
title
instance variable. You can edit a few of these instance variables directly on the canvas, but most must be edited in the
attributes inspector
. Select the bottom label and then click the icon in the inspector selector to reveal the attributes inspector.
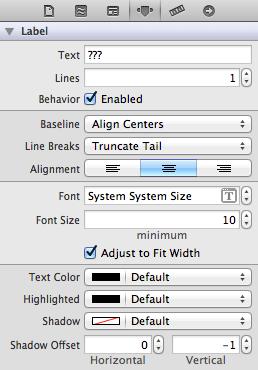
In the attributes inspector, you can set the instance variables of the selected object. For example, labels have a
textAlignment
instance variable. The default is left-aligned, but we want this text to be centered. Near the top of this inspector, find the segmented control for alignment. Select the centered text option, as shown in
Figure 1.9
.
Figure 1.9 Centering the label text