Lights, Camera... Nude!: A Guide to Lighting the Female Nude for Photography (2 page)
Read Lights, Camera... Nude!: A Guide to Lighting the Female Nude for Photography Online
Authors: A. K. Nicholas

Photo 3: Contrast ratio 2:1
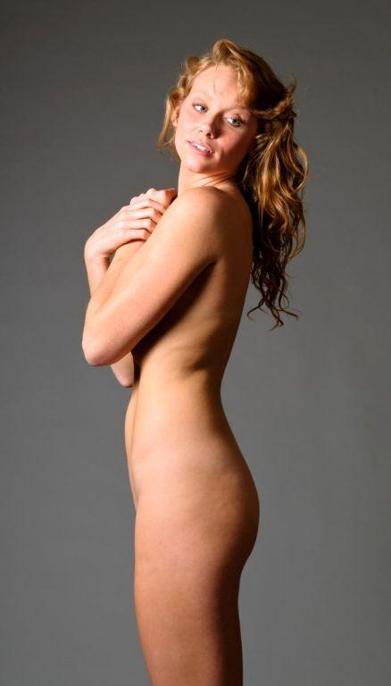
Photo 4: Contrast ratio 3:1
You usually reduce the output of a light by lowering its power. You could move the light farther away, or add a diffuser, but these alter light quality (hard/soft) as well.
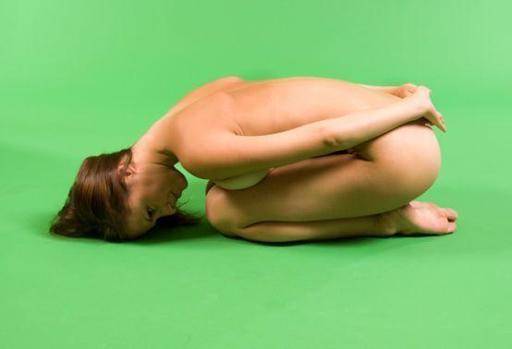
Photo 5: Color reflection
Model: Michelle W.
The size and colors of your studio affects your lighting. The walls, floor, ceiling, every object in your studio, reflects light. They reflect light towards your model—sometimes in ways you don’t want.
In the images at the left you can see the green reflected onto the model. Avoid rolling any more colored background paper in front of the model than is needed; it will just reflect additional unwanted light, affecting skin tone.
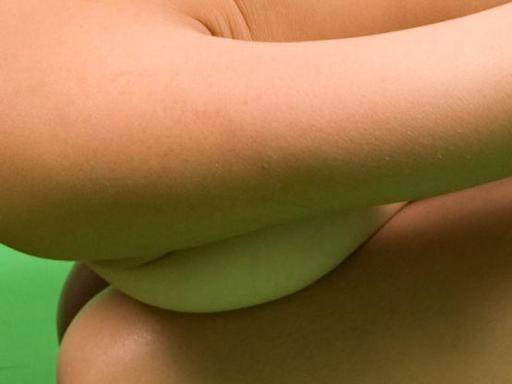
Photo 6: Close-up, color reflection
In a small studio, white walls act like built-in reflectors kicking light onto your model. The smaller the studio, the closer the walls are to the model, the more light bounce you’ll have. With a standard-height ceiling, it works in the same way, reflecting light back at the model from above.
Sometimes reflected light helps by filling shadows, but too much can spoil the image. You could paint some or all of the walls (and possibly the ceiling) black. Then you can add reflectors where you want them.
Instead of painting walls black, you could hang up black cloth, foam board, wide rolls of paper, or anything black that will absorb the light. A device designed to absorb light, sometimes called a “black reflector,”
prevents
reflection
.
This is an effective way of experimenting before committing to painting walls. I can’t tell you exactly how to paint your studio, because each room is different and it also depends on your photographic style and equipment. I will give you a diagram as an example.
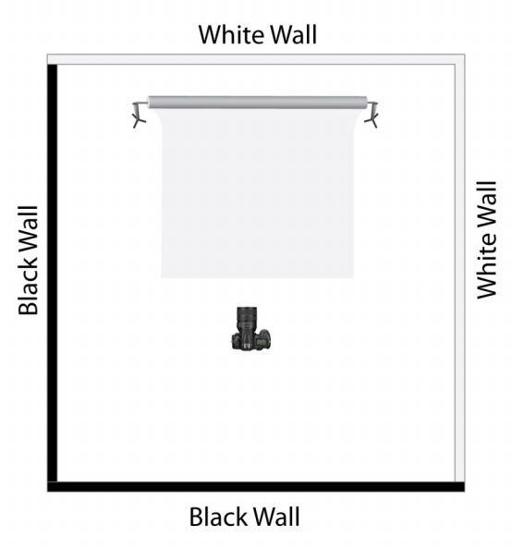 Figure 1: Example Studio wall colors
If you have only one small, low-powered light and you paint the walls black you might not have enough light to get acceptable photographs.
Avoid colored walls that will reflect their hue onto the model — even an off-white such as cream colored. Green walls make for green skin; yellow walls, jaundiced skin; and so on. Stick to neutrals (white, gray, black).
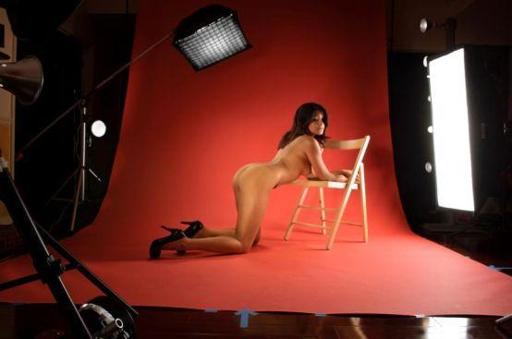 Photo 7: Studio surroundings affect light
Model: Ariel W.
You may have noticed that high-end cameras, tripods, and light stands are painted black. This is so that they don’t reflect as much light — especially onto shiny props (like wine glasses) that you’re trying to photograph. Many photographers also wear dark, neutral colored clothing for the same purpose.
It’s easy to see what your results will be using a digital camera’s LCD screen. But don’t skip the process of carefully measuring and analyzing every detail of your lighting. In nude photography, careful exposure is important to make sure the skin tones and other elements of the composition have the effect you want. You can carefully inspect test images as you set up the lights. However, a spot meter works well to get the background lights balanced. Measure the light at the model’s position, near the four corners of your frame, and any other points of interest.
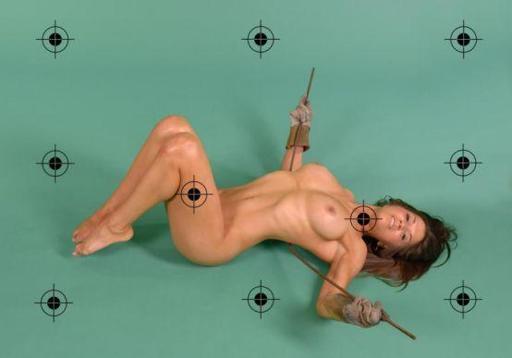 Figure 2: Examples of metering locations
Model: Toni C.
In many images, such as shown in the figure below of Toni, I will meter the sides, center, foreground, background, and a couple of spots in the model zone. Having a regimen that includes metering can also help you avoid careless errors, such as forgetting to turn on one of your strobe heads. I strongly encourage a hand-held light meter, even if you always shoot with available light, and a remote trigger for studio strobes.
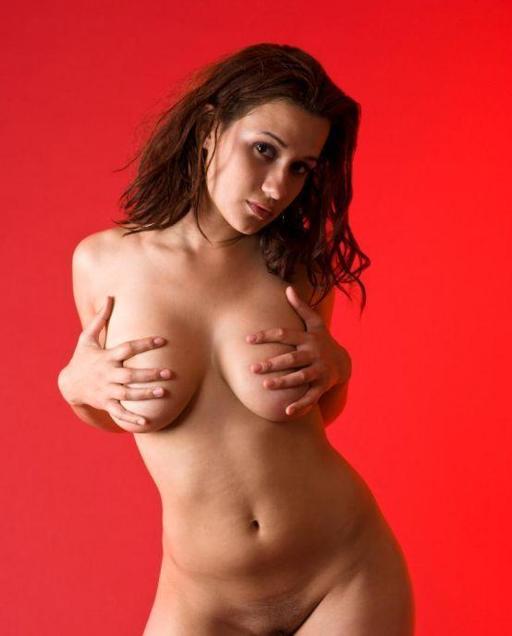
Photo 7: Two lights
Model: Aurora L.
The short answer is, “at least one.” The long answer is really a question: “What do you want your light to do?” There are all kinds of lights, each with a job. If you need a job done, you need to choose the correct light. For example, if you want light on the background add a background light, maybe two or four or more, depending on the effect you want, how large your background is, and so on. More on background light later. The point is that there is no magic number of lights. The shots in this guide used from one to six lights.
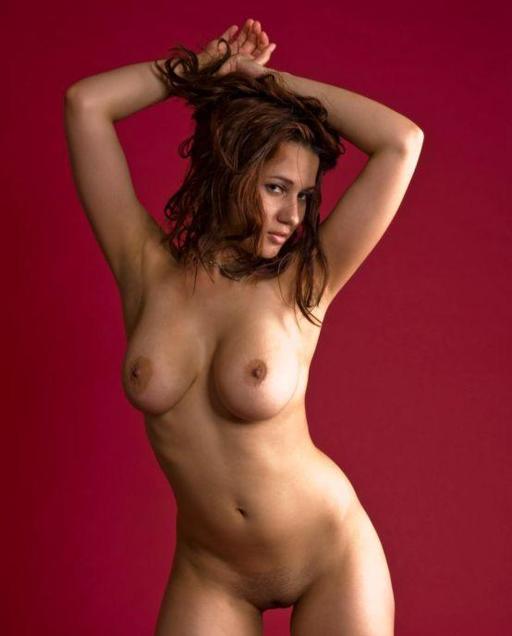
Photo 8: Five lights
These two images show the same model, same background, and just minutes apart. The only change is the lighting, but the results are dramatically different. The top shot used two lights, one on the model, and one on the background – the background light used a red gel to intensify the background color. The second shot used five lights. The effect of each is subtle, but the resulting tonalities are more complex.
An important lighting principle is to never add a light without a specific reason. Use as few lights as you need to get the desired effect. Every light you add increases the complexity of controlling the light. Resist the temptation to set up every light in the kit, and turn them all up to the max.
A common mantras is to use as large a diffuser as possible, and to place it as close to the model as possible. The desired result is for the light “wrap around the model.” Examine the following three images using different sized diffusers.
With a small umbrella, the light coverage is narrow and the contrast is a bit harsh. Notice the quick light falloff across the torso and the length of the body.
With a medium umbrella, the light is a bit softer and coverage is wider.
With a large umbrella, the transition from light to shadow is more gradual. This is evident in the floor shadows and on the body. This smooth transition between lit and unlit areas is what some refer to as wrapping the subject in light.
