Mastering the Art of French Cooking, Volume 2 (197 page)
Read Mastering the Art of French Cooking, Volume 2 Online
Authors: Julia Child

Other fillings
Cooked fruits rather than jams are also desirable fillings for the
jalousie.
Among them we suggest the
apricot filling
. Another idea is a filling of baked apple slices, such as those for the
gratin de pommes,
Step 2
; spread some apricot jam over the pastry before piling on the baked apple slices, and more
over the apples before you cover them with the pastry. Pitted prunes stewed in wine, butter, and sugar, and mixed with toasted almonds or chopped walnuts would be delicious. Glazed canned pineapple and diced bananas is another idea; glaze the pineapple following the directions for the
orange mousse
. These are only a few possibilities, and you will think of many others yourself.

MILLE-FEUILLES
[Napoleons—Layers of Puff Pastry Interspersed with Pastry Cream or Whipped Cream; Iced with Fondant and Chocolate or with Confectioner’s Sugar]
The
mille-feuilles
dessert, according to some authorities, was not developed in France until the latter part of the nineteenth century. The name “Napoleon,” at any event, is not associated with it at all in any French recipes; the French icing, furthermore, is simply a layer of confectioner’s sugar. The rest of the world has long wondered, then, how the pastry came to be named “Napoleon” outside of France, and who changed the icing from confectioner’s sugar to white fondant and lines of chocolate. The Danes have been told for generations that a Danish royal pastry chef invented the dessert way back in the early 1800’s on the occasion of a state visit between the Emperor Napoleon and the King of Denmark, in Copenhagen. The Italians are sure it is a corruption of Napolitain, because of the layered pastries made in Naples. Some sources believe that the chocolate lines appear to form the letter N, for Napoleon—which is far easier for foreigners to pronounce anyway than
mille-feuilles.
A final story, with a certain air of mischievous
fumisterie
about it, is that the dessert was really a French invention after all, and Napoleon’s favorite pastry; he ate so many of them, however, on the eve of Waterloo that he lost the battle. The pastry then disappeared from view for half a century; when it finally reappeared from banishment, it wore another icing and a new name.
MANUFACTURING NOTES
Mille-feuilles
and Napoleons are thin rectangles of crisply baked puff pastry that are mounted in 3 layers with whipped cream or pastry cream in
between, and a topping of confectioner’s sugar for
mille-feuilles
or of white frosting and lines of chocolate for Napoleons.
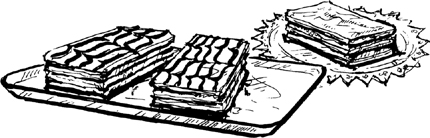
The traditional method of forming and cutting them, illustrated in the following recipe, is to bake the pastry in large sheets, and to cut each sheet into 3 long strips 4 inches wide, as in
Step 4
. After the 3 strips are glazed with apricot, the first is spread with filling, the second is laid over the first and filled, then the third strip is laid on top, and covered with sugar or fondant. This giant
mille-feuilles
is finally cut crosswise into rectangular serving pieces 4 inches long and 2 inches wide, as shown in the final drawing.
This is certainly the easiest and most practical method, and works especially well for puff pastry made with the French household flour or its American equivalent of ⅓ unbleached all-purpose flour and ⅔ unbleached pastry flour. You may find, however, that puff pastry made with the all-purpose and cake-flour formula will flake or crumble a bit too much for that final cutting into serving pieces. You will be able to judge this when you cut the sheet of pastry into three strips; if it seems brittle, glaze the strips with apricot, then cut each into its final rectangles, and build the individual servings separately. It will take you a little longer, but you will avoid trouble. As with many recipes of this sort, be ready to adapt yourself to circumstances because the exact state of a baked pastry is impossible to predict.
For 16 pieces

1)
Forming the puff pastry
4 baking sheets all of a size, 12 by 18 inches, approximately (or form and bake 1 pastry at a time, and use 2 baking sheets)
About 1 Tb soft butter
Chilled fresh puff pastry, either the
simple dough
but with 6 turns rather than 4, or the
classic puff pastry
A large knife or a pastry wheel
A rotary pastry pricker
, or 2 forks
(Please read Manufacturing Notes preceding this step.) Lightly butter topsides of 2 baking sheets, and bottom sides of the 2 others. Roll chilled pastry into a 14-inch rectangle, cut in half crosswise, and chill one half. Roll remaining piece rapidly into a 13- by 19-inch rectangle ⅛ inch thick; roll up on pastry pin, and unroll over one of the buttered baking sheets. Trim off ⅓ inch of pastry all around, so that the horizontal layers of dough within the puff pastry will be even at the edges.
Prick pastry all over at ⅛-inch intervals with pastry pricker or forks. Chill for at least 30 minutes to relax dough before baking. Roll and form second piece of dough in the same manner.
2)
Baking the pastry—about 20 minutes at 450 degrees
Preheat oven to 450 degrees and set racks on upper- and lower-middle levels. Cover each chilled sheet of pastry dough with a buttered baking sheet, and set in the two levels of the oven. The pastry is to rise as little as possible during baking; you are to prick it again, and push down the covering sheets several times, as follows. In 5 minutes, lift covering sheets and rapidly prick pastry all over to deflate it; press covering sheets down on the pastry, and bake 5 minutes more. Rapidly prick the pastry again, and switch from one level to the other, so both will bake evenly. Prick and press pastry again in 5 minutes; it should be starting to brown. Remove covering sheets if pastry has set, and let it brown and crisp 2 to 3 minutes more, but cover again with the baking sheets if it starts to puff up—watch carefully during these last few minutes that pastry does not brown too much. At end of baking, pastry should be crisp and golden, and between ¼ and ⅜ inch thick. Remove from oven and cool 5 minutes, with the covering sheets in place to prevent pastry from curling. The pastry is now ready for cutting, next step.
(*)
AHEAD-OF-TIME NOTE
: Pastry is at its best when freshly baked. Use within a few hours, but you may keep it fresh in a warming oven (100–150 degrees) for a day or so; otherwise, wrap airtight and freeze.
3)
Preliminaries to assembling mille-feuilles or Napoleons
apricot glaze:
1 cup apricot jam (preserves) forced through a sieve into a small saucepan
2 Tb sugar
A wooden spoon
A pastry brush
Bring strained apricot jam and sugar to the boil, stirring, for several minutes until last drops of jam to fall from spoon are sticky. Reheat to liquefy again before using.