Read Mastering the Craft of Making Sausage Online
Authors: Warren R. Anderson
Tags: #Methods, #Cooking, #General, #Specific Ingredients, #Cooking (Sausages), #Sausages, #Meat
Mastering the Craft of Making Sausage (2 page)

The list of equipment, below, is in alphabetical order, not in order of importance.
Casing Perforator (Sausage Pricker)

When sausage is stuffed into casings, invariably there will be air pockets visible just under the casing membrane. If these air pockets are not eliminated, unsightly fat and gelatin will accumulate there.
Getting rid of these air pockets is very easy; just perforate them with a sharp needle or a tool called a
casing perforator
or
sausage pricker
. When the sausage is being cooked, these tiny holes will be sealed by coagulated protein, preventing the escape of juices.
This tool is available by mail order from sausage equipment suppliers, and it costs about $7. It has three needles embedded in a plastic handle. However, a large, sharp needle, such as a large sewing needle, works equally well. I use a homemade casing perforator—a sharpened stainless steel rod embedded in a wooden handle.
Cutting Board
It is difficult and awkward to prepare meat for making sausage without a cutting board. If you don’t have one, you might consider buying the modern plastic type. Wooden cutting boards are porous and difficult to clean, so they are good breeding grounds for germs and bacteria. A big board is better than a small one. A stiff scrub brush, used with dish detergent and hot water, is very effective for cleaning your cutting board. Use a bleach-and-water solution to remove most stains and to sterilize the board.
Food Processor
A food processor is required if the emulsified sausages in Chapter 10 will be made. A food processor for home use will do the job, but it must be a powerful machine. If emulsification is attempted with a small, underpowered processor, it might destroy the motor. A large and powerful Cuisinart brand food processor, or the equivalent, is up to the task. With a 7-cup (680 ml) Cuisinart, I am able to process 1¼ pounds (570 g) at a time. The Cuisinart model I use is equipped with a 560-watt motor.
Hog-Ring Pliers and Hog Rings
Special hog rings and hog-ring pliers are made for use with large sausage casings, such as fibrous casings. (They are not the same as the hog rings used for things such as furniture upholstery.) These special hog rings for sausage making may be used to close both the bottom and the top of fibrous casings, but they are most often used to close the top. They are a little easier and faster to use than twine, and they look professional.
The spring-loaded hog-ring pliers are easier to use than the common type because they hold hog rings in the jaws of the pliers, allowing two hands free to twist the casing closed. However, the spring-loaded type cost about five times more than the common manual type.
For 2½-inch (6.4 cm) diameter casings, use the -inch (10 mm) hog rings. The 3-inch (7.6 cm) diameter casings require ½-inch (12.7 mm) hog rings. Please see the last section in Chapter 5,
Stuffing fibrous casings,
for photographs and additional information. (If you wish to purchase these special hog rings and hog-ring pliers, please see Appendix 5.)
Knives
Trimming and cutting meat is a major part of making sausage, but only two or three kinds of knives are required. They should be of the proper shape and length to do the job at hand. If they are always kept sharp and used properly, your work will proceed efficiently and safely. They need not be expensive; almost all of my knives were bought very cheaply at garage sales or Salvation Army-type stores. These used knives were of high quality and in good condition. They had been discarded simply because they were dull.
Knives with plain edges are better than knives with serrated cutting edges. Serrated edges tend to saw food, rather than cut it cleanly. Furthermore, serrated blades are difficult or impossible to sharpen.
Knives should never be washed in a dishwasher, especially knives that have wooden handles. The very hot water used for washing in a dishwasher, and the high heat used for drying, will gradually damage the wood by removing its natural oils. The loss of natural oils and the resultant cracking of the wood will cause the handle rivets to loosen.
If you are going to buy a knife, you may wish to consider the various materials described below that are used to make a knife blade.
KNIFE BLADE MATERIAL
Carbon steel
is the choice of many because it holds its edge fairly well and it is easy to sharpen. One disadvantage is that the blade will rust and tarnish—but, if you use it often, it will not get a chance to rust, and most of the tarnish can be removed with steel wool. Another minor negative point is that a carbon steel blade may impart a metallic taste and odor to acidic foods such as tomatoes, onions, and citrus fruits.
Stainless steel
used to make high quality knives is not the same kind of stainless steel used to make your mixing bowls or your rustproof mailbox. Stainless steel is a general term for many different alloys. Your mixing bowls are probably made with 18 percent chromium and 8 percent nickel. An alloy used to make high quality stainless steel knives might contain small amounts of molybdenum, vanadium, manganese, and carbon in addition to the chromium and nickel. In other words,
stainless steel
is not an exact term, but a high quality stainless steel knife will be made of an alloy that will hold its edge for a long time. This is good, of course. The other side of the coin is that a knife that holds its edge well, such as a high quality stainless steel knife, will be difficult to sharpen once the edge is dull.
High carbon stainless steel
knives are among the most expensive knives. The steel used in these knives has the rust- and stain-resistant properties of ordinary stainless steel knives, but they sharpen as easily as the carbon steel knives. Of course, because they are easy to sharpen, they do not hold their edge as well as the common stainless steel knives.
BONING KNIFE
The term “boning knife” may be a slight misnomer. With its slender blade and blade length of 6 inches (15 cm) or less, it is a very handy knife for boning meat, but it is more often used to trim meat. For example, the first step in making sausage is to trim the meat before cutting it into cubes for grinding. Cutting out the gristle, tendon, sinew, and blood clots is not a difficult job if a boning knife is used. The boning knife is one of the essential knives for making sausage.
GENERAL PURPOSE KNIFE
A knife with a blade about 8 inches (20 cm) to 10 inches (25 cm) long is an essential knife to have for general use and for cutting meat into cubes that will fit in the grinder. A chef’s knife, or some other kind of knife with a stepped blade, is the best choice. (A knife with a stepped blade is a knife that has the cutting edge considerably lower than the handle.) The stepped blade keeps your knuckles from banging on the cutting board or counter top.
SLICING KNIFE
It is easy to slice large-diameter sausages if you use a straight knife with a blade at least 12 inches (30 cm) long—longer is better. If, however, you do not intend to make large sausages, there will be little need for a slicing knife.
Meat Grinders (Meat Choppers or Meat Mincers)
Meat grinders are also called meat choppers or meat mincers. All these terms refer to the same kind of hand-operated or electrically powered machine. The terms will be used interchangeably in this book.
Freshly ground meats bought at a food market can be used to make sausage. Eventually, however, you will need a meat grinder in order to process meats to suit your taste; for example, ground pork sold in grocery stores usually contains too much fat to make quality sausage. Also, some ethnic sausages should be made with coarsely ground meat, which is difficult to buy at a common grocery store.
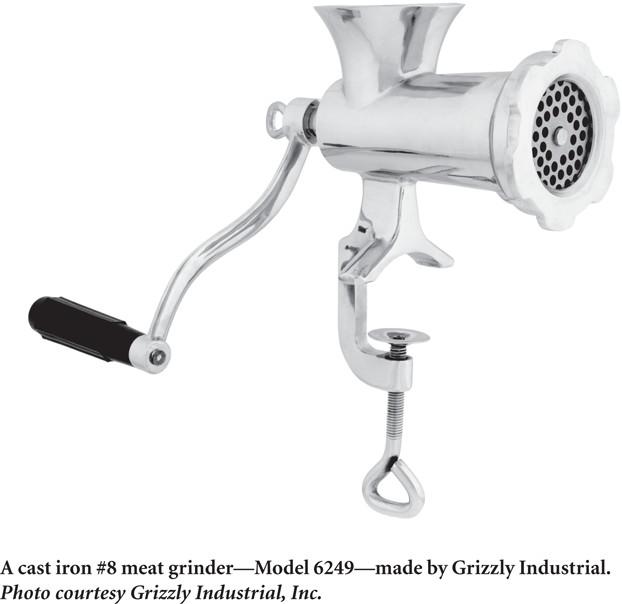
HAND OPERATED AND ELECTRIC GRINDERS
An old-fashioned (hand-operated) meat grinder made of tin-dipped cast iron will do the job very well. Either the size #8 or the slightly larger size #10 is adequate for home use. These meat choppers clamp on a table, a countertop, or on the breadboard built into most kitchen cabinets. If you buy a meat chopper that attaches to the countertop by suction cups, you will be disappointed; suction cups are inadequate to hold the machine in place.
An electric meat grinder does the job faster and with much less effort, but it is not necessary unless you intend to make large quantities of sausage frequently. It should be mentioned, however, that cleanup is much easier for the electric meat grinder because you need only wash the relatively small and lightweight parts in the front of the electric grinder that come in contact with the meat. If a manual grinder is used, the entire grinder comes in contact with the meat and must be washed, and because the grinder is made of cast iron, the heavy weight makes it cumbersome to clean.
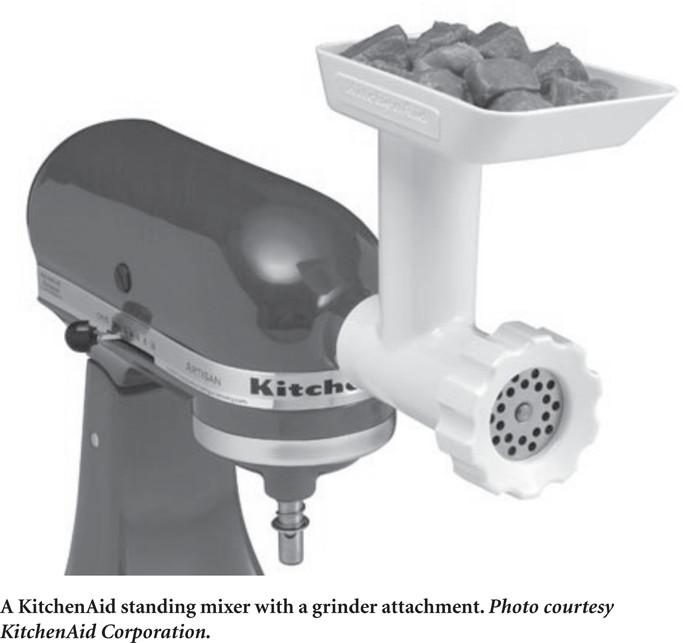
If you decide on an electric grinder, buy a powerful one. The VillaWare
®
Elite ProGrinder
™
model V5267 (or the equivalent) is a good choice. It has a 550 watt, ¾ horsepower motor and a handy reverse switch. It will cost about $165. If you happen to have a heavy-duty KitchenAid standing mixer, you might want to consider a grinder attachment; these grinder attachments work very well and they cost only about $65.