Passionate About Pizza: Making Great Homemade Pizza (33 page)
Read Passionate About Pizza: Making Great Homemade Pizza Online
Authors: Curtis Ide
Tags: #Baking, #Cookbook, #Dough, #Pizza

Crispy Sausage and Mushroom Pizza
Makes one fourteen to sixteen inch pizza or two ten to twelve inch pizzas.
8 ounces Italian sausage
8 ounces mushrooms, sliced
1 recipe Cracker-style Dough (see recipe
page 97
)
1 cup Basic Pizza Sauce (see recipe
page 113
)
8 ounces Mozzarella cheese, shredded
Italian herbs
Romano cheese
unbleached all-purpose flour (for kneading and shaping)
Toppings
–
Cook the sausage in a sauté pan until mostly cooked through, breaking the sausage up into bite-sized pieces. Add the mushrooms. Cook until the sausage is fully cooked and the mushrooms are soft and cooked through.
Resting
–
After the dough has risen, punch it down with one fist, take it out of the bowl, and knead it briefly (about one minute) without adding any flour, to release the large air bubbles. Make a dough ball then shape it into a flat circle about one inch thick. Sandwich the dough between two layers of plastic wrap and let it rest briefly in the refrigerator or on the counter for five to ten minutes before shaping it.
If you want very thin pizza, cut the dough into two pieces and make two disks before letting the dough rest. You can then shape each piece into a pizza and split the toppings across the two pizzas.
Shaping
–
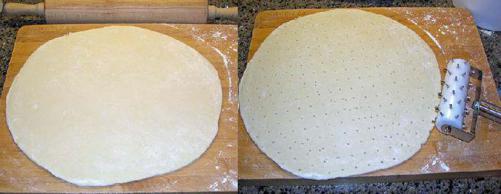
It is necessary to use a rolling pin to create this even, round, very thin pizza crust. This crust has no rim; just roll it out to the desired size. Use a fork to poke holes at one-inch intervals over the entire surface (including the edges). Alternatively, you can roll a dough docker over the entire surface, if you have one. Place the shaped (and docked) dough onto an oiled pizza screen or pizza pan. If you make the dough larger than your pizza pan or pizza screen, you can cut it to size with a knife. You can use the pan or the screen as a cutting guide; place the pan over the pizza and run a knife right around the edge to cut the dough.
The docked holes in the dough connect the top surface of the crust to the bottom surface. They also let the carbon dioxide produced by the yeast escape during cooking. This keeps the dough very thin and crispy.
Assembly
– Spread an even layer of sauce over the pizza up to 1/2 inch from the edge. The layer of sauce should be just thick enough so that you do not see bare spots through the sauce, but be careful not to use too much sauce. Spread the cheese and toppings evenly over the sauce. Sprinkle with herbs and Romano cheese, if desired. The sauce and toppings will migrate toward the center, so you should put a little less in the center; otherwise, the cooked pizza may be soggy in the center.
Baking
– Bake at 500˚ for ten to twelve minutes; the actual baking time may vary from eight to fourteen minutes depending on the oven, but be careful not to bake too long. You want to bake the pizza so that the crust is nicely browned and crunchy-chewy, but not overdone. In addition, the toppings should be heated through with the cheese and sauce bubbling slightly (it will almost look like it is boiling) over the whole surface of the pizza. This ensures that the toppings and sauce have heated to the right temperature.
If you want crispier crust, you can bake the pizza on a pizza screen for the first five or so minutes then slide the pizza off the screen and onto a baking stone. Preheat the oven with the stone in it and slide the pizza screen and pizza directly onto the baking stone. After five minutes, pull the pizza screen out (with the pizza on it), slide the pizza onto a pizza peel, then slide the pizza onto the stone using the peel. Continue baking the pizza until it reaches the desired doneness. Be careful when you handle the hot pizza screen and partially cooked pizza!
Serving
– After removing the pizza from the oven, let it stand for a few minutes on a trivet until the cheese stops bubbling and the pizza cools slightly. This allows the toppings and cheese to set prior to cutting. Cut the pizza into manageable size slices and serve while still warm.
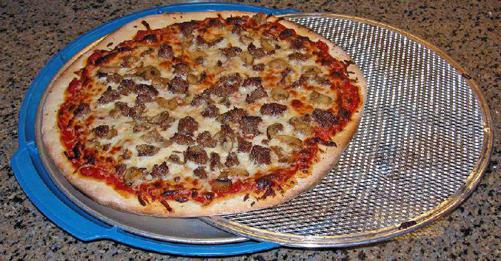
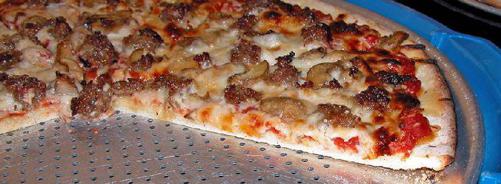
If you have one, serve the pizza on a perforated pan. The holes in the pan let steam and sauce out so that the bottom crust does not become soggy.
Variations
Dough
– 3/4 recipe Basic Pizza Dough (omit the sugar), Cracker-style Dough, 3/4 recipe New York-style Dough
Sauce
– Basic Pizza Sauce, Chicago-style Sauce, Fresh Plum Tomato Sauce, Mexican Chile Sauce, Squashed Tomato Sauce
Toppings
– You can use almost any fruit, vegetable, cheese, and meat, but make sure to dice them into very small pieces.
Assembly and Baking
– If you are very adept at pizza peel technique, you can assemble and bake this pizza on a pizza peel. It can be very difficult to get the pizza moving due to the seepage of sauce through the holes. Do not be surprised of the pizza sticks to the peel.
You can make thinner crust by splitting the dough into two pieces and making two pizzas.
Professional pizza chefs quickly create very thin pizza crust using a machine called a dough sheeter. They also use a tool called a dough docker, a roller that has many small tines on it, to prick the holes. As you roll the docker, the tines prick the dough.
Double Crust Pizza
Did double crust pizza start out as a large Calzone that never rose? We may never know, but it is kind of like a cross between a sandwich and a pizza.
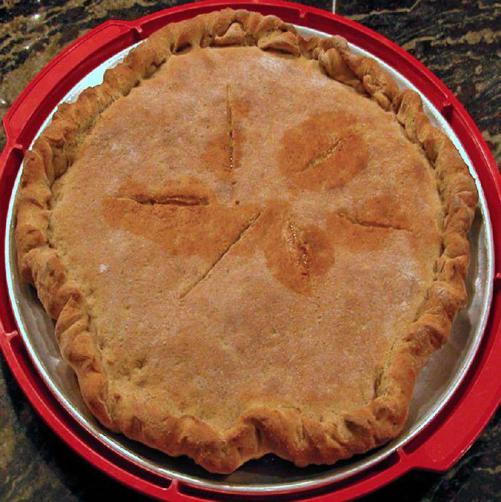
Two pieces of dough are layered with the toppings (in this pizza they are called fillings) in between. Since there is nowhere for any liquids to go, you should keep the moisture content of the fillings low so that the crust does not get soggy. You roll out the first crust just like a regular pizza. After you place the fillings on the dough, you place another thin layer of crust on top and seal the two pieces of dough together at the edge. You then cook the pizza without any sauce on top. Of course, you can serve sauce on the side.
Ham & Cheese Sandwich Pizza
Makes one fourteen to sixteen inch pizza.
1 1/2 recipe Rye Pizza Dough (see recipe
page 101
)
olive oil
1 pound thinly sliced ham
6 ounces Mozzarella cheese, shredded
6 ounces cheddar cheese, shredded
grated Romano cheese
Italian herbs
unbleached all-purpose flour (for kneading and shaping)
Resting
–
After the dough has risen, punch it down with one fist, take it out of the bowl, and knead it briefly (about one minute) without adding any flour, to release the large air bubbles. Split the dough into two parts, one part just slightly larger than the other one. Make a dough ball from each piece and shape each into a flat circle about one inch thick. Sandwich each piece of dough between two layers of plastic wrap and let it rest briefly in the refrigerator (or on the counter) for five to ten minutes before shaping it.


