Read To Walk Far, Carry Less : Camino de Santiago Online
Authors: Jean-Christie Ashmore
Tags: #Backing, #Camino
To Walk Far, Carry Less : Camino de Santiago (3 page)

Caveat:
Footwear should be bought well in advance and broken in—or you could experience serious regrets.
Packing Tips
Be Firm. Ask Yourself...
- Will I use this every day?
Think twice about taking anything that you don’t expect to use every single day on the Camino. Exceptions: rain gear, first aid kit, cold-weather clothing, and most likely a sleeping bag (see the pros and cons of sleeping sheets and sleeping bags in
Chapter 6: Sleeping Bag or Sheet?
). - Will I need this?
If in doubt, leave it out. Extra clothes for dinner at an expensive restaurant? Not needed: pilgrims of both genders wear their cleanest hiking clothes and hide their boots under white tablecloths while they eat gourmet meals and drink fine wines. On the Camino routes, it’s almost always acceptable. - Will I need this much, or that many?
“Don’t pack for the worst scenario. Pack for the best scenario and simply buy yourself out of any jams,” writes Rick Steves, author of a series of popular guidebooks to Europe. Great advice for any type of traveling. - Is this a fear?
Remember Vidal’s words. Are you packing items that represent your fears? I took a small flashlight and a space blanket on
three
different pilgrimages before admitting the truth: I never once used them. I suppose that somewhere in the back of my mind I was afraid of getting lost in the dark woods on a cold night. But of course I learned that the Camino is not the same as a wilderness hike, and that spending a cold night in the woods would probably never happen. The flashlight and the space blanket are gone forever from my Camino pack list.
* * *
Now let’s look at how to weigh your Camino gear. In order to create a backpack that weighs about 10 percent of your body weight, every single item that you want to carry in your backpack must be weighed, from lip balm to sleeping bag. Sure, it’s a hassle to weigh every item, just as it’s tough to recognize the difference between the items you
want
and those you truly
need.
But the payoff is worth it.
Experienced backpackers know that grams quickly add up to kilograms. Weighing each item reveals weight hogs, helping you determine what to bring and what to leave behind.
Once you’ve weighed everything, you’ll be able to choose items wisely based on their weight, instead of debating which shirt or soap to bring based on less important criteria (blue or green shirt? liquid or powder soap?).
For dramatic proof, keep a pile of everything you decide not to take. Weigh that pile after you’ve finished packing, and you’ll see why experienced lightweight backpackers weigh
everything,
from dental floss to footwear.
Once you’ve determined your backpack’s weight budget, gather
all
the probable contents of your backpack. Then weigh the essential items first, including the backpack itself. Essential items are the things you’ll use every day, as well as some other must-haves such as rain gear and a first aid kit.
A weight budget of 10 percent of your body weight usually doesn’t allow for those might-need or nice-to-have items. For now, recognize them as such, and put them in a separate dream pile.
Once you’re satisfied with your final pack weight, take another look at that dream pile. Even lightweight backpackers often carry treats or small comforts. Just be sure your nonessentials offer enough satisfaction to justify carrying them for hundreds of kilometers.
I sometimes carry micro-ground instant coffee in my pack because I think it’s nice to have. Twelve cups’ worth weighs about 46 grams (1.6 ounces)—the small amount of extra weight is worth it for the pleasure it gives to me and to others who’ll enjoy a hot cup of coffee on the trail.
A small postal scale, with a weight limit up to 2200 grams (5 pounds), works perfectly for weighing backpacking gear (and so does an accurate kitchen scale, if it has a large enough base to place the items on). A sleeping bag will likely weigh the most, and it shouldn’t weigh more than about half of that small postal scale’s weight limit.
Postal scales can be found pretty much anywhere office supplies are sold, and they aren’t very expensive. I bought my 2200-gram (5-pound) digital postal scale for about $25 (€18). I’ve used it for weighing food too. (Yes, it gets cleaned between weighing the boots and the pasta!)
Lightweight Notes
Forget the body scale you may have at home. While it could be used to weigh a fully loaded backpack, it won’t be able to accurately weigh small items—a tiny bar of soap, a pair of socks, a digital camera, a pocketknife, a bandana—whose individual weight should be considered.
It can be awkward to weigh some items on the small weighing platform of the scale. Use a rubber band or string to scrunch up clothing and other items so they fit on the platform. Also weigh the string or rubber band by itself, and deduct its weight from the weight of the item you wrapped it around. Even that minuscule amount makes a difference in the overall totals (perhaps enough to make you feel OK about packing that micro-ground coffee, for example).
Use a computer spreadsheet application to keep a running total as you enter each item’s weight. Or make a list on paper with two columns: item and weight. It’s best to use a pencil with an eraser, as you’ll likely make adjustments.
Digital postal scales usually offer a choice to weigh in grams or ounces. Choose grams: it’s easier to add whole numbers than fractions. You’ll notice how complicated adding ounces can be in
Chapter 16: Example Camino Pack List
, where weights are listed in both grams and ounces.
If metric weights seem meaningless to you, convert to ounces after weighing in grams. You can easily find conversions online if you Google, for example, “how many ounces is 500 grams.”
Lightweight Notes
Average Versus Actual Weights
When buying items online, look for the weight of an item listed under “Specs” or “Specifications,” but be aware that the weights are usually an average. Size differences, for example, will affect the actual weight—pants for a petite woman will weigh less than those for a tall man. If the weight is not indicated online, get it by calling or emailing the retailer. Once you receive the item, weigh it yourself so you’ll have a more accurate final tally.
The key question: according to the list you made of each item’s weight, does your backpack weigh about 10 percent of your body weight,
before
food and water?
If not, this is the time to eliminate excess weight. The rest of this book will help in that process by offering specific ideas to reduce weight on each item.
After reaching your weight-budget goal in theory, it’s time for the real-world test. To weigh your fully loaded backpack, you’ll need a larger-capacity scale than your small postal scale. For the most accurate weight, go to a bank, a fitness center, or a post office. You can also use your body scale at home if you’re sure of its accuracy. Product reviews often indicate that these scales are not accurate, however, and inaccuracy will defeat the purpose of having weighed each item individually. Getting an accurate total weight for your pack ensures that your tedious efforts to weigh and write down each item’s weight weren’t in vain.
Another option is to use a hand-held digital luggage scale. But again, read reviews regarding their accuracy.
Add water and food to your pack—estimate what you’d consume on an average day, including snacks, a picnic lunch, and
at least
one liter of water—for a final, realistic grand total.
* * *
Now that you know about the basic methods to create a lightweight backpack, let’s look at options, advice, and weight considerations for everything you’ll wear and carry on a Camino pilgrimage.
Chapter 3 Camino Clothing: How to Stay Warm When It’s Cold and Cool When It’s Hot
The Camino frees one from fashion concerns. A pilgrim typically has one core outfit that he or she wears every day—for weeks. It’s liberating because it’s simple. (So is the laundry.)
The challenge is to choose the right clothing so that you’ll feel comfortable in a variety of situations. For example, you’ll often experience different levels of exertion throughout each day’s hike—especially in the hilly or mountainous areas. And of course the weather is a big factor. If you’re walking for days or weeks, you should be prepared for everything: cold or hot temperatures, rain, and maybe even a surprise dusting of snow. But you’ll also want to feel comfortable at night—when going out to dinner, visiting the local sites, and just hanging out inside the pilgrims’ refuges, which can range from chilly monasteries to stuffy-when-crowded facilities.
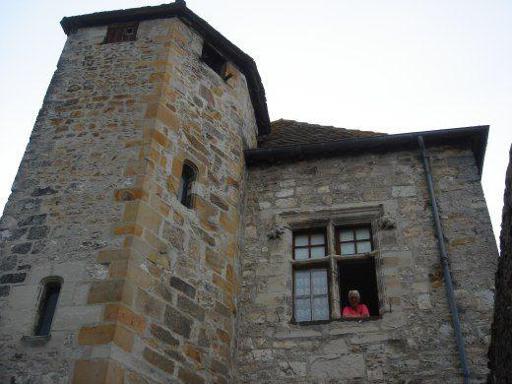
A pilgrim enjoying the view at a medieval—and chilly-at-night—pilgrims’ refuge along the Vézelay route
First we’ll look at a few basic features to consider when choosing Camino clothing. Then I’ll explain in depth a system to layer your clothing, since that’s the key to staying warm when it’s cold and cool when it’s hot in any Camino situation.
Gear Guide
Backpacking Clothes: Three Features to Look For
- Lightweight:
Several layers of lighter clothing provide more options for staying warm or cooling off than one or two heavy layers. The following section provides more specifics on choosing your layers. - Wicking:
Fabrics that pull the sweat from the surface of your skin to evaporate or to be transferred to the next layer of clothing help keep your body dry. You’ll feel warmer when it’s cold and less sweaty when it’s hot. - Breathability:
Choose garments that allow body heat to escape. This can be accomplished through design and/or fabric. Breathable fabrics usually have labels indicating as much. As for design, look for features such as a mesh panel located under the arms or on the back of a shirt. Another option: get a larger size than you normally would. That roominess itself provides ventilation.
There’s some debate in the backpacking community about how many layers of clothing backpackers should use. Some say three layers—a base layer, a mid-layer, and a shell—is sufficient for any type of backpacking, but I recommend taking four layers of clothing (plus undergarments) on the Camino—an inner layer, a mid-layer, an insulation layer, and a shell. The difference with my system is this: what I consider to be the mid-layer are your walking clothes for a pleasant-weather day on the Camino, not an insulation layer, and the base layer is for sleeping and for providing extra warmth during very cold weather. I suggest this approach because it provides more layering options for the not-in-the-wilderness Camino journey, while still making it possible to accomplish the lightweight backpack goal. Although it’s possible to get by with less on the Camino in summer, you should at least take rain gear as an outer shell layer: summer rains are not uncommon. (Rain gear is such an important topic for Camino pilgrims that it has its own chapter.)
It’s also not uncommon to experience cold weather in the summer—day or night, in the mountains or not. Summer storms can make the temperatures drop. That’s why I recommend taking warm clothing regardless of when you walk the Camino. Layers provide the most flexibility for both hot and cold temperatures.
Two or three lightweight garments that can be layered are more adaptable than one heavy fleece jacket. Even on a cold day, a Camino pilgrim can get hot, especially when marching up a steep hill. Layers provide the option to peel off just the right amount of clothing to avoid overheating. And you can always layer up again, adding the right amount of clothing to keep your body at a comfortable temperature.
When starting out in the morning, here’s a simple way to test your layers: if you’re warm and cozy while standing still, you’ll likely overheat once you start walking. Take a layer off. If you continue to warm up while walking, remove additional layers. When you stop for a break or a picnic lunch, add layers again to prevent getting chilled while in repose.
Not Considered a Layer: Undergarments
Underpants
Why it’s called a “pair” when it’s just one thing, I don’t know. But I take three pairs: one to wear (and wash at night), another to put on after my end-of-the-day shower, and the third for when I’m too lazy to wash the worn pair at night.
A third pair can also serve as an emergency replacement. I once miscalculated and squatted too close to some dry weeds that attached what seemed like a hundred burrs to the inside of my undies, requiring me to change them on the spot and throw them away (later), because removing a hundred burrs from one’s undies is impossible, embarrassing, annoying, ridiculous, and time consuming.
