Ukulele For Dummies (36 page)
Read Ukulele For Dummies Online
Authors: Alistair Wood

 If you're wondering why âA' is used for the ring finger, the names come from the Latin (
indice
,
medius
,
annular
). In keeping with this, you'll sometimes see the thumb referred to with a P for
pulgar
.
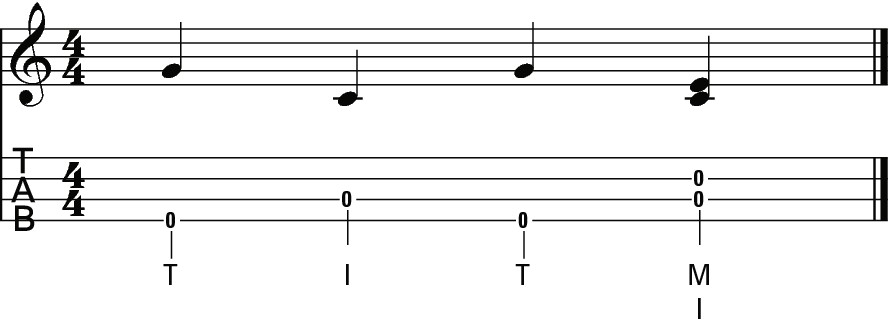
These finger names appear directly underneath each note. Where two notes are picked at the same time, they appear one on top of the other in the same configuration as the tab.
In Figure 8-2, you pluck the g-string with your thumb, and then the C-string with your index finger, and then the g-string with your thumb again, and then C with your index finger and the E-string with your middle finger at the same time.
Figure 8-2:
Picking pattern tab.

Picking Up Some Picking Patterns
Even with just four strings to use, the uke provides a huge variety of fingerpicking patterns for you to play. This section describes four patterns, hand-picked (cue collective groan for the pun) just for you.
Getting the lowdown on the up pattern
 The simplest pattern of all goes up through the strings one at a time, as shown in Figure 8-3 and on Track 27, Part 1.
Figure 8-3:
Up pattern tab.

This example uses a simple C chord all the way through, so that you can concentrate on the picking. Each string is picked (or plucked) in turn (first the g-string with your thumb, and then the C-string with your index finger and so on). Make sure that you let the notes ring into each other so that by the time you've picked all the notes a full C chord is ringing.
To start off with, play the notes as slowly as you can. The important thing is to keep the tempo as even as possible. When you're comfortable playing it, increase the speed a little at a time.
 At the start of the phrase, all the fingers are touching the strings: this position gives you plenty of time to get each finger positioned.
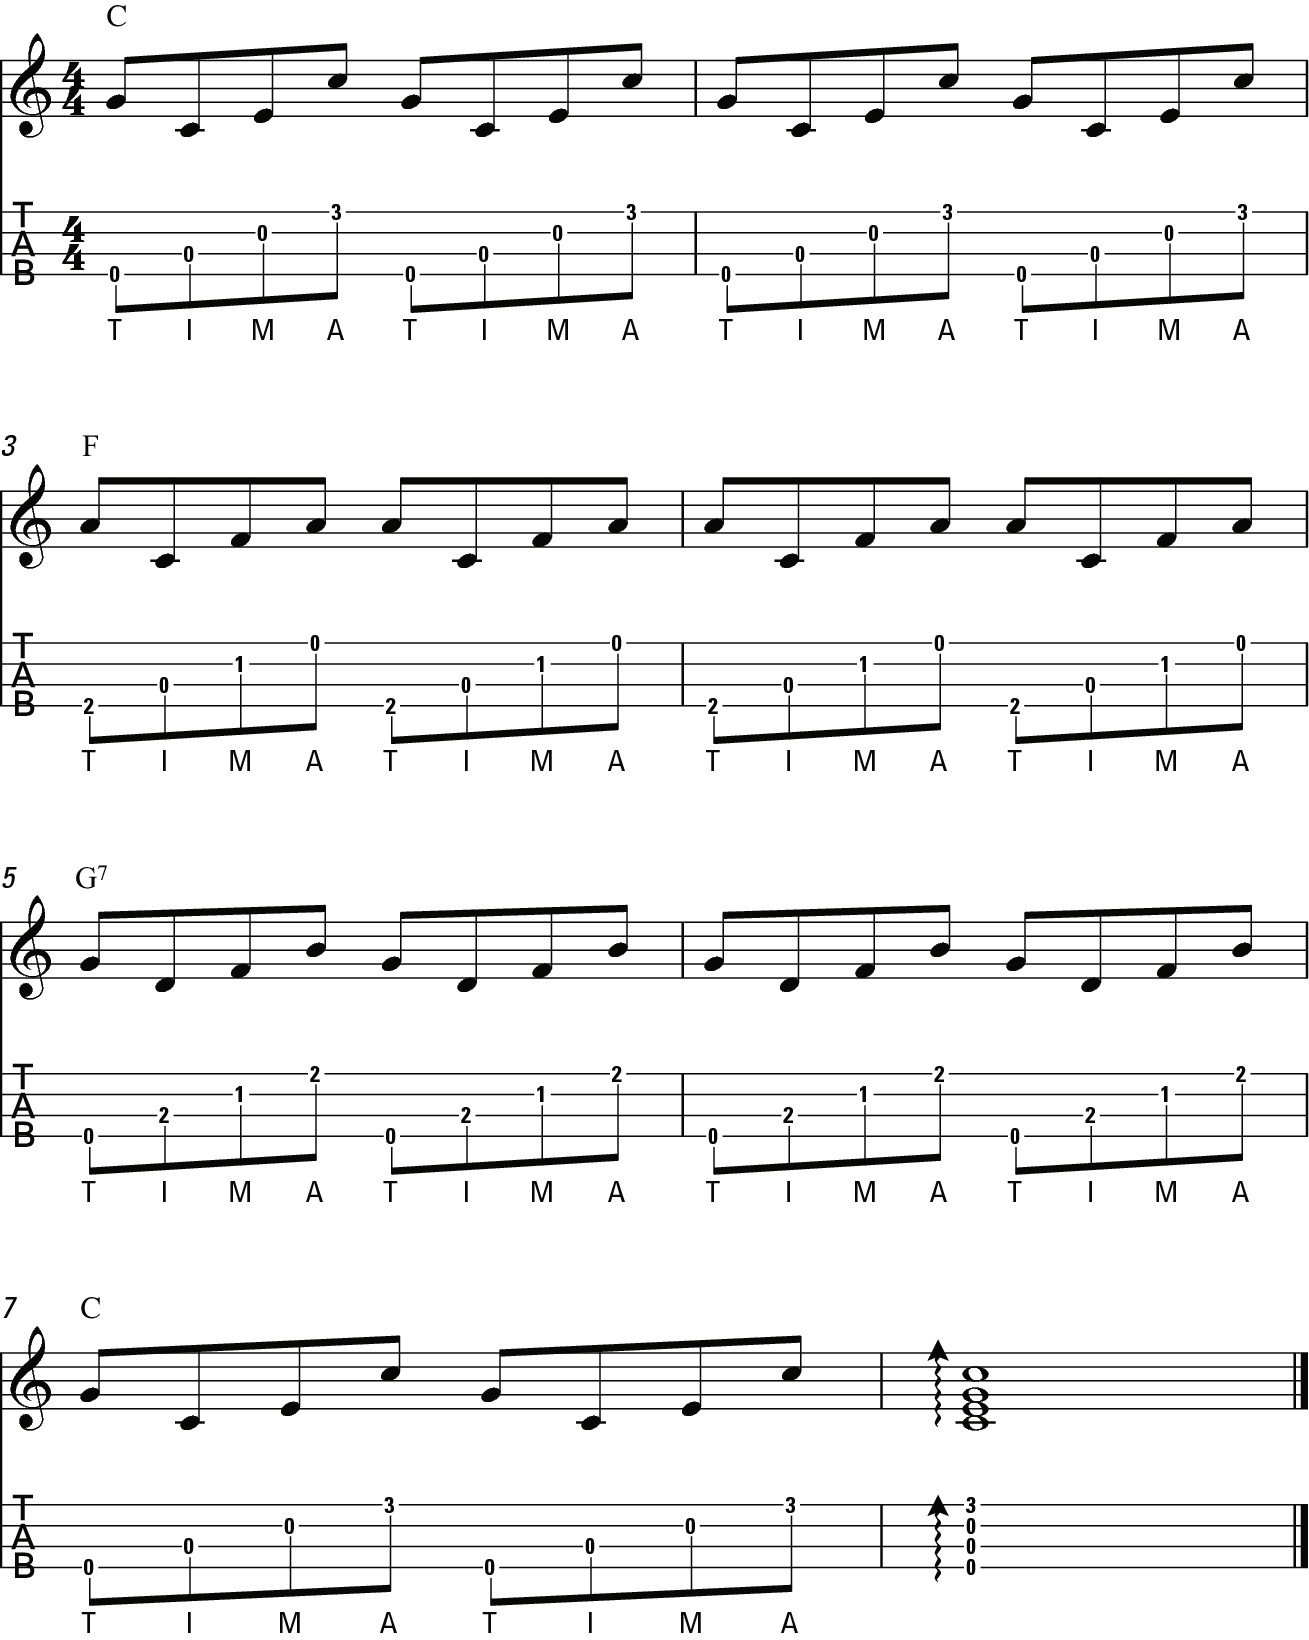
 When you get the hang of the pattern, try changing chords while playing it: Figure 8-4 changes between the C, F and G7 chords (turn to Chapter 4 for more on these chords). Listen to Track 27, Part 2, for an example.
Again, start by playing slowly. Make sure that the transitions between the chords are smooth before you try to speed up.
To end the phrase, I use a strum through the chord with my thumb.
Picking and changing chords can feel a bit like trying to rub your stomach and pat your head at the same time: the co-ordination can be tricky at first. But after some practice it starts to come more naturally.
Figure 8-4:
Up pattern with chord progression.

Although this pattern is very simple, combining it with interesting chords can make it sound very intricate. The re-entrant string (which I discuss in Chapter 2) can be used to make the pattern sound like the notes are skipping all over the place.
Figure 8-5 contains some unusual chords that you can use with this picking pattern. Each one is a variation on a main chord (C, F or G7).
Figure 8-5:
Chord shapes for Figure 8-6.

 Figure 8-6 uses the same overall chord progression as Figure 8-4 (two bars of C, two bars of F, two bars of G7 and then finishing on C) but the small variations in the chords give it texture. Listen to Track 27, Part 3, for an example.
 Be sure to hold the chord shapes throughout the pattern so that the notes ring into each other.
 This progression also contains a neat little trick. The chord variation right before a chord change introduces a note from the chord that's coming up next. For example, at the end of bar 4 an open g-string is added to the F chord to transition into the G chord. This technique is a nice way to lead from one chord into the next and you can do it with strumming as well as with picking.
