101 Excel 2013 Tips, Tricks and Timesavers (5 page)
Read 101 Excel 2013 Tips, Tricks and Timesavers Online
Authors: John Walkenbach

Figure 6-2:
The downside to storing your work in the cloud.
Tip 7: Saving to a Read-Only Format
If you need to share information in a workbook with someone — and be assured that the information remains intact and isn’t altered — you have several choices.
Send a printed copy
Printing a workbook on paper is the low-tech approach. If the recipient is not nearby, this option may also require some type of delivery service.
Send an electronic copy in the form of a PDF file
PDF files (for Portable Document Format) is a common file format, and just about everyone has software installed that displays PDF files.
To save a workbook as a PDF file, choose File⇒Export⇒Create PDF/XPS Document and click the Create PDF/XPS button to display the Publish as PDF or XPS dialog box. Click the Options button for additional options:
→ Choose the pages
→ Specify what to save (the current range selection, the selected sheet(s), or the entire workbook
→ Save document properties and accessibility information
For best results, use Excel’s Page Layout view (View⇒Workbook View⇒Page Layout) before saving, so you’ll see exactly how the pages will break. Figure 7-1 shows Adobe Reader displaying an Excel workbook that was saved as a PDF file.
 Excel provides another option: XPS format (for XML Paper Specification). This is Microsoft’s format. When exporting from Excel, it’s limited to a single worksheet, and it doesn’t support images. An XPS viewer is installed with Windows. This format is not widely used.
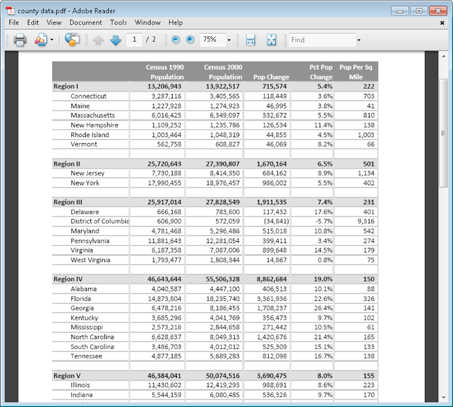
Figure 7-1:
Adobe Reader displaying a PDF file created from an Excel workbook.
Send an MHTML file
Many Excel users don’t know about this file format. An MHTML faithfully renders an Excel workbook in a single file that can be opened with many browsers, including Internet Explorer, Opera, and Mozilla Firefox (extension required). Choose File⇒Save As to display the Save As dialog box. Then select Single File Web Page (
*.mht
,
*.mhtl
) from the Save As Type drop-down menu.
Figure 7-2 shows a workbook that was saved as an MHTML file, displayed in the Internet Explorer browser. Note the worksheet tabs displayed along the bottom.
If you need to send a read-only, non-alterable workbook, the MHTML format is probably your best choice (assuming that the recipient has a browser that supports this format).
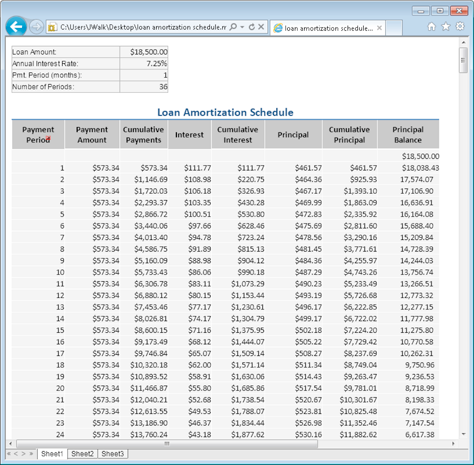
Figure 7-2:
An Excel workbook saved as an MHTML file and displayed in a web browser.
Tip 8: Generating a List of Filenames
This tip describes how to retrieve a list of filenames in a folder and display them in a worksheet.
This technique uses an Excel 4 XLM macro function in a named formula. It’s useful because it’s a relatively simple way of getting a list of filenames into a worksheet — something that normally requires a complex VBA macro.
Start with a new workbook and then follow these steps to create a named formula:
1.
Choose Formulas⇒Define Name to display the New Name dialog box.
2.
Type
FileList
in the Name field.
3.
Enter the following formula in the Refers To field (see Figure 8-1):
=FILES(Sheet1!$A$1)
4.
Click OK to close the New Name dialog box.
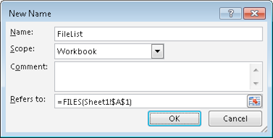
Figure 8-1:
Using the New Name dialog box to create a named formula.
Note that the FILES function is not a normal worksheet function. Rather, it’s an old XLM style macro function that is intended to be used on a special macro sheet. This function takes one argument (a directory path and a file specification) and returns an array of filenames in that directory that match the file specification.
A normal worksheet formula cannot use these old XLM functions, but named formulas can.
After defining the named formula, enter a directory path and file specification into cell A1. For example:
E:\Backup\Excel\*.xl*
Then this formula displays the first file found:
=INDEX(FileList, 1)
If you change the second argument to 2, it displays the second file found, and so on.
Figure 8-2 shows an example. The path and file specification is in cell A1. Cell A2 contains this formula, copied down the column:
=INDEX(FileList,ROW()-1)
The ROW function, as used here, generates a series of consecutive integers: 1, 2, 3, and so on. These integers are used as the second argument for the INDEX function. Note that cell A21 (and cells below it) displays an error. That’s because the directory has only 19 files, and the formula is attempting to display files that don’t exist.
When you change the directory or filespec in cell A1, the formulas update to display the new filenames.
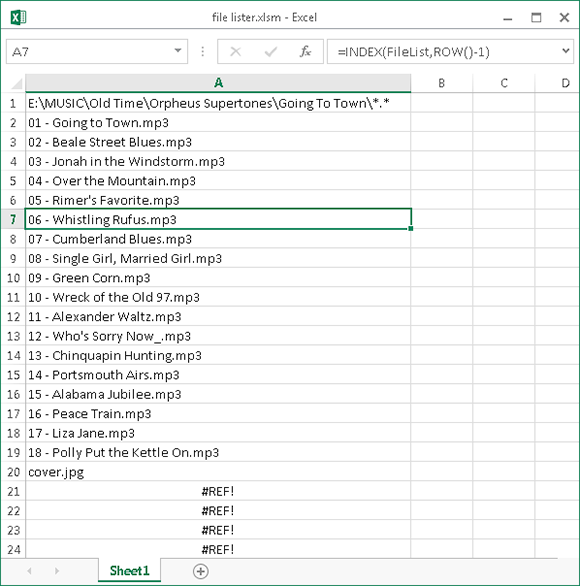
Figure 8-2:
Using an XLM macro in a named formula can generate a list of filenames in a worksheet.
If you use this technique, you must save the workbook as a macro-enabled file (with an *.xlsm or *.xls extension).
Tip 9: Generating a List of Sheet Names
Oddly, Excel doesn’t provide a direct way to generate a list of sheet names in a workbook. This tip describes how to generate a list of all the sheets in a workbook. Like the previous tip (“Generating a List of Filenames”), this tip uses an Excel 4 XLM macro function in a named formula.
Start with a workbook that has lots of worksheets or chart sheets. Then follow these steps to create a list of the sheet names:
1.
Insert a new worksheet to hold the list of sheet names.
2.
Choose Formulas⇒Define Name to display the New Name dialog box.
3.
Type
SheetList
in the Name field.
4.
Enter the following formula in the Refers To field (see Figure 9-1):
=REPLACE(GET.WORKBOOK(1),1,FIND(“]”,GET.WORKBOOK(1)),””)
5.
Click OK to close the New Name dialog box.
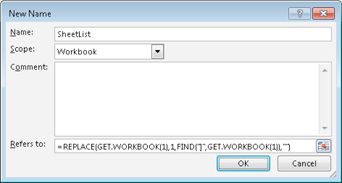
Figure 9-1:
Using the New Name dialog box to create a named formula.
Note that this formula uses the GET.WORKBOOK function — which is not a normal worksheet function. Rather, it’s an old XLM-style macro function intended for use on a special macro sheet. Using an argument of 1 returns an array of sheet names, and each name is preceded by the workbook name. The REPLACE and FIND functions remove the workbook name from the sheet names.
To generate the sheet names, enter this formula in cell A1, and then copy it down the column:
=INDEX(SheetList,ROW())
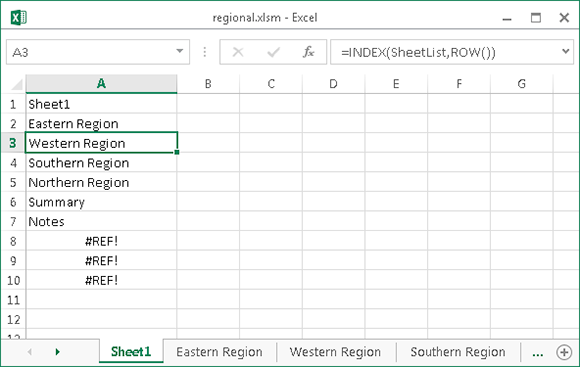
Figure 9-2 shows this formula in the range A1:A10. The workbook has seven sheets, so the formula returns a #REF! error when it attempts to display a nonexistent sheet name. To eliminate this error, modify the formula as follows:
=IFERROR(INDEX(SheetList,ROW()),””)