Make: Electronics (34 page)
Authors: Charles Platt

Figure 3-51.
Solid-core color-coded wires, soldered onto the wires from an AC adapter, provide a convenient way to feed power to a breadboard. Note that the wires are of differing lengths to reduce the risk of them touching each other.
Shortening a Power Cord
When I travel, I like to minimize everything. It always annoys me that the power cord for the power supply of my laptop is 4 feet long. The thinner wire that connects the power supply to the computer is also 4 feet long, and I just don’t need that much wire.
After searching exhaustively I couldn’t find any laptop power cables shorter than 3 feet, so I decided to shorten one myself. If you feel no need to do this, you should try the following procedure on an old extension cord, just as an exercise. You do need to go through these steps to acquire some practice in soldering heavier, stranded wire and using heat-shrink tubing:
1.
Use your wire cutters to chop the wire, and then a utility knife to split the two conductors, with one shorter than the other. When splicing a power cord or similar cable containing two or more conductors, it’s good to avoid having the joints opposite each other. They fit more snugly if they are offset, and there’s less risk of a short circuit if a joint fails.
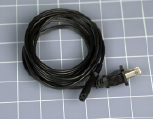
Figure 3-52
.
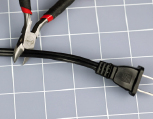
Figure 3-53
.
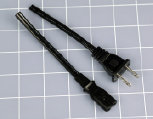
Figure 3-54
.
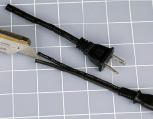
Figure 3-55
.
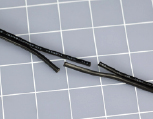
Figure 3-56
.
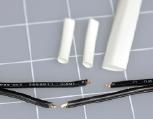
Figure 3-57
.
2.
Strip off a minimal amount of insulation. One-eighth of an inch (3 mm) is sufficient. The automatic wire strippers that I mentioned in the shopping list in
Chapter 1
are especially convenient, but regular wire strippers will do the job.
3.
Cut two pieces of heat-shrink tubing, each 1 inch long, big enough to slide over the separate conductors in your cable. Cut a separate 2-inch piece of larger tubing that will slide over the entire joint when it’s done. The steps described so far are illustrated in Figures 3-52 through 3-58.
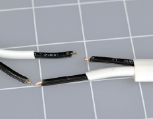
Figure 3-58.
Figures 3-52 through 3-58 illustrate the sequence of steps to prepare for making a shortened power cord for a laptop computer power supply.
4.
Now for the most difficult part: activating your human memory. You have to remember to slide the tubing onto the wire
before
you make your solder joint, because the plugs on the ends of the wires will prevent you from adding any heat-shrink tubing later. If you’re as impatient as I am, it’s very difficult to remember to do this every time.
5.
Use your helping hand to align the first joint. Push the two pieces of wire together so that the strands intermingle, and then squeeze them tight between finger and thumb, so that there are no little bits sticking out. A stray strand of wire can puncture heat-shrink tubing when the tubing is hot and soft and is shrinking around the joint.
6.
The wire that you’re joining is much heavier than the 22-gauge wire that you worked with previously, so it will suck up more heat, and you must touch the soldering iron to it for a longer time. Make sure that the solder flows all the way into the joint, and check the underside after the joint is cool. Most likely you’ll find some bare copper strands there. The joint should become a nice solid, rounded, shiny blob. Keep the heat-shrink tubing as far away from the joint as possible while you’re using the soldering iron, so that heat from the iron doesn’t shrink the tubing prematurely, preventing you from sliding it over the joint later.
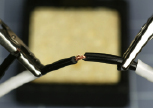
Figure 3-59
.
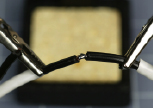
Figure 3-60
.
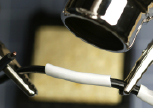
Figure 3-61
.
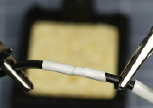
Figure 3-62
.
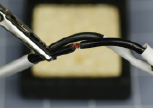
Figure 3-63
.
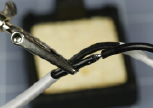
Figure 3-64
.