Pro Puppet (38 page)
Authors: Jeffrey McCune James Turnbull

Next, you need to configure an Apache virtual host for our Dashboard implementation, which will include enabling the required Passenger module. The Puppet Dashboard provides an example of this virtual host, which you can see in
Listing 7-2
. We will put the file in our Apache configuration directory,
for example/etc/httpd/conf.dor/etc/apache2/conf.d, on Red Hat and Debian/Ubuntu flavored hosts, respectively.
Listing 7-2.
Apache Virtual Host for Passenger
LoadModule passenger_module /var/lib/gems/1.8/gems/passenger-2.2.11/ext/apache2/mod_passenger.so
PassengerRoot /var/lib/gems/1.8/gems/passenger-2.2.11
PassengerRuby /usr/bin/ruby
PassengerHighPerformance on
PassengerMaxPoolSize 12
PassengerPoolIdleTime 1500
PassengerStatThrottleRate 120
RailsAutoDetect On

        ServerName dashboard.example.com
        DocumentRoot /usr/share/puppet-dashboard//files/06/21/01/f062101/public/

                Options None
                AllowOverride AuthConfig
                Order allow,deny
                allow from all

  ErrorLog /var/log/apache2/dashboard.example.com_error.log
  LogLevel warn
  CustomLog /var/log/apache2/dashboard.example.com_access.log combined
  ServerSignature On
The virtual host file first loads the mod_passenger module, in this case customized for a Debian or Ubuntu environment. If we'd installed Passenger via a gem those lines might look more like this:
   LoadModule passenger_module /usr/lib/ruby/gems/1.8/gems
/passenger-2.2.9/ext/apache2/mod_passenger.so
   PassengerRoot /usr/lib/ruby/gems/1.8/gems/passenger-2.2.9
   PassengerRuby /usr/bin/ruby
The next options control Passenger-specific options. You can read about each in more detail athttp://www.modrails.com/documentation/Users%20guide%20Apache.html#_configuring_phusion_passenger.
Last is a very simple virtual host definition that specifies the location of the Dashboard application. The important options to note areDocumentRootandDirectory. For Passenger to serve out a Ruby on Rails application, these need to be set to thepublicdirectory underneath the root of the Rails application, in our case/usr/share/puppet-dashboard/public.
We can now reload Apache and browse to the URL and see the Dashboard, for example on Red Hat:
$ sudo service httpd restart
You can see the home page of the Dashboard in
Figure 7-1
.
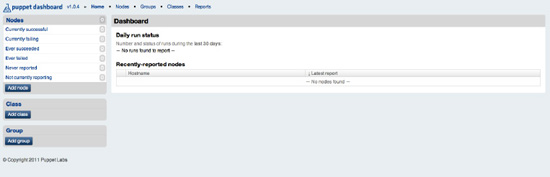
Figure 7-1.
The Dashboard home page
 Tip
Tip
If you'd prefer to use the Nginx server rather than Apache, you can see some instructions athttp://wiki.rubyonrails.org/deployment/nginx-passenger. Other deployment options include Unicorn (http://unicorn.bogomips.org/) and Thin (http://wiki.rubyonrails.org/deployment/nginx-thin).
With Puppet Dashboard installed we can now use it, starting with looking a how to integrate our Puppet masters and agents into the Dashboard.
DASHBOARD SECURITY
One of the limitations of the current Dashboard tool is its lack of authentication, authorization and encryption. Currently Dashboard does not provide any of these, though they are on the product's roadmap. The best way to protect your Dashboard from unauthorized access is to:
Configure a combination of host- and network-based firewalls to limit access to the Dashboard from appropriate network segments
HTTP Basic authentication, for example using Apache. If you do specify HTTP basic authentication, remember that ANY connection – including report aggregation and external nodes – will need to be authenticated. This means including the HTTP Basic username and password in any supplied URL, for example setting the
reporturloption in thepuppet.conffile tohttp://username:[email protected].
Now that you've installed the Dashboard, you can integrate Puppet and start to make use of some of its capabilities. We're going to demonstrate:
- Importing Puppet reports
- Live aggregation of Puppet reports
- Displaying reports
- Using the Dashboard for external node classification
Finally, we'll look at logging, database and data management, including backing up your Dashboard data.
But the first capability we're going to use is the Dashboard's ability to display Puppet reports and reporting statistics. We can do this in two ways: by importing existing reports using a Rake task, usually scheduled via a cron job, or by configuring Puppet to send its reports directly to the Dashboard.
Note
If desired, you can both import your existing historical data into the Dashboard with the Rake task, and ensure regular updates by configuring Puppet to send reports to the Dashboard.
Let's first see how we can incorporate existing reports from Puppet. The Dashboard comes with a Rake task to perform this action. Change into the root directory,/usr/share/puppet-dashboard, of the Dashboard application. Then, run thereports:importtask.
$ sudo rake RAILS_ENV=production reports:import
By default, the task will look in/var/puppet/lib/reportsfor any reports to be imported. If your reports aren't located here then you can specify a location on the command line:
$ sudo rake RAILS_ENV=production reports:import REPORT_DIR=/path/to/your/reports
You can run this command multiple times, for example via a cron job. Any reports that have already been imported will be skipped. You should see lists of nodes appear in your Dashboard as reports for each are added. You can see some initial nodes in
Figure 7-2
.
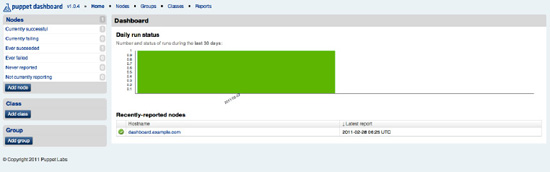
Figure 7-2.
Initial nodes in the Dashboard
Tip
You can see a full list of all reports on the Dashboard by clicking the Reports link in the top menu bar.
In addition to manual report importation, you can also configure Puppet to send your reports to the Dashboard. There are two methods to do this, depending on what version of Puppet you have running. For both methods you need to make changes on both the Puppet master and clients.
Note
Many of the changes we're going to describe relate to reports and reporting capability we will talk about in
Chapter 9
.
For versions 2.6.0 and later, you need to enable reporting on our clients (if you haven't already) by setting thereportoption in the[agent]section of thepuppet.conffile, like so:
[agent]
report = true
On the master you need to enable a new type of report calledhttp, which sends report data over an HTTP connection, and specify a location to send our HTTP report,reporturl. You don't have to specify a URL, in which case it will default to the local host on port 3000. To do this you need to update the[master]section of the Puppet's master'spuppet.conffile.