Stitch 'n Bitch: The Knitter's Handbook (12 page)
Read Stitch 'n Bitch: The Knitter's Handbook Online
Authors: Debbie Stoller

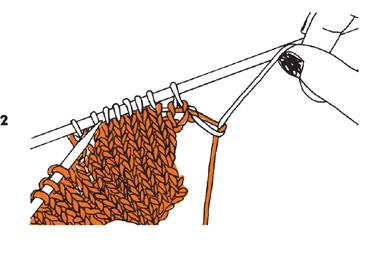
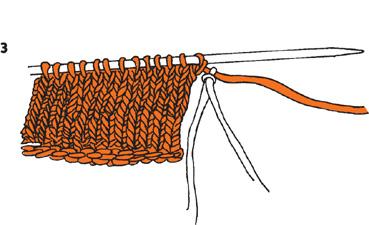
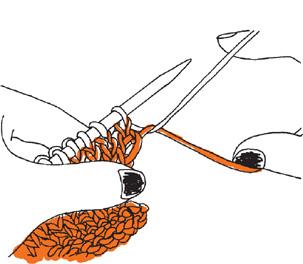
Another way to secure that new yarn is to knit the first one or two stitches using the old and new yarn together. This method only works well if you aren’t using yarn that is very bulky, and you should be careful, on the next row, to knit the two yarns together as one stitch, and not two.
Finally, there’s the cheater’s way out: Make a slip knot in the new yarn, pass the old yarn through it, and slide the new yarn up to the base of the first stitch, then knit away. This can make for a sloppy beginning of a row, but try it, you might like it.
(figure 3)
Learning to Make Stripes
Okay, so you know how to add a new ball of yarn when you’re knitting. Now what if that new ball is a different color? Know what you’d have then? Stripes, my friend. And stripes are one of the easiest ways to make your knitting colorful and more fun. Add stripes by ending the old yarn, starting the next color of yarn, knitting for a few rows until your stripe is as wide as you want it to be, then adding the next color. Of course, you will always want to start your stripes at the
beginning
of a row. (Because you’ve been paying attention and you’d never dare add new yarn in the middle of a row, right?)
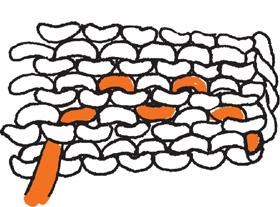
If your stripes are only a few rows wide, you’ll get pretty tired of starting new yarn over and over again. Instead, just let the yarn you aren’t using hang along the side of your piece. Then, every time you get to the side where this yarn is hanging, just twist it once with the yarn you are using to knit. When you are ready for it, start knitting with the other yarn again.
How to Weave in Yarn Ends
When you’ve finished knitting a piece of fabric, you’ll have a couple of yarn tails hanging along the side. You might want to pass these off as some kind of really weird fringe, but you’d be better off to hide them by weaving them in. Here’s how:
Thread the yarn end through a yarn needle (see
page 22
). Bring the yarn in and out through the bumps along the edge or the back of your piece until you’ve tucked in about 4 inches of your yarn tail. Snip the yarn close to the end.
B
ABY
’
S
F
IRST
S
WATCH
Before you start knitting any real projects, you should practice by making a little square of knit fabric. This little test square is called a swatch, and even experienced knitters make them, to see how their yarn knits up with a certain size of needle. You’ll learn more about that in the next chapter, but for now, get ready to make a cute little test swatch in garter stitch, which is what you get if you knit every row.
Start with a pair of size 8 needles and some worsted-weight yarn, such as Brown Sheep Company Lamb’s Pride Worsted. Size 8 needles are the middle size of needles, and worsted-weight yarn is the middle weight of yarn, so this combo is a good one to start with.
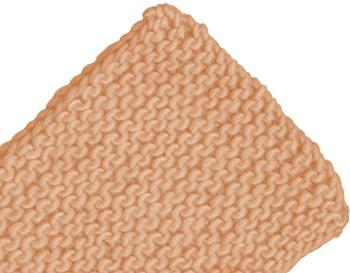
It may not look like much, but it’s all yours
.
Using the slingshot, double cast-on method, cast on 20 stitches.
Knit 30 rows.
As you’re going along, stop every now and then and count the stitches you have on the needle after you’ve finished a row. Make sure you only have 20 stitches. If you end up with more than 20 stitches, check to see if you are hanging your yarn in front every time you begin a new row (see Caution,
page 38
). If you have holes in your knitting, make sure you are leaving your yarn in the back between every stitch, and not accidentally crossing it over the top of your needles and adding new stitches (and holes). If you do end up with extra stitches, don’t worry. Just continue knitting with the new number of stitches. Your goal is to be able to knit at least 10 rows without adding or subtracting stitches.
Bind off. Cut the yarn, leaving a 6-inch tail hanging. Work away your yarn ends.
Hooray! Save your garter-stitch swatch. It is the very first thing you knit, and you’ll want to cherish it.
Toss it in your bag with your sunglasses; it will make a great lens cleaner.
Go-Go Garter Stitch Scarf
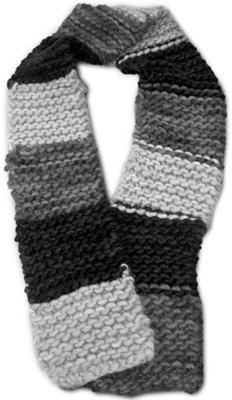
Here’s a nice, chunky scarf that can be made in a few evenings and will help you to practice some basic skills: casting on, knitting, adding a new color of yarn, and binding off. Best of all, by the time you’re done with it, you will really be comfortable making the knit stitch.
Use an extra-bulky yarn. We used some really beautiful 50% alpaca/50% wool yarn from Blue Sky Alpaca (100 grams, 45 yards), 1 skein of each of the following three colors: green, purple, and teal. Other yarns you could use would be Brown Sheep Burly spun, Rowan Big Wool, or GGH Marakko in three colors that you like.
You’ll also need a pair of size 17 straight needles—these are humungo and usually come only in plastic.
Start by casting on 10 stitches using the green yarn. Knit 14 rows. Cut the green yarn, leaving a 6" tail. Add in the purple yarn, and knit 14 rows. Cut the purple yarn, leaving a 6" tail. Add in the teal yarn, knit 14 rows. Cut the teal yarn, leaving a 6" tail. Repeat this striping pattern (the green yarn is next) 3 more times—so you have 4 repeats altogether. Bind off. Work all the yarn ends away with a yarn needle.
Using such fat yarn on such big needles means you will need to knit only 2 stitches to make an entire inch wide of fabric. And since this scarf starts with 10 stitches, that means it will come out to be 5" wide. After the striping repeats, it will be about 69" long. You can make this basic garter stitch scarf over and over again. Use a thinner yarn and you’ll end up with something lacier. Or use a thinner yarn (like a worsted weight yarn) on thinner needles (like size 10) and start by casting on 20 stitches instead of 10, if you want something a little less bulky.
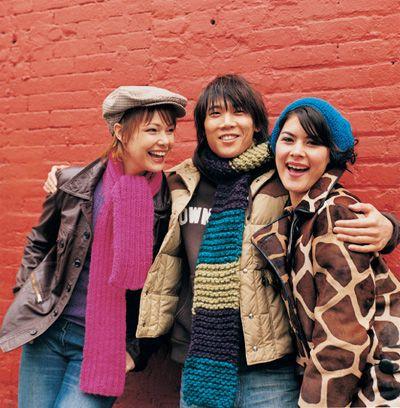
Ribbed-for-Her-Pleasure Scarf
(left)
, Go-Go Garter Stitch Scarf
(center)
,
Kitschy Kerchief
(right)
LEARNING TO PURL AND MAKE SIMPLE STITCH PATTERNS
Poor little purl stitch. Long the underdog of the knitting world, the purl stitch is destined to be always a bridesmaid, never the bride. Some people despise purling so much that they knit in the round just to avoid it; others, like certain friends of mine, claim to prefer it, simply because of its status as the unloved, black-sheep sibling of the more popular knit stitch.
So how did the purl stitch get such a bad rap? After all,
a purl stitch is nothing more than a knit stitch facing backward
. In fact, both stitches are just loops; the only difference is that when you knit, you
pull
the loop from the back to the front of the old loop—like pulling a tissue out of a box. When you purl, you
push
the loop through the front to the back of the old loop—like pushing that tissue back into the box. And that difference alone makes purling a stitch more difficult than knitting a stitch.