The Art and Craft of Coffee (17 page)
Read The Art and Craft of Coffee Online
Authors: Kevin Sinnott

Each paper filter ends up in the trash after use, which raises some concern about their environmental impact. Weigh this against the impact of cleaning and caring for permanent filters. Paper filters break down in compost along with coffee grounds.
Illustrated Brewing Techniques
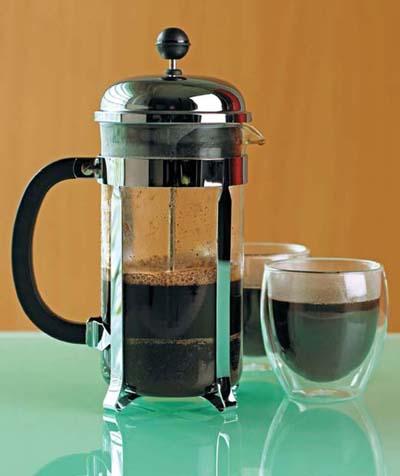
This section offers step-by-step instructions for several of the world’s most popular brewing methods, each of which has been thoroughly tested by coffee aficionados and should be a great starting point for the coffee newbie. Once you master the basics, feel free to improvise on your own.
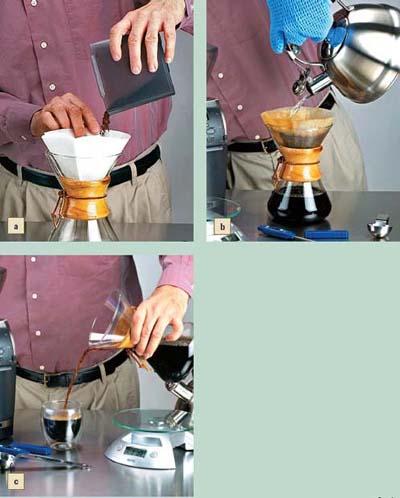
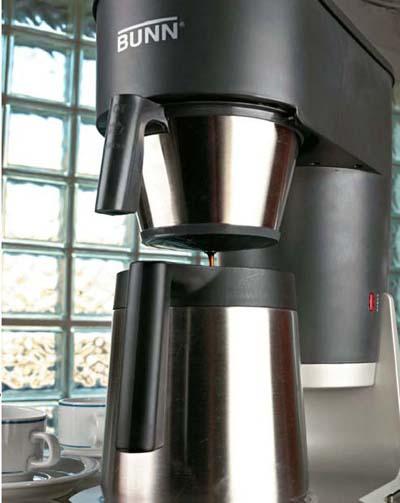
A classic automatic drip brewer in action.
Manual Drip
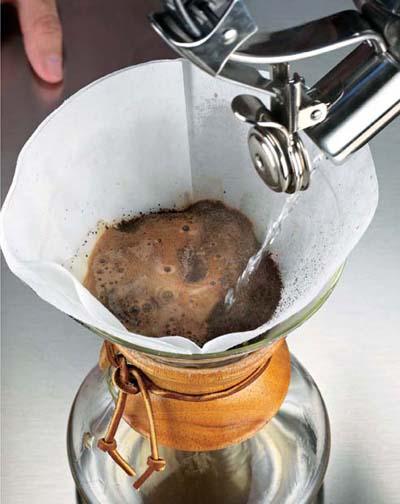
To make manual drip coffee, tiny droplets of water flow over the coffee grounds and allow the coffee to drip through, extracting oils from the grounds as they pass. Gravity and the amount of grounds control the contact time between grounds and water. More grounds take more time through which to pass, increasing the brew’s strength.
Drip brewing requires a careful balance of variables. Grind fineness, batch size, and other factors must work together precisely to ensure that hot water drenches the grounds for an exact amount of time. This does not mean you can’t make great drip coffee; it just requires a more minute grind or formula changes.
Materials
Kettle
Stovetop
Fresh water, 6 ounces (180 ml) for every 2 tablespoons (10 g) whole bean coffee
Digital scale
Fresh coffee, 2 tablespoons (10 g) whole bean per 6 ounces (180 ml) water
Grinder set to medium-fine
Paper or mesh filter (see page 93 for recommendations)
Drip maker, one that makes the amount of coffee you like to drink
Thermometer, optional
< Manual drip brewing’s advantage is in the hands of the hot water pourer. You can literally steer the stream to ensure all the grounds are thoroughly submerged by piping hot water. The foaming on the fresh-soaked grounds is a sign of roasting freshness.
Expert Notes on Manual Brewing
Here are some tips for brewing manually:
• Time a batch. Pay attention to the moment the grounds get wet until the last drip of coffee enters the carafe. If the time exceeds seven minutes (including a one-minute break for initial grounds foaming and settling), coarsen your grind and repeat.
• Run water through bleached filters (which I recommend) before setting in the brewer to remove any possible chemicals used for whitening (usually hydrogen peroxide, not chlorine). This will prepare the filter for brewing and prevent even the slightest possibility that it will absorb your first coffee extracts.
• Watch the temperature. If you use a thermometer, pour water when it reads 200˚F (90˚C) instead of one minute off the boil.
• Examine the filter after brewing. The top of the grounds bed should look flat and wet, indicating that all of the grounds participated equally in the extraction process.
• Stir the drip coffee before serving the finished brew. The first extracts are stronger than the last.
• Compost the used coffee grounds and paper filters.
Instructions
1.
Set the water kettle on high heat to boil.
2.
Weigh the whole beans and grind medium-fine. Do not grind too fine.
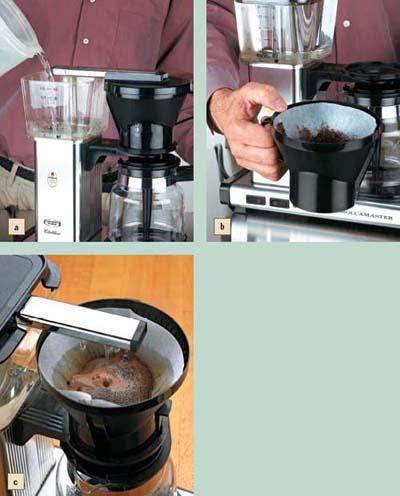
3.
Prewet the paper filter, fold the filter in half, and set it in the basket. Place the double fold (the thicker of the two sides) over the runnel (the channel on the brewer).
4.
Add the grounds to the filter
(a)
. Shake the basket to settle the grounds, but never pack them.
5.
Remove the boiling water from the heat and let it stand for 1 minute or until the water stops bubbling.
6.
Slowly pour the water over the grounds in a circular motion
(b)
. Fresh roaster/fresh ground coffee will likely foam up (releasing carbon dioxide) and then settle back down. For better flavor extraction, allow this to occur before pouring more water.
7.
Repeat until all the coffee is brewed.
8.
Remove the filter and discard.
9.
Stir the brew to mix together the strongest coffee, which comes through earliest, with the weaker coffee, which comes at the drip brew’s end. Serve the coffee
(c)
.
Manual Drip Tutorial
Automatic Drip
Unlike manual drip, automatic drip features onboard water boiling and delivery over the grounds. In other words, this brewer does the heating for you, decides when the water is hot enough, and then dribbles it over your coffee grounds. From that point on, it’s no different than the manual drip, with gravity pulling the water through the ground coffee and the brew falling from the filter into the carafe below.
Despite its name, automatic drip still requires the user to measure and grind coffee and have knowledge of the overall coffee-making process, particularly knowing how to tweak an automatic drip (see pages 102 for more information). Fully automatic machines are in development, but haven’t arrived yet.
Materials
Digital scale
Fresh whole bean coffee, 2 tablespoons (10 g) per 6 ounces (180 ml) water
Grinder set to medium-fine
Automatic drip brewer (preferably one that brews a full batch in 6 minutes or less)
Fresh water, 6 ounces (180 ml) for every 2 tablespoons (10 g) whole bean coffee
Paper or metal filter (see page 93 for recommendations)
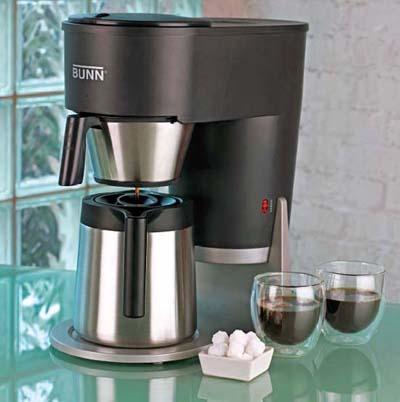
< Automatic drip brewers offer convenience and a sleek design for the modern kitchen.
Expert Notes on Automatic Brewing
Here are some notes about automatic brews:
• Examine the grounds after brewing. All the grounds should appear damp, with no dry grounds present, and lie flat. This indicates an even, thorough soaking. If you see dry grounds, grind finer next time.
• Adjust the batch size until you get it right. For example, if the brewer takes longer than six minutes and the grounds are wet but didn’t overflow, make a smaller batch next time.
• Grind coarser if the grounds basket overflowed during brewing.
• Add water to the finished brew if the coffee is too strong.
• Use less ground coffee if the coffee retains some bitter notes.
• Check the brewer’s temperature if the coffee is weak but contact time is six minutes. Wearing an oven mitt, hold a thermometer under the brewer’s spray head (if you have a flexible thermometer, place it into the brew basket and run a full cycle). It should read between 190˚F (88˚C) and 205˚F (96˚C). If the temperature and timing are right and the grounds are getting soaked, but the coffee still ends up too strong or too weak, adjust the brew formula or move the grind one notch in either direction.
Instructions
1.
Weigh whole bean or ground coffee. If using whole bean, grind medium-fine. Do not grind too fine.
2.
Fill the machine’s water compartment, usually up top, with cold water
(a)
.
3.
Prewet the filter and insert it into the holder.
4.
Add the grounds to the filter. Shake the basket to settle the grounds flat, but never pack them
(b)
.
5.
Close the lid or insert the filter holder into the machine, depending on your model’s design.
6.
Turn the brewing switch on.
7.
Time from the first drip until the last drip exits the filter. This should take 6 minutes maximum
(c)
.
8.
Stir the finished brew in the carafe to mix earlier, stronger coffee with later, weaker extraction.
Automatic Drip Tutorial