The Contemporary Buttercream Bible (29 page)
Read The Contemporary Buttercream Bible Online
Authors: Christina Ong Valeri Valeriano

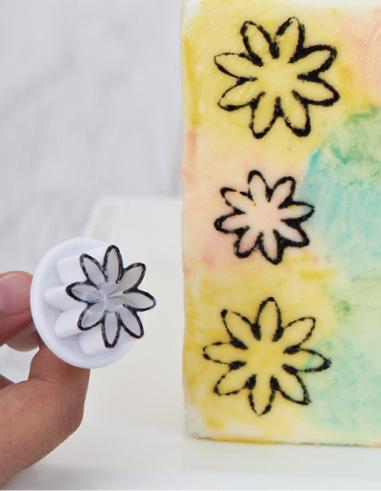
600–800g (1lb 5oz–1lb 12oz) of uncoloured
buttercream (see Covering Cakes in Buttercream
Basics). Colour the remaining buttercream in the
following quantities: 150–250g (51⁄2–9oz) each of
light blue, dark blue, violet and green. Create the
marbled flowers following the tutorial. Apply white
sprinkles to the flower centres. Pipe a thicker
border at the top and bottom edges of the cake (see
Scrolls, Lines and Zigzags in Piping Texture and
Patterns).
330
Transfers, Stamping
and Stencilling
In this chapter we look at three ways to re-create an intricate pattern on the surface of a cake. Have you
seen a specific design from somewhere that you
desperately want to use,
but
the details are too much to handle? Here is a solution: create a frozen
buttercream transfer or FBCT! If you want a
delicate pattern to cover a large area, then a stencil might be the way to achieve it, and there are
hundreds of stamps to choose from to create a wide
range of effects. Just delve into this chapter to find the technique that suits you.
331
332
Frozen Buttercream
Transfers on a Flat Surface
Typically, when a pattern is transferred onto a cake, a border of stars or swirls is piped around the edge, making it obvious that a transferred pattern has
been used. Let us show you the Queen of Hearts
way! No one will even notice that you have used this
technique – they will just admire the seemingly
impossibly detailed pattern you have created.
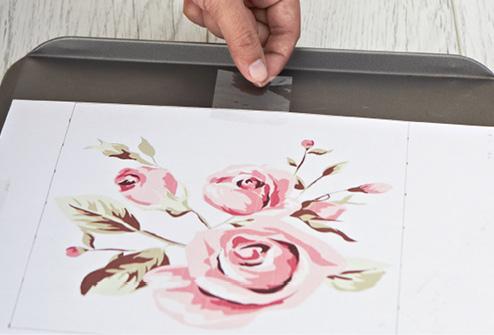
1 Choose your graphic image and make sure that
you re-size it so that it will fit on your cake, and
create a reverse/mirror image before printing it.
Next it is essential to draw a guide line around your pattern according to the exact size of your cake (A).
333

A
2 Place your pattern on a baking sheet (or any
freezer-proof flat board), lay a piece of greaseproof (wax) paper on top of it and secure both with sticky
tape (B).
B
334
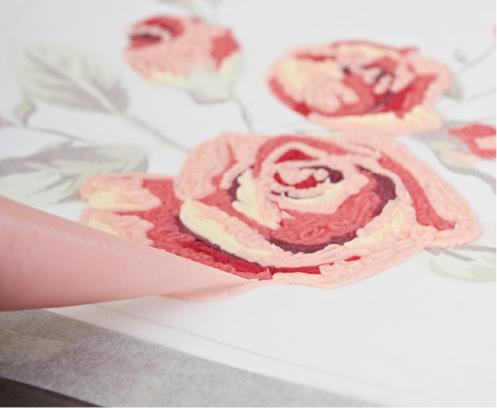
3 Outline your pattern using different tinted
buttercream if needs be. When you have done so,
begin filling in colours (C). Layer in the colours as you go by finishing each one before using another.
Make sure that there are no gaps in between the
colours.
C
4 When you have finished (D), quick freeze the
pattern for about 5–10 minutes until the
buttercream is firm. This is important so your
pattern will not move. Remove it from the freezer
and, using buttercream of the same colour as the
background of your cake, pipe a thin layer within
335
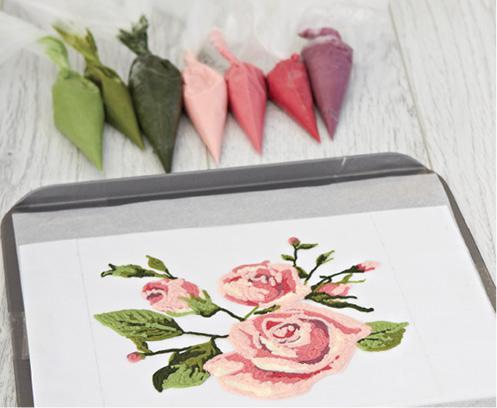
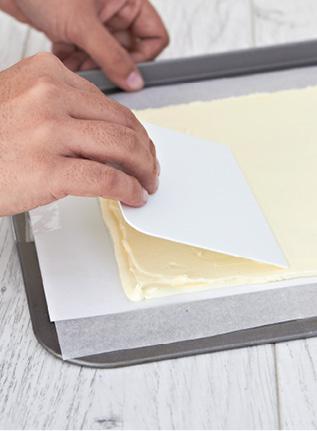
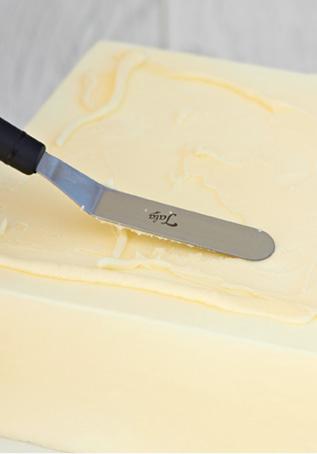
and up to the guide line you drew to show the exact
size of the cake (E). Spread the buttercream with a
palette knife and even it out with a scraper (F).
When done, freeze for about 30 minutes to an hour
or until the pattern is rock hard.
D
336

E
337
F
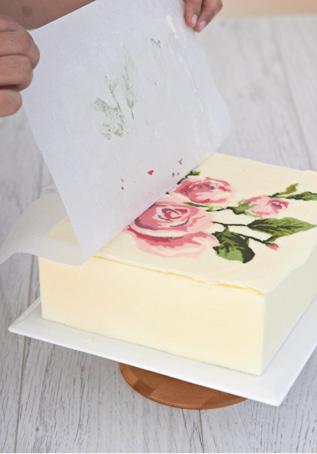
5 When the pattern is frozen, apply a thin layer of
buttercream to the surface of the crumb-coated
cake where you will apply the pattern, making sure
it is even (G). Take the pattern out of the freezer
then quickly but carefully flip it and position it on the cake, lightly pressing it down so it sticks (H).
Using your palette knife, remove the excess frozen
buttercream around the cake.
G
338
H
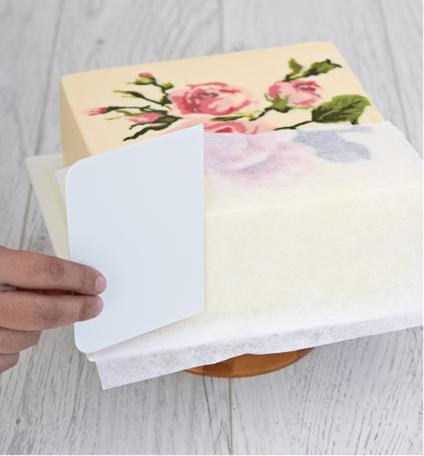
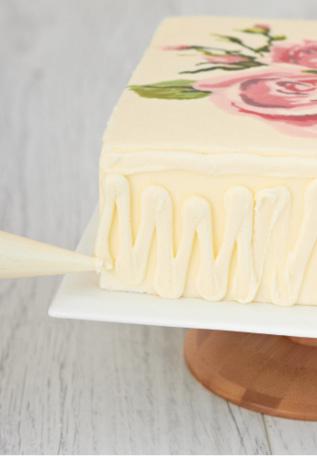
6 Using the same colour as the background, apply
another layer of buttercream over all the remaining
surfaces of the cake (I). Remember that it is
really
important
to make this layer the same thickness as the pattern or the illusion will be spoiled. At about the same moment that you finish this, you should
find that the buttercream of the pattern has become
soft again. When this is so, smooth the sides and
edges of the cake to a perfect finish (see Smoothing
in Buttercream Basics) (J).
339
I
340
