The Contemporary Buttercream Bible (30 page)
Read The Contemporary Buttercream Bible Online
Authors: Christina Ong Valeri Valeriano

J
Tip
Before printing your pattern, be mindful that
you need to flip or make a mirror image of the
picture before you print it out. Make sure that
your
pattern
is
really
frozen
so
your
greaseproof paper will peel off easily and not
stick.
341
342
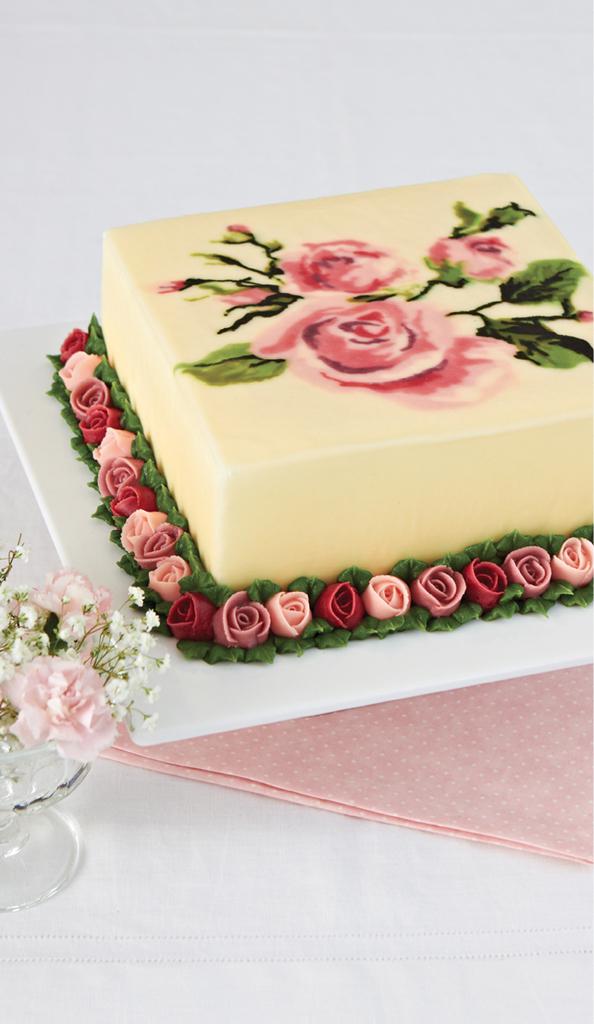
To create this cake…
• 20 × 10cm (8 × 4in) square cake
• 2.25–2.95kg (5lb–6lb 6oz) buttercream
• Paste colours: light pink (Sugarflair Pink), dark
pink (Sugarflair Claret), dusky pink (Sugarflair
Dusky Pink), foliage green (Sugarflair Foliage
Green), light green (Sugarflair Gooseberry), dark
green (Sugarflair Spruce Green)
• Piping bags
• Palette knife
• Scraper
• Pen
• Ruler
• Scissors
• Greaseproof (wax) paper
• Sticky tape
• Printed pattern (see Templates)
• Baking sheet or any flat board
• Small petal nozzle (Wilton 104)
• Small leaf nozzle (Wilton 352)
343
• Writing nozzles 1–3 (optional)
• Cake stand or covered cake board
Crumb coat (see Crumb Coating in Buttercream
Basics) and place the cake on a stand or covered
board. Use the template supplied to create your
frozen buttercream transfer by following the
tutorial. You will need to colour the buttercream in
the following quantities: 200–300g (7–101⁄2oz) each
of light pink, dark pink, dusky pink, foliage green,
light green and dark green. Leave 1–1.1kg (2lb
4oz–2lb 71⁄2oz) of buttercream uncoloured to apply
the transfer and cover the sides of the cake. Smooth
the sides to a perfect finish (see Smoothing in
Buttercream Basics). Pipe roses around the base in
all the pink shades and arrange using the ‘freezing’
method (see Rose and Rose Bud in Piping Flowers).
Add some leaves in foliage green (see Sunflowers
and Leaves in Piping Flowers).
344
Frozen Buttercram Transfers
on a Curve
Now that you have seen how to do the flat version
of a frozen buttercream transfer, you might wonder
how you apply this technique to the curved side of a
round cake. We have spent lots of time and loads of
buttercream experimenting and perfecting a
method to achieve this. Here we modestly offer you
yet another brilliant innovation, brought to you
exclusively by Queen of Hearts Couture Cakes!
1 Choose your graphic image and make sure that
you re-size accordingly and flip it to make a mirror
image before printing it. Place your pattern on a
baking sheet (or any flat board) with greaseproof
(wax) paper on top of it. Secure the image and the
greaseproof paper with sticky tape.
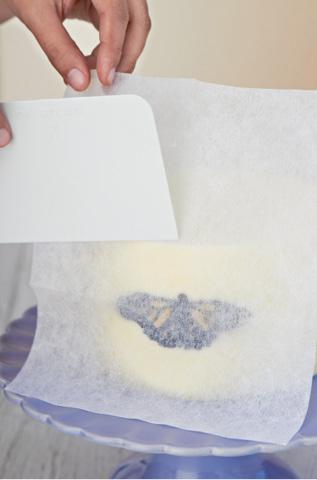
2 Using buttercream tinted in the colours you
require, outline and fill in your pattern in layers.
When you have finished, quick freeze it for about
5–10 minutes until the buttercream is firm. When
the pattern is hard enough, take it out of the freezer and pipe over it with another thin layer of
345
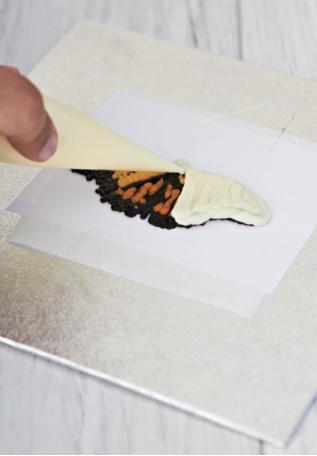
buttercream which is slightly bigger than the
pattern (A) and smooth (B). The buttercream
should be the same as the background colour of
your cake.
A
346
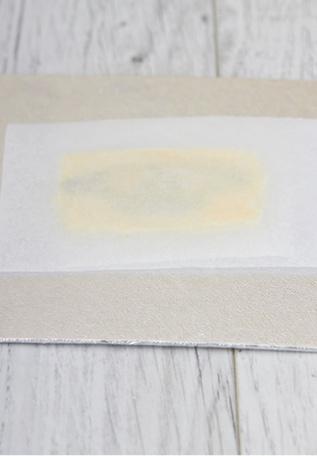
B
Tip
If your pattern is big or wide you will have to
divide it into several parts, freeze each and
reassemble it when you apply it to the cake,
repeating the process described above for
each part.
3 Remove the pattern from the board and gently
slide it onto the side of a round Styrofoam dummy
cake. Secure it with cocktail sticks (toothpicks) or
347
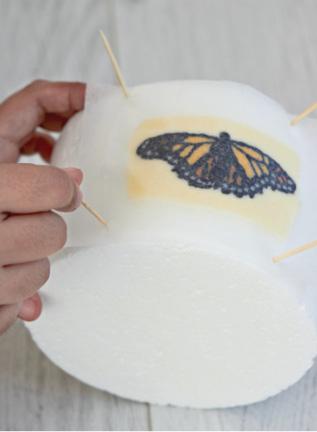
headed pins (C). Freeze the dummy with the
pattern on it for about 30 minutes to an hour, or
until it is rock hard. Secure it in the freezer so that it doesn’t roll over.
C
4 When the pattern is ready, apply a thin even layer
of buttercream on the surface to which you will
apply it. Take the pattern out of the freezer then
quickly but carefully flip it and position it on to the cake, lightly pressing it down so that the pattern
sticks (D).
348
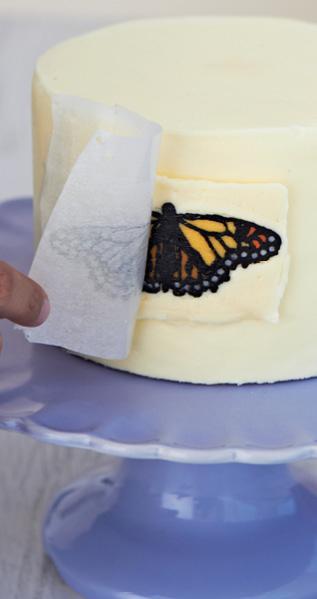
D
5 Using the same colour as the background, apply
another layer of buttercream around your pattern
(E)and level it using a palette knife (F). It is most important that the amount of buttercream you
apply everywhere on the cake including between
patterns is the same thickness as the pattern.
Repeat the same process to apply any other
349
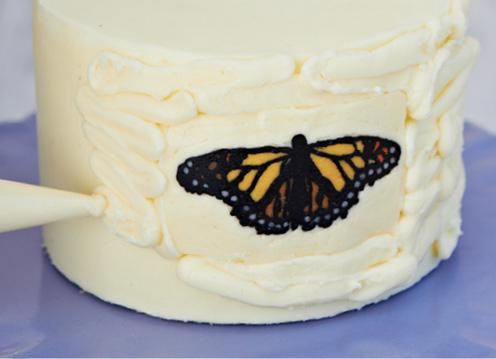
patterns. Apply buttercream to the rest of the
surface of the cake and remove any excess.
E
350
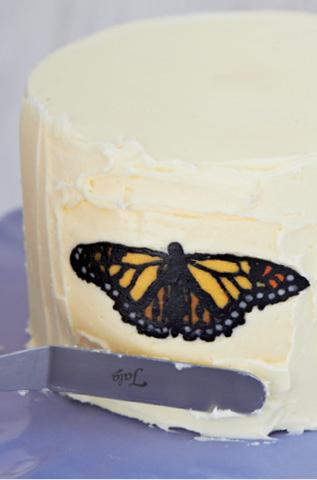
F
Tip
When placing a pattern over the edge of a
cake, make sure the pattern is firm from
freezing but not rock hard, so that it will bend
to the required shape. Press it firmly on to the
surface and quick freeze the whole cake again
to reduce the risk of the pattern sticking to the
greaseproof paper when you pull it off.
351
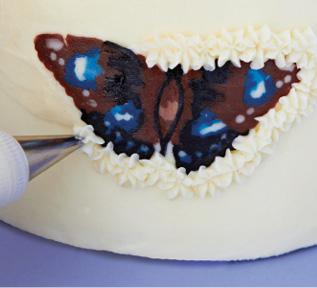
6 When cake is crusted, finish by creating a
perfectly smooth surface (see Smoothing in
Buttercream Basics) (G).
G
Tip
You can also pipe borders around your pattern
once you have stuck it to your cake. If you do
this, make sure you follow the shape of your
pattern.
352