The Contemporary Buttercream Bible (39 page)
Read The Contemporary Buttercream Bible Online
Authors: Christina Ong Valeri Valeriano

E
4 Optionally, you may add some piped details to
give variations in texture.
Rice paper versus icing sheet
Rice paper is basically like a sheet of paper,
only edible, but an icing sheet (below) is
slightly thicker, heavier and very flexible. It will
not remain stiff without backing support, so it is
best to apply icing sheet flat onto the cake. On
rice paper, colours are not as bright and rich
as when printed on an icing sheet, though you
can boost the colours by painting brighter
453
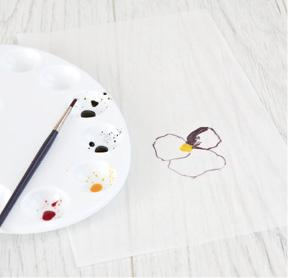
edible colours or using edible colour pens on a
rice paper image. If you do, make sure you do
not use too much liquid as it will dissolve and
wrinkle the paper. For the icing sheet, have
your image printed, cut around it and leave it
uncovered. It will eventually harden and
becomes easier to stick onto the cake. Be very
careful though as it tends to become very
brittle.
Tip
To prevent colours from bleeding you can
spray the rice paper or icing sheet pattern with
an edible glaze.
454
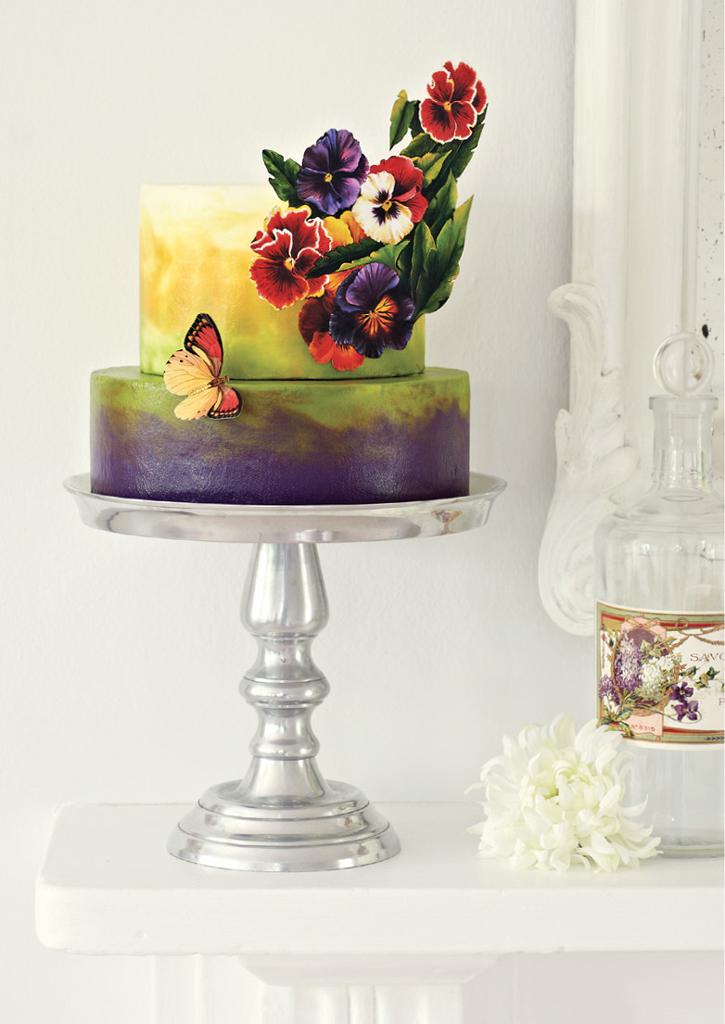
To create this cake…
• 20 × 10cm (8 × 4in) round cake (bottom tier), 15
× 10cm (6 × 4in) round cake (top tier)
455
• Dowel rods
• 1.4–1.8kg (3lb 11⁄2oz–4lb) buttercream
• Paste colours: violet (Sugarflair Grape Violet),
yellow-green (Sugarflair Bitter Melon), yellow
(Sugarflair Melon)
• Piping bags
• Scissors
• Palette knife
• Cake scraper
• Pattern printed on rice paper or icing sheet
• Cake stand or covered cake board
Crumb coat, dowel and stack the cakes (see
Buttercream Basics) and place on a stand or
covered board. Colour the buttercream in the
following quantities: 300–400g (101⁄2–14oz) each of
violet, yellow-green and yellow, leaving 500–600g
(1lb 2oz–1lb 5oz) plain. To cover the cake, apply the tinted buttercream in layers and spread using a
palette knife to give a blended background for the
cake (see Blending in Palette Knife Techniques),
before you take off the excess using a cake scraper.
Give the cake a smooth finish (see Smoothing in
456
Buttercream Basics). Scan the Templates supplied
to create rice paper or icing sheet patterns, and
apply them to the cakes following the tutorial.
457
Sprinkles
Known variously as sprinkles or nonpareils or
hundreds and thousands, sprinkles are basically
coloured beads made of sugar. On ordinary cakes,
you might just cover the whole cake with these tiny
balls but then, as you know, we don’t want an
ordinary cake, we want a couture cake! So what we
have done here is to create a cut-out pattern to
mask an area of the cake. The whole of the cake is
then covered with sprinkles and when the mask is
removed it leaves the pattern. These tiny balls are
not just for topping your cupcakes, they can be used
in a fabulous design.
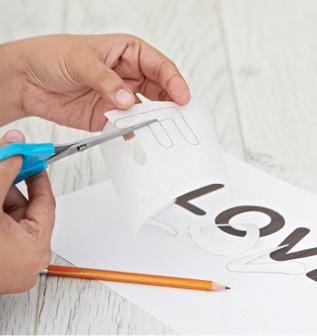
1 After covering your cake with a smooth finish, put
it in the fridge to chill and prepare your pattern.
You can either print a pattern out then copy on to
the greaseproof (wax) paper and cut or draw it
freehand (A).
458
A
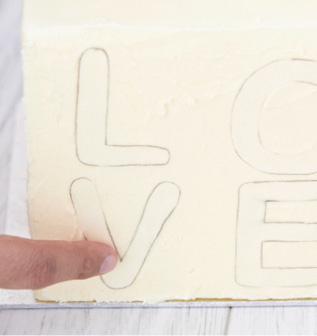
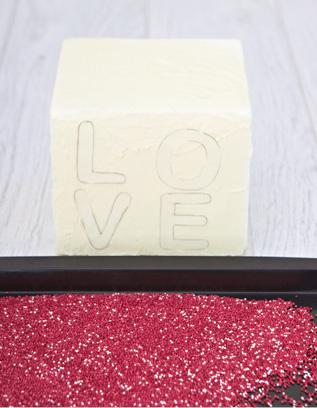
2 Remove your cake from the fridge and position
your cut-out pattern on the cake surface as a mask
(B). The pattern should stick straight onto the cake
as it is covered with buttercream, but you can apply
a very thin layer of butter or vegetable fat
(shortening) to the greaseproof paper.
459
B
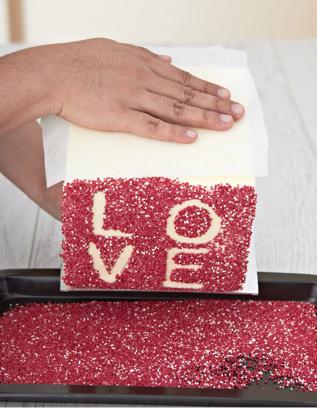
3 Prepare your sprinkles (nonpareils) by pouring a
mix of red and white onto a large shallow tray (C).
With pieces of greaseproof paper between your
hands and the cake to protect it, and if the cake is
small, lift it and place it into the tray of sprinkles with the front side down (D). Gently but firmly
press it down so that the sprinkles adhere to the
buttercream. Repeat the same process on all of the
sides of the cake.
460
C
D
461
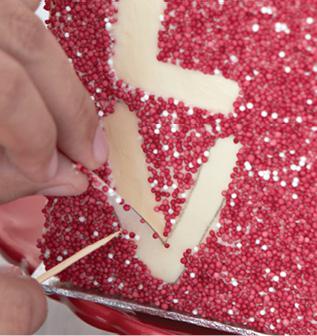
4 Remove the excess sprinkles with a cocktail stick
(toothpick) (E) then carefully remove the paper
mask.
E
Tip
If you use a small cake it is easy just to turn
and roll it in the bed of sprinkles. If your cake is
relatively big do not attempt this, just use a
spoon to scoop the sprinkles and gently press
them all around the cake.
462
463
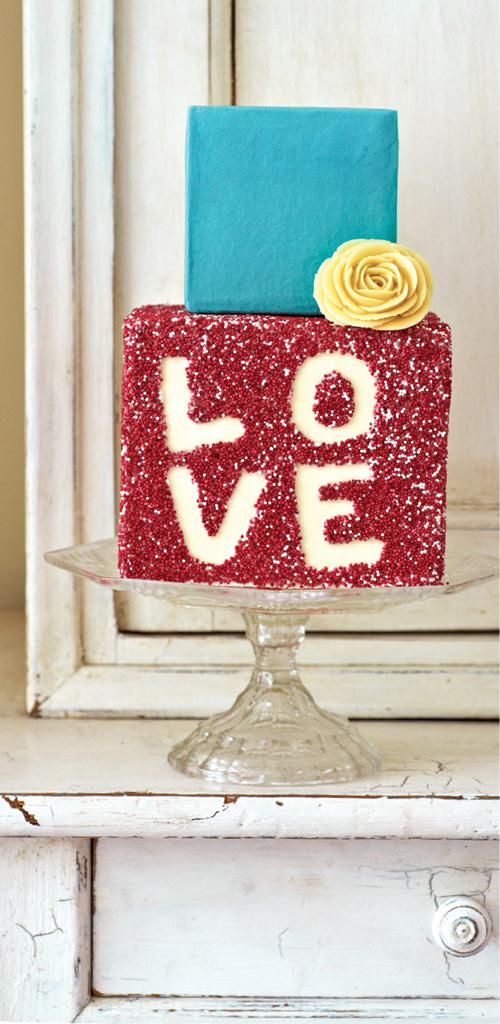
To create this cake…
• 15 × 13cm (6 × 5in) square cake (bottom tier), 10
× 10cm (4 × 4in) square cake (top tier)
• Dowel rods
• 1.3–1.6kg (3lb–3lb 8oz) buttercream
• Paste colours: sky blue (Sugarflair Baby Blue),
beige (Sugarflair Caramel)
• Greaseproof (wax) paper
• Pen
• Scissors
• Red and white sprinkles (nonpareils)
• Large shallow tray
• Piping bags
• Cocktail stick (toothpick)
• Small petal nozzle (Wilton 104)
• Cake stand or covered cake board
Crumb coat the cakes then cover the top tier with
500–600g
(1lb
2oz–1lb
5oz)
of
sky
blue
buttercream and the bottom tier with 600–700g
(1lb 5oz–1lb 9oz) of plain, giving both a smooth
464
finish (see Covering Cakes in Buttercream Basics).
Place the bottom tier cake in the fridge to chill.
Follow the tutorial to create the sprinkles
(nonpareils) pattern on the bottom tier. Dowel and
stack the cakes (see Dowelling in Buttercream
Basics) and place on a stand or covered board.
Colour 200–300g (7–101⁄2oz) buttercream beige,
pipe a rose (see Rose and Rosebud in Piping
Flowers) and position it on the top of the bottom
