Windows Server 2008 R2 Unleashed (285 page)
Read Windows Server 2008 R2 Unleashed Online
Authors: Noel Morimoto

site at http://sharepoint.microsoft.com/product/related-technologies/Pages/
windows-sharepoint-services.aspx.
2. From the Download section, choose 32- or 64-bit as appropriate to your server, and
select the appropriate language (assumption is that English will be downloaded) and
the country you are downloading to. Click Download Now.
3. Click Save, choose a local destination to save to (for example, C:\Temp), and click
Save. The file will now download, which will take several minutes or more depend-
ing upon your Internet connection speed. For this installation, the version down-
loaded was 12.0.6425.1000.
4. Click Open Folder, right-click on the application (SharePoint.exe), and choose Run
as Administrator.
5. Check the I Accept the Terms of This Agreement check box, and click Continue.
6. Then next screen allows you to choose Basic or Advanced. For the purposes of this
installation, choose the Basic button. The installation will start and includes the
Installing Windows SharePoint Services
1445
35
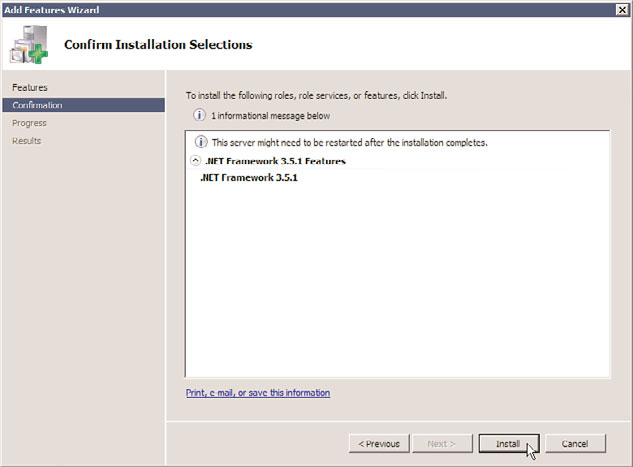
FIGURE 35.2
Add Features Wizard Confirm Installation Selections screen.
ptg
installation of SQL Server 2005 Express Edition. This will take several minutes
depending upon the speed of your server.
7. Once the installation process completes, the Microsoft Windows SharePoint Services
3.0 window will appear, and the check box next to Run the SharePoint Products and
Technologies Configuration Wizard will now be checked. Click Close.
8. The Welcome to SharePoint Products and Technologies Configuration Wizard will
open. Click Next.
9. Click Yes in the warning window that lists the services that might need to be started
or reset. The Configuration Wizard will proceed with the basic install of WSS 3.0.
This includes creating the configuration database, securing resources in the Registry,
registering SharePoint services, provisioning the Central Administration Web
Application, creating sample data, installing application content files, and finalizing
the install.
10. The Configuration Successful message should appear. Click Finish to close the wizard.
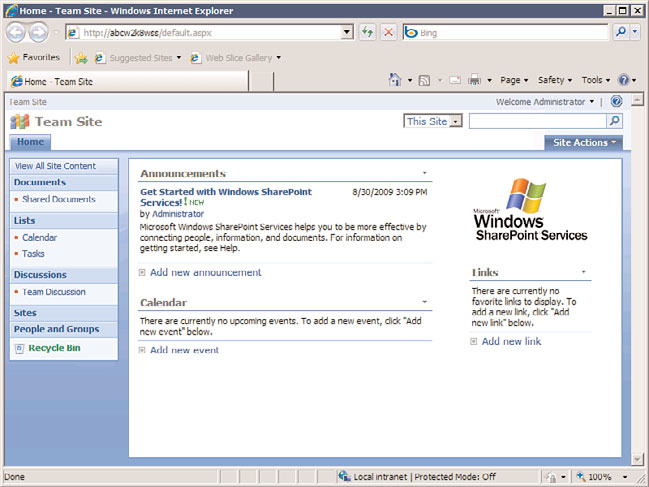
11. The default Team Site should now open, as shown in Figure 35.3, and you might
need to authenticate using the account you performed the installation with.
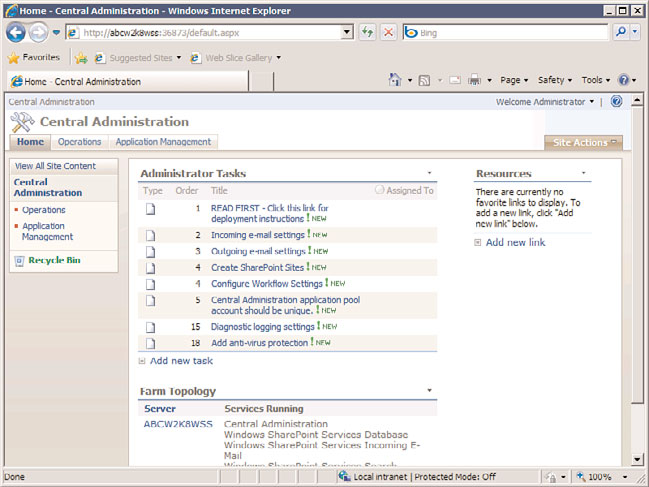
12. To ensure the installation is fully completed, click the Start button, and click the
SharePoint 3.0 Central Administration link. If this link isn’t available here, click All
Programs, Administrative Tools, SharePoint 3.0 Central Administration. The Central
Administration console should open, as shown in Figure 35.4.
1446
CHAPTER 35
Windows SharePoint Services
ptg
FIGURE 35.3
Default Team Site after new installation of WSS 3.0.
FIGURE 35.4
Default Central Administration console after new installation of WSS 3.0.
Installing Windows SharePoint Services
1447
Reviewing the Internet Information Services (IIS) Configuration
During the installation process, websites are created in IIS. A brief walk-through of these
changes is helpful to provide an overview of what websites are created following the WSS
3.0 installation. In general, it is recommended to not change the settings at this point,
assuming WSS 3.0 has just been installed for testing purposes. If WSS 3.0 was installed for
production uses, changes might be required, such as adding host headers, changing bind-
ings, or adding SSL certificates to one or more websites, but such steps are not included in
this chapter.
Follow these steps to review the IIS configuration:
1. Click the Start button, click Administrative Tools, and click on Internet Information
Services (IIS) Manager. The IIS Manager tool will open.
2. Expand the node for your server in the left pane, and expand the Sites node. You
should see the Default Web Site with a square icon next to it indicating that it is
stopped, a SharePoint – 80 site below it, and a SharePoint Central Administration
v3 below it.
3. Highlight the SharePoint – 80 site node, and clink on the Bindings link in the
35
Actions pane on the right. This should show the type of site as http and the port as
80. Click Close.
ptg
4. With this node still selected, click on the Browse :80 (http) link in the right pane
under Manage Web Site. The default Team Site should open.
5. Next, highlight the SharePoint Central Administration v3 site node and click on the
Bindings link. This will show you the http type and the random port assigned to the
Central Administration site. It is a good idea to make a note of this port in case you
are having trouble accessing the Central Administration site.
The right pane in the IIS Administration tool proves to be very useful for daily administra-
tive tasks. For example, the bindings of the website can be edited (for example, the
website can be bound to a different port, or a host header can be applied); the site can be
stopped, started, or restarted; and advanced settings can be accessed. The center pane
provides access to ASP.NET tools, IIS tools, and management tools. So, settings such as
authentication, compression, logging, and Secure Sockets Layer (SSL) can be accessed.
Additional exploration of IIS 7 is covered in more depth in Chapter 12, “Internet
Information Services.”
Reviewing Installed Software and Databases After the Installation
Now that the software is installed, many administrators want to get a better sense of what
software was actually installed, and where the WSS 3.0 databases “live.” Reviewing the
Programs and Features tool is helpful as a starting point. Installing SQL Server
Management Studio Express is a helpful step for more curious administrators as it allows
1448
CHAPTER 35
Windows SharePoint Services
the administrator to see the databases that were installed and delve more into the configu-
ration settings of the version of SQL Server that was installed.
Follow these steps to review Programs and Features:
1. Click the Start button, click Control Panel, click the Programs category, and then
click Programs and Features.
2. Microsoft Windows SharePoint Services 3.0 will show, but no reference to SQL Server
software will be provided.
3. Next click on View Installed Updates in the left pane, and Windows SharePoint
Services 3.0 SP2 (SP2) will be in the list, assuming the SP2 version was actually
installed.
The version of SQL Server that is installed with the Basic installation of WSS 3.0 is the SQL
Server 2005 Express Edition (also known as SSEE) and no management tools are provided
with it. A helpful step to take at this point is to download and install the Microsoft SQL
Server Management Studio Express tools by completing the following steps:
1. Visit the following page:
http://www.microsoft.com/downloadS/details.aspx?familyid=C243A5AE-4BD1-4E3D-
94B8-5A0F62BF7796&displaylang=en
ptg
2. Scroll down the page and select either the 32- or 64-bit version of the application as
appropriate. Click the Download button, and click Run.
3. The wizard will open. Click Next.
4. Accept the license agreement and click Next.
5. Enter your name and company information and click Next.
6. Click Next to accept the default feature selection and installation path.
7. Click Install to complete the installation.
8. Once the installation has completed, click Finish to close the wizard.
9. Click the Start button, click All Programs, and now there will be a Microsoft SQL Server
2005 entry. Click that entry and then select SQL Server Management Studio Express.
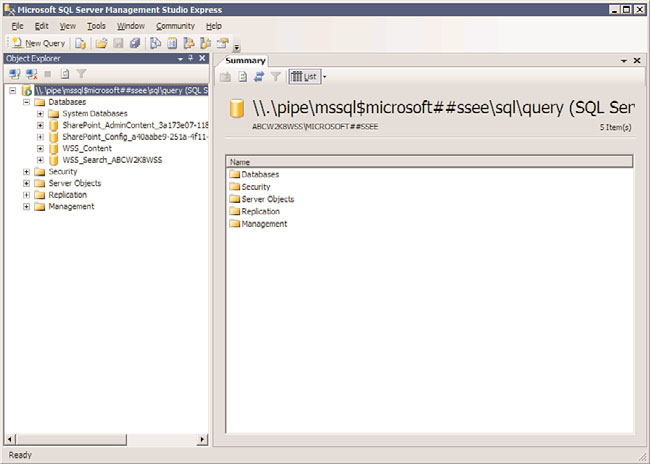
10. From the Connect to Server window, enter the following:
\\.\pipe\mssql$microsoft##ssee\sql\query and click Connect.
11. The Management Studio Express will then connect to the WSS 3.0 databases, as
shown in Figure 35.5.
12. Right-click the top-level node in the left pane and click Properties to see more infor-
mation about the installation, including the location of the root directory, which
actually contains the database files. The default root directory is C:\Windows\SYSM-
SI\SSEE\MSSQL.2005\MSSQL. Navigate to this directory and the .mdf and .ldf files
will be visible.
An experienced SQL administrator can delve more into the features of the Management
Studio Express, but less-experienced administrators should tread lightly as changes made
in the Management Studio Express tool can affect WSS 3.0 performance and can cause
failures in the installation.
Installing Windows SharePoint Services
1449
35
FIGURE 35.5
SQL Server Management Studio Express.
ptg
Using the Central Administration Console to Complete the
Installation
The Central Administration console is designed to make it easy for a SharePoint adminis-
trator to finish the configuration of the Windows SharePoint Services 3.0 environment
and to perform administrative tasks outside of the user interface provided in Windows
SharePoint Services 3.0 site collections. The tool offers a Home page, as well as two tabs—
Operations and Application Management—which provide access to tools that help config-
ure features such as services, security, logging and reporting, backup and restore, site
management, workflow management, and external connections. This section walks
through some of the basic tasks needed to finish the WSS 3.0 installation.
Configure Incoming E-Mail Settings
To enable incoming email, the SMTP service needs to be installed. Installing the SMTP