Bread Machines For Dummies (13 page)
Read Bread Machines For Dummies Online
Authors: Glenna Vance,Tom Lacalamita

The opium poppy, from which the edible seeds are taken, first grew in Asia Minor and has been widely cultivated in Turkey, Iran, India, and China. The seeds are contained in one large seedpod in the center of the flower. If the unripe seedpod is cut open, opium oozes out. The ripe seeds, however, are harmless; they contain only the poppy seed oil. They better be harmless; we use a whole quarter of a cup in the Lemon Poppy Seed quick bread (Chapter 16), and umm, is it good.
If you have ever looked at fresh rosemary, it will not surprise you to learn that rosemary is an evergreen shrub. Rosemary's leaves appear like small pine needles on long, thin branches. Their fragrance is like pine and mint together. If you are using fresh rosemary in a bread dough, be sure to use kitchen scissors and cut them fairly fine before adding. Dried rosemary retains flavor and color, so it can be substituted for fresh. One half teaspoon dried rosemary is equal to 2 teaspoons of fresh.
Saffron is produced from the dried stigmas of the crocus plant. In many countries it is the highest-priced of spices and the highest-prized. It takes about an acre of land and 75,000 flowers to yield one pound of saffron. Each flower blooms for only about one week of the year, during which the stigmas must be handpicked and dried. Saffron is marketed in whole threads or ground into powder. It is advisable to buy threads rather than powder as unscrupulous saffron dealers have been known to dilute saffron by adding the similar- looking safflower, marigold petals, turmeric, or soaking the real threads in oil to add weight. Some like to gently toast them in a metal spoon over low heat before pounding them in a mortar. Our Saffron Bread recipe (Chapter 12) uses only 1/4 teaspoon of ground saffron. It is a beautiful golden loaf, with a golden brown crust.
Sesame seeds are rich in vitamins and minerals and high in fat, thus high in calories. The good news about the fat in sesame seed oil is that it's polyunsaturated â the good kind of fat.

Sesame seeds are greatly enhanced by a preliminary roasting in a skillet pan, over gentle heat, for two to three minutes.

Because of the high oil content in sesame seeds, it is best to store them in the refrigerator â especially in the summer â to prevent rancidity.
The following sections describe some of the more common fruit and nut ingredients that can be added to bread.
Grated lemon and orange peel is also called
zest.
When grating the peels of citrus fruits, remove only the top, colored layer, as the white pith beneath is bitter. You can use a regular grater for making zest or a small handy tool called a
zester,
which will remove the peel from citrus fruits in long strips for garnishing, or fine zest for flavoring, depending on the strokes you use when zesting.
Glenna uses a paring knife to trim thin layers of peel off in small pieces. She puts the strips in a coffee mill to grind into small pieces. She freezes any extra in small plastic bags. That way, when she's making a bread like the Banana Lemon Loaf, which only calls for a teaspoon of grated lemon peel, she can just crumble off 1 teaspoon from the frozen zest. Having zest in the freezer is a time-saver and a convenience.
There are a variety of dried fruits that taste great in bread. Dried cranberries, a fairly new dried fruit, are especially delicious in bread. We use them in the Cranberry Orange quick bread (Chapter 17) and the Peanut Butter and Jelly bread (Chapter 12). However, many dried fruits (dried apricots, for example) are treated with sulfites to help them retain their bright color when they are dried. Unfortunately, these sulfites inhibit yeast activity. When you are purchasing dried fruit for use in baking bread, be sure to read the label. If at all possible, buy dried fruit that does not list sulfur dioxide as a drying agent. We use mixed dried fruit in the Fall Treasures quick bread because quick breads use baking powderânot yeastâas a leavening agent. But, if you're using dried fruit and yeast together, always check to make sure that the fruit doesn't contain sulfites.
Cherries and Citrus Fruit Peel are candied in a thick combination of sugar and corn syrup and are used in holiday breads and as garnishes for decorating them. However, because dried fruit is lower in sugar and healthier for us than the candied fruit, we have used it in our recipe for Stollen bread (Chapter 14). For you traditionalists, we do give you the option of using the candied fruit.
If you are tempted to add more dried fruit or candied fruit than is listed in the recipe, you may end up with a dense-textured bread. While yeast do like sugar and they do ferment sugar, giving off gases, and causing the bread to rise, they also have a tendency to gorge themselves if there is too much sugar and then they get sluggish and don't work very hard. (Like people, maybe?) So the old adage, a little is good, a lot is not better holds true for adding sugar to yeast breads.
The almond tree is native to western India. Today it is widely grown in the countries that border the Mediterranean Sea. The trees also thrive in California, where commercial groves produce large annual crops of sweet almond nuts.
Sweet almonds have very little fat. Some people like to toast them for salad or garnishes, but use them untoasted as an ingredient in bread. You will find almonds in the Guglehupf recipe (Chapter 14).
Exotic and nutritious nuts from Hawaii, macadamias were the only appropriate nuts to use in the Hawaiian Honey bread (Chapter 14).
The pecan tree is a type of hickory that grows naturally in the Mississippi Valley region. Pecan orchards are planted throughout the Southern states as far north as Virginia. Georgia is the leading pecan-growing state.
The English walnut tree was brought to the United States from southern Europe. It is grown commercially in California and Oregon. Today, the United States leads the world in the production of walnuts. The thin-shelled nut tastes sweet, and has much nutritive value. It contains both fats and proteins.
The black walnut tree is native to North America and is primarily valued for its wood. It does have a delicious nut, more distinctive in flavor than the English walnut. We prefer the black walnut with its rich flavor for the Black Walnut Coffeecake; you can also use the English walnut.
Dehydrating (removing the water) vegetables, intensifies both their flavor and color. They are not commonly used in bread. We do like the color that the sun-dried tomatoes add to the Mediterranean Bread (Chapter 10). Dried onions is another vegetable that we use to bring out a subtle, well-blended onion taste in the Onion Dill Bread and the Risotta Bread (also in Chapter 10).
There is a World War II story about the comforting power of bread. (Although we have heard it from different sources, we have no documentation to prove this is absolutely a true tale.) It seems many orphans were gathered up by the Allied Forces, placed in camps, and given excellent care. Yet they had a difficult time sleeping.
Then a psychologist came up with the idea of giving them a piece of bread to hold in their hands while they slept. This proved to be a great solution, as the slice of bread reassured them that they would have food to eat the next day. Feeling secure about the morrow, they were able to have a restful night's sleep.
If your sleep is fitful or you have a hard time falling asleep, try setting up your bread machine with all the ingredients in a delicious morning bread recipe like Whole Wheat Oatmeal (Chapter 11), set the delay timer to have your bread ready to come out of your machine at your wake-up time. Try it. We think you'll find it's a simple answer to a restful night's sleep.
Measuring 101
In This Chapter
![]() Differentiating between liquid and dry measuring cups
Differentiating between liquid and dry measuring cups
![]() Achieving accuracy
Achieving accuracy
![]() Measuring temperature for quality control
Measuring temperature for quality control
![]() Converting from U.S. standard measurements to metric
Converting from U.S. standard measurements to metric
G
lenna watched her son's girlfriend prepare a meatloaf in her kitchen. When she saw her take a liquid measuring cup to measure the bread crumbs, she said, “Oh, Leah, you probably want to use this cup for dry measurement.” She said, “Oh, okay if you think so.” Then she poured the bread crumbs in and tapped the cup on the countertop so as to fit more crumbs into the cup. Glenna almost said, “Don't tap dry ingredients down.” But she caught herself and thought, “I've eaten her food, it's always tasted delicious, and this is only a meatloaf. Let it go.” BUT, if she gets into bread-machine baking, someone will have to teach her all about measuring â for her own good, of course. Because, like cakes and desserts, bread machine recipes are formulas that need exact proportions of ingredients.
It seems so simple; anyone can measure. We've heard it over and over, “I measured to a T and my bread isn't turning out.” Or, “Something must be wrong with the recipes. Were they tested before you published them?” Often people will blame their bread machine, and even take it back to the store where they purchased it for an exchange. When Tom was working as a culinary consultant at Bloomingdale's, a customer was on her third bread machine exchange when she happened to see Tom demonstrating measuring techniques and expounding on the complications of inaccurate measuring. Fortunately for her, she took the time to listen to what was being said. Because she didn't realize the importance of proper measuring techniques, she had experienced either a short dumpy loaf, or a loaf that rose nice and high and then fell in the center as soon as the bread machine began to bake. She thought that the thermostat in her machine was off, but the problem was actually in her measuring skills.
You may feel quite confident about your measuring techniques, but if you have even a smidgen of doubt in this area, you will want to review this chapter. It's all about measurements, maybe even some you haven't considered making before, like measuring the temperatures of your liquids or the temperature of completely baked bread. We contrast liquid measuring cups to dry measuring cups and explain their respective uses. We describe how you can improve your accuracy when you measure ingredients and we promote the virtues of using thermometers. We even tell you how you can convert the units of measure in these recipes to the metric equivalent.
Liquid measuring cups, transparent (if glass) or at least translucent (if plastic), make the ingredients visible so that you can measure accurately. The volume measure marks on the side register fractions of a cup and corresponding fluid ounce lines. Sometimes one side of the cup will denote cups and ounces, and the opposite side will show metric measurements of milliliters and deciliters.
Liquid measuring cups (like the ones shown in Figure 7-1) have a pouring spout, extra space at the top to ensure against spilling and come in 1- to 4-cup sizes. We prefer using a 1- or 2-cup size. For measuring bread machine ingredients, you will not measure any amount larger than will fit in a 2-cup size and the larger measuring cups can be cumbersome to use.
Figure 7-1: | 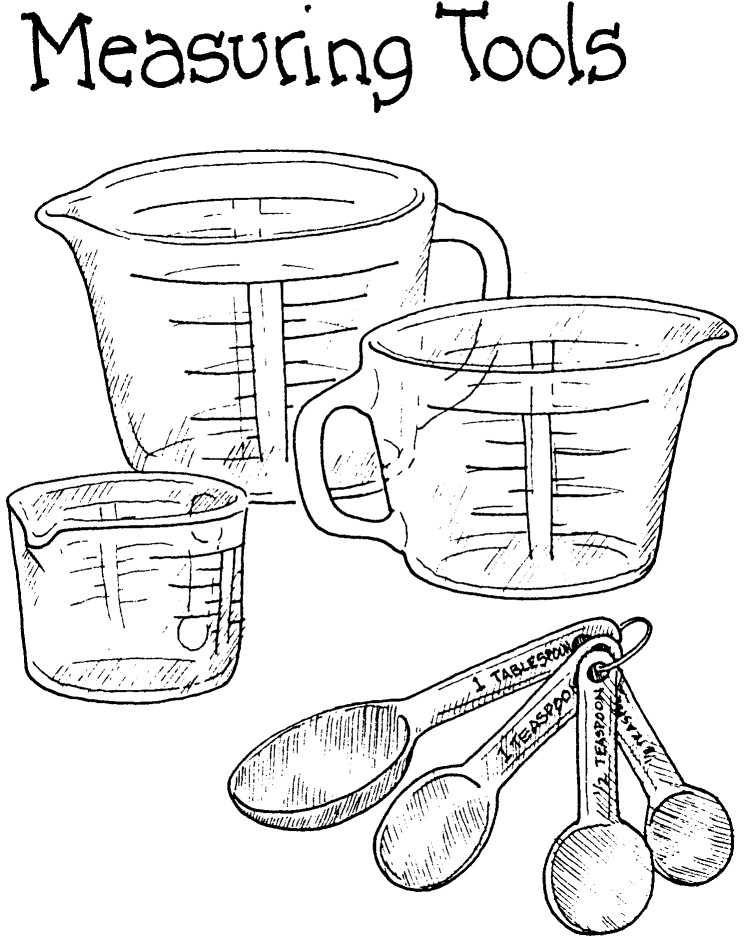 |
Unless you choose to use an eye level shelf in your cupboard, you will measure liquids on “bended knee.” At whatever level you choose, place the measuring cup on a solid, level surface. (Do not hold the cup in your hand and attempt to hold it level â it's accuracy you want, and holding the cup in your hand will cause the water to slosh around.) Bring your eye to the same level as the measurement you need. Don't try to look at the measurement line from an angle. Slowly pour the liquid into the measuring cup to the desired level of measurement.
When you empty the liquid measuring cup into the bread pan, use a rubber spatula to clean out all the liquid from the cup, especially when measuring honey, molasses, or oil.
Molasses and honey are so difficult to measure; here's a trick. Measure the oil alternately with the sticky stuff or grease your measuring cup or spoon.
If your butter doesn't come in 1/4 pound sticks with measured markings on the packaging, you can still accurately measure it. When you need to measure in teaspoons or tablespoons, let the butter soften to a point that you can press it into the measuring spoon and level with the flat edge of a knife. If, however, you want to measure 1/4 cup of butter, fill a liquid measuring cup with very cold water to the 3/4 cup level. Carefully spoon pieces of butter into the water until the water reaches the 1-cup mark. Pour off the water; the remaining butter will be exactly 1/4 cup.
This old axiom means one pint of water weighs one pound. Many other ingredients weigh about the same as water, so this conversion works for them as well. For example, one pint of butter weighs about one pound. Using the axiom gives a good guesstimate, but if you use the old saying to help you measure your dry ingredients, you will not be as accurate as you should be â especially for a bread machine. All measurements given in the recipes in this book are in volume and not weight.
Dry measuring cups come in a group with different sizes, stacked one inside the other. They have a flush rim for leveling. The standard sizes are 1/4 cup, 1/3 cup, 1/2 cup, 2/3 cup, 3/4 cup, and 1 cup.
Measuring spoons come in the standard sizes of 1/8 teaspoon, 1/4 teaspoon, 1/2 teaspoon, 1 teaspoon, and 1 tablespoon. Some sets also include 1 1/2 teaspoon and 1 tablespoon plus 1 teaspoon.
To measure flour, use a large spoon or scoop and stir the flour to add air and loosen any compression that naturally occurs during storage. Do not sift. Then, using the spoon or a scoop fill the measuring cup and level off the top with a flat edge (a dinner knife works great), as shown in Figure 7-2.
Figure 7-2: | 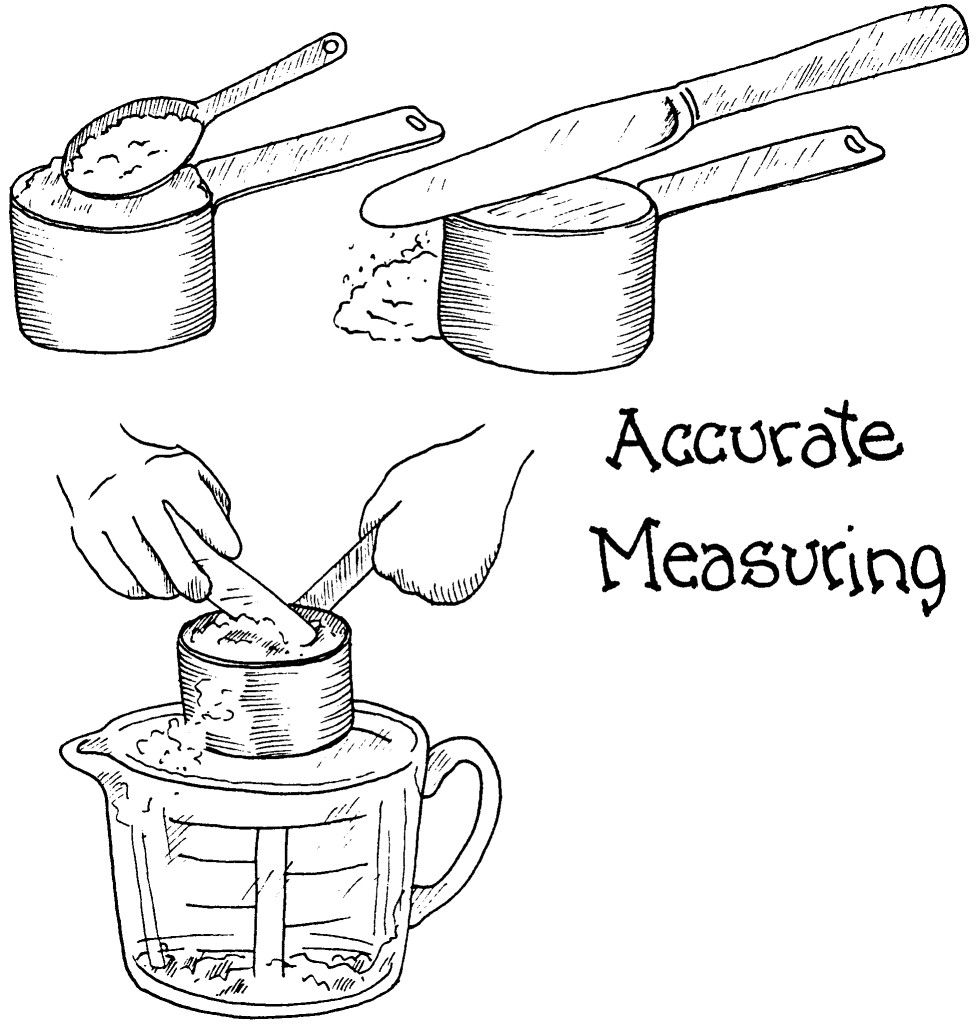 |
.jpg)
Avoid these measuring mishaps when dealing with flour:
 Never scoop the flour from the sack or canister with the measuring cup. This packs the flour and changes the measurement.
Never tap the side of the cup to shake it down so that you can get more flour into the measuring cup.
Never measure over the bread pan you are adding the ingredients to. Your hand can shake, or someone can bump you. At any rate, the chance of adding more than the correct amount is great.
Use large containers that are relatively airtight for flour, sugar, salt, and so on. Keep a set of measuring cups or spoons in each. They're inexpensive, and it saves a lot of preparation time (looking for the right size) and clean-up time (they don't have to be washed between each use).
To measure brown sugar, select the correct-size dry measuring cup or spoon and pack the sugar into it all the way to the top. Level off with a flat edge.