Everyday Play (4 page)
Authors: Christy Isbell

plastic straws (must be thick plastic) | child-safe scissors
What to Do• Show your child how to hold a straw with one hand and snip pieces from it with the scissors. Say “Pop!” as he cuts the straw.
• Encourage him to cut his straw and listen for the “pop!”
• Provide paper and glue for him to use to make unusual artwork with his pieces of straw.
• Help him stack or build “structures” with straw pieces and glue.
Helps your child practice holding scissors appropriately
What You Needcard-weight paper including magazine inserts, junk mailings, greeting cards, or index cards | child-safe scissors
What to Do• Cut greeting cards into single pieces (instead of folded), so they are easier for your child to manipulate.
• Show her the proper way to hold and cut with scissors. Give her verbal cues, such as “Thumb on top!” or “Open, close, open, close.”
• Invite her to cut the cards with scissors, and help her hold the scissors correctly, if necessary.
• Make a shaker out of scrap card pieces. Help your child cut her card into pieces of confetti. Place the confetti inside a clean, clear, dry plastic bottle. Secure the lid onto the bottle with glue.
Develops your child’s pre-scissor skills and hand strength
What You Needwooden clothespins (squeeze type) | craft sticks | glue (wood glue works best) | pizza boards or pieces of cardboard
What to Do• Help your child glue a craft stick to one stem of the squeezable end of a clothespin. The craft stick should be perpendicular to the clothespin, similar to a tail wing for an airplane. Allow to dry thoroughly.
• Give him a piece of cardboard to use as a runway and show him how to squeeze the clothespins with his fingers on the “tail wing” so that the airplane will open.
• He can take the plane in for a landing by placing clothespins around the edges of the cardboard.
• Encourage him to use markers, paint, or glitter to decorate his airplanes or design his runways.
• Hang runways vertically at his shoulder height to add a new landing challenge.
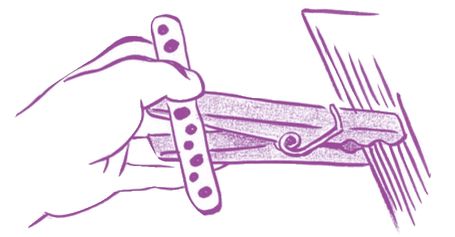

Develops your child’s eye-hand coordination and the ability to use two hands to tear paper
What You Needpieces of medium-weight paper, such as construction paper or paper bags pieces of light-weight paper, such as newspaper or magazines | glue sticks or small bowls of glue | paper (for the collage base)
What to Do• Encourage your child to use two hands to tear strips of paper to make shredded paper.
• Encourage her to glue the shredded paper onto a clean piece of paper to make a collage. She may use glue sticks or dip the strips of paper into glue.
• Talk about her creation. Is the collage flat or raised? Are the shredded pieces of paper long or short?
• Invite her to paint her shredded paper collage after the glue dries. This will add another dimension to the art.
• Sprinkle glitter on the collage while the glue is still wet.
Develops your child’s hand strength for scissor skills and his eye-hand coordination
What You Needsmall, plastic spray bottles filled with water | bath soap foam (color foam works best) | finger paint paper or wax paper | plastic shower curtain or sheet | easel or wall
What to DoNote
: This is a great outdoor activity.
: This is a great outdoor activity.
• Cover the floor with a shower curtain or sheet and clip or tape paper to an easel or the wall.
• Help your child make a target by squirting bath-soap foam in a circle (target shape) on the paper. Ask your child to squirt the target with water.
• See how many squirts it takes to wash the target away.
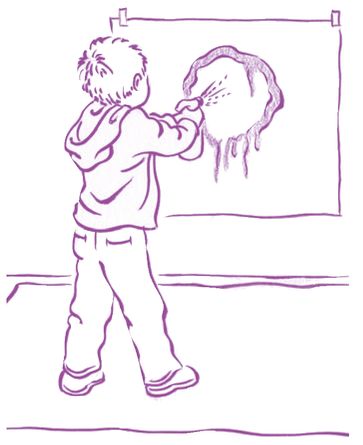
• Experiment with different sizes and distances for the target.
Helps your child practice opening and closing tools and builds hand strength and coordination
What You Needvariety of tongs (large, small, plastic, metal) | variety of tweezers (large, small, plastic, metal) | small objects, such as cotton balls, cotton swabs, pieces of sponge, crayons, small blocks, pegs, or Lego blocks | variety of containers
What to Do• Show your child how to use tongs and tweezers to pick up small objects.
• Encourage her to use the tongs and tweezers to place objects into the various containers.
• Ask her which objects are easier and which objects are more difficult to pick up with the tools. Why?
• Add playdough to the activity. Your child can roll small balls and snakes, or she can tear the playdough into pieces to pick up with tongs or tweezers.
• See how many objects she can put into a container without dropping one.
Improves your child’s bilateral coordination, helps him identify shapes, and develops his pre-writing skills
What You NeedNo materials needed
What to Do• Show your child an example of a line (for example: vertical, horizontal, or diagonal) or shape (for example: circle, square, or triangle).
• Ask him to use his body to form that line or shape.
• If he is having difficulty, demonstrate how to make the line or shape with your body.
• Talk with your child about the characteristics of the shape. For instance, a circle is round and a square has four sides.
• Encourage your child to try to make the shape again, and help him as needed.
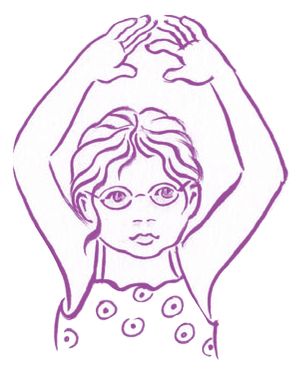
• Take photographs of your child making the Body Shapes. Hang the photos alongside a drawing of the corresponding shape so he has a model to look at later when he is trying to make the shape again.
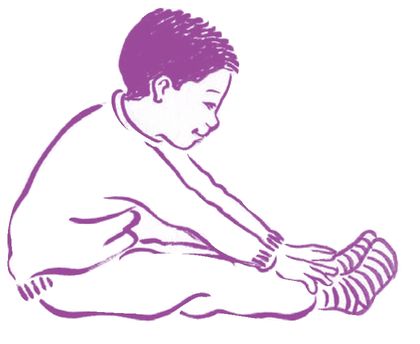
Helps your child learn how to draw shapes and develops the foundations for writing
What You Needscrap pieces of cardboard (two-ply cardboard works well) | adult scissors or knife (for adult use only) | large markers or large crayons | paper and card stock
What to Do• Cut out circles, squares, and triangles from cardboard (adult-only step).
Note:
Shapes that are 4”-6” in diameter work best for preschool-aged children. Save the outside pieces of cardboard to use as stencils.
Shapes that are 4”-6” in diameter work best for preschool-aged children. Save the outside pieces of cardboard to use as stencils.
• Show your child how to use cardboard shapes and stencils. Encourage her to use one hand to hold the stencil and the other hand to trace around the edge.
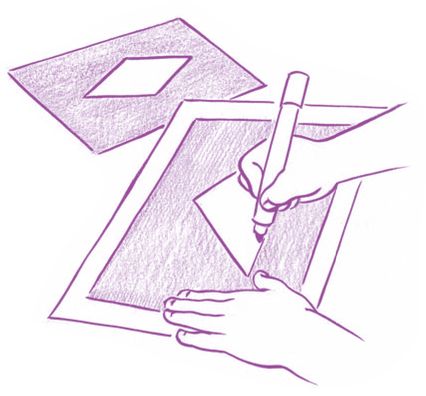
• To encourage a good grasp and wrist posture, use clips to place stencils on easels. This will give your child the experience of writing on a vertical surface.
• Invite her to use the card stock to create greeting cards and to decorate them with the stencils.
Develops your child’s finger isolation and helps him learn to make simple lines or shapes
What You Needresealable plastic freezer bags | fingerpaints
What to Do• Give your child a resealable plastic freezer bag.
• After he chooses the color that he wants, help him pour the fingerpaint into his bag.
• Help him close and seal the bag securely. Make sure the bag does not have excess air inside.
• Place the sealed bag flat on the table or floor and show your child how to use his index fingers to make lines or shapes in the paint.
• Talk about the different shapes or designs that your child makes.
• Squirt two different colors of paint into the bag. Encourage your child to use his index finger to mix the paint together.
• Explore the new colors he creates by mixing paint.
Develops your child’s foundations for writing
What You Needlarge sheet of paper | paint, markers, or electrical tape | variety of small cars and trucks
What to Do• Cut a sheet of paper large enough to cover your entire tabletop or floor space.
• Help your child draw or use electrical tape to make a racetrack, using circles and large vertical, horizontal, and diagonal lines.
Note
: Keep the pattern simple and make lines a solid color.
: Keep the pattern simple and make lines a solid color.
• Encourage your child to drive her cars and trucks on the racetrack.
• Ask her to identify the round and straight lines of the track.
Other books
Grace by Laura Marie Henion
The Yoga of Max's Discontent by Karan Bajaj
Persona Non Grata by Ruth Downie
Rage of Eagles by William W. Johnstone
Mystery of the Invisible Thief by Enid Blyton
Kríe Captivity (The Nira Chronicles Book 1) by Kora Knight
The Other Side of You by Salley Vickers
For All Their Lives by Fern Michaels
The House of Sleep by Jonathan Coe
