iOS Programming: The Big Nerd Ranch Guide, 3/e (Big Nerd Ranch Guides) (78 page)
Read iOS Programming: The Big Nerd Ranch Guide, 3/e (Big Nerd Ranch Guides) Online
Authors: Aaron Hillegass,Joe Conway
Tags: #COM051370, #Big Nerd Ranch Guides, #iPhone / iPad Programming

When the time label bounces, it should also change its opacity. Try and match the fading of the opacity with the shrinking and growing of the label.
After the
TimeViewController
’s view appears onto the screen, have the
What time is it?
button slide in from the side.
After completing the silver challenge, make it so the
What time is it?
button starts to fade in and out over and over again. This animation should only begin once the button has slid into place.
You can think of an instance of
CALayer
as having two parts: the content that gets composited onto the screen and a set of parameters that describe how it should be composited (
opacity
,
transform
,
position
, etc.). When a layer is being animated, it actually has two copies of these parameters: the model version and the presentation version. The presentation parameters are the ones that are being smoothly changed by the animation object. The model parameters are the persistent ones – the ones that will be used once the animation is over.
So, when a layer is being animated, its content is composited to the screen using the presentation parameters. When it is animation-less, the model parameters are used.
Apple calls these sets of parameters the
model layer
and the
presentation layer
.
When you ask a layer for its
position
, you are getting the position of the model layer. To get the presentation version, you ask for the
presentationLayer
first.
CGPoint whereIsItNow = [[layer presentationLayer] position];
Why is this useful? Imagine a game that has animating objects on the screen, and if the user taps one of the objects, it blows up. Only the presentation layer knows where the object currently is on the screen, which you must know in order to judge the accuracy of the user’s tap.
In this chapter, our examples have had the animated objects return to their original states after the animation is complete. Often, however, you want to animate an object to a state and then have it stay there once the animation is over. To do this, you must keep the presentation and model layers clear in your mind. Not doing so leads to two common errors:
- Your animation goes great, but at the end it snaps back to its initial position (or opacity or whatever) when you wanted it to remain where it was.
This happens because you forgot to update the model parameters to match the final state of your animation. Try using an explicit animation in
touchesBegan:withEvent:
method in
HypnosisView.m
. (Also comment out
touchesMoved:withEvent:
.)In this animation, If you build and run now and tap the screen, you will see the- (void)touchesBegan:(NSSet *)touches withEvent:(UIEvent *)event
{
UITouch *t = [touches anyObject];
CGPoint p = [t locationInView:self];
CABasicAnimation *ba = [CABasicAnimation animationWithKeyPath:@"position"];
[ba setFromValue:[NSValue valueWithCGPoint:[boxLayer position]]];
[ba setToValue:[NSValue valueWithCGPoint:p]];
[ba setDuration:3.0];
// Update the model layer
[boxLayer setPosition:p];
// Add animation that will gradually update presentation layer
[boxLayer addAnimation:ba forKey:@"foo"];
}
- (void)touchesMoved:(NSSet *)touches
withEvent:(UIEvent *)event
{
// UITouch *t = [touches anyObject];
// CGPoint p = [t locationInView:self];
// [CATransaction begin];
// [CATransaction setDisableActions:YES];
// [boxLayer setPosition:p];
// [CATransaction commit];
}
boxLayer
slowly move to wherever you touched the screen.
If you comment out the line that says
[boxLayer setPosition:p]
, you’ll see that the layer bounces back to its starting position once the animation ends. For beginners, this is a very common error.
- No animation happens. Your layer leaps directly to its final state.
When an animation begins, if there is no
fromValue
, the
fromValue
is taken from the model layer. If you update the model to the final state before starting the animation, your
fromValue
and
toValue
end up the same. Usually the fix is to give the animation an explicit
fromValue
.
UIStoryboard
In your projects so far, you’ve laid out the interfaces of your view controllers in separate XIB files and then instantiated the view controllers programmatically. In this chapter, you will use a
storyboard
instead. Storyboards are a feature of iOS that allows you to instantiate and lay out all of your view controllers in one XIB-like file. Additionally, you can wire up view controllers in the storyboard to dictate how they get presented to the user.
The purpose of a storyboard is to minimize some of the simple code a programmer has to write to create and set up view controllers and the interactions between them. To see this simplification – and its drawbacks – let’s create an application that uses a storyboard.
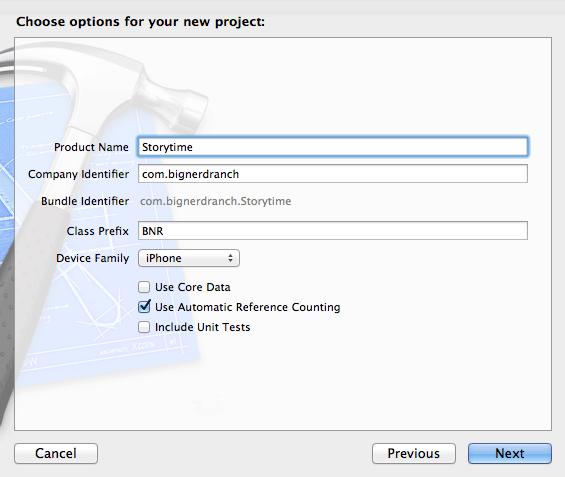
Create a new iOS
Empty Application
and name it
Storytime
(
Figure 24.1
).
Figure 24.1 Creating Storytime
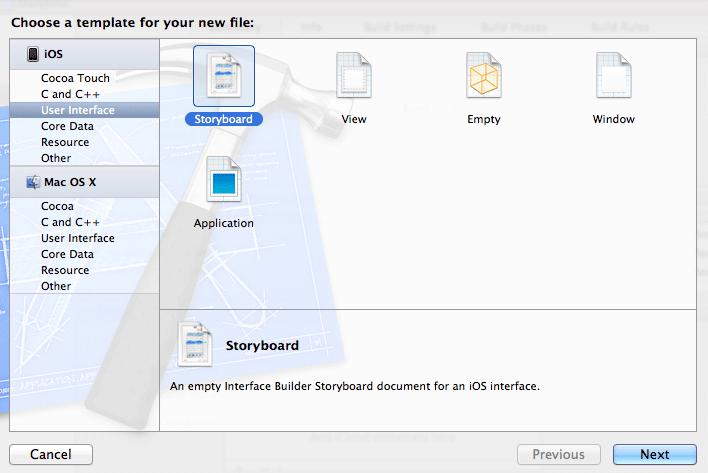
Then, select
New File...
from the
New
menu. Select
User Interface
from the
iOS
section. Then, select the
Storyboard
template and hit
Next
(
Figure 24.2
).
Figure 24.2 Creating a storyboard
On the next pane, select
iPhone
from the
Device Family
pop-up menu and click
Next
. Then, name this file
Storytime
.
This will create a new file named
Storytime.storyboard
and open it in the editor area. A storyboard is a lot like a XIB, except it allows you to lay out the relationships between view controllers in addition to laying out their interfaces. The
Storytime
application will have a total of five view controllers, including a
UINavigationController
and a
UITableViewController
.
Figure 24.3
shows an object diagram of
Storytime
.
Figure 24.3 Object diagram for Storytime
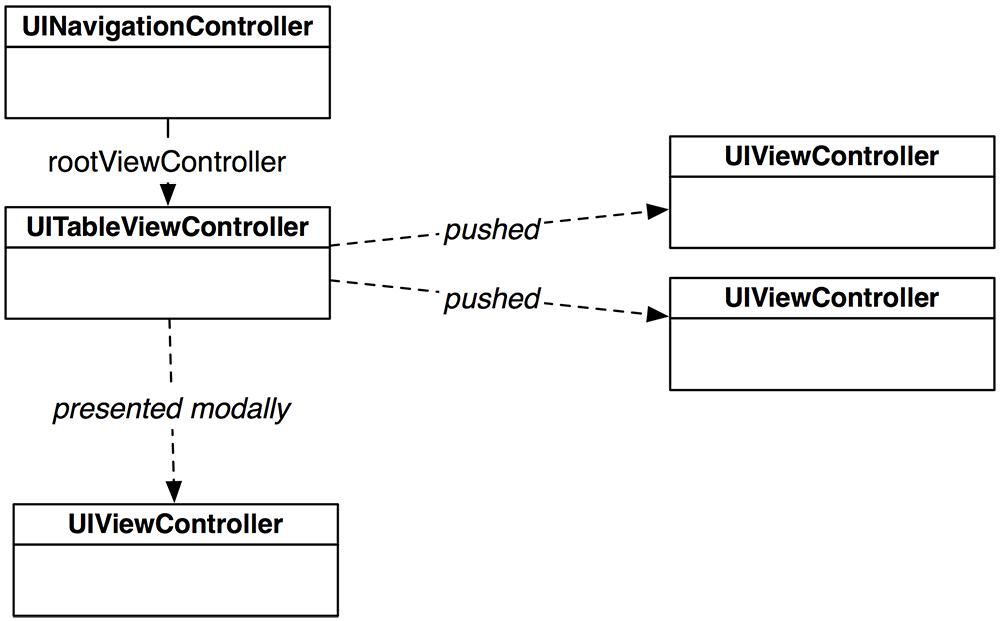
Using a storyboard, we can set up the relationships shown in
Figure 24.3
without writing any code.
To get started, open the utilities area and the
Object Library
. Drag a
Navigation Controller
onto the canvas. The canvas will now look like
Figure 24.4
.
Figure 24.4 Navigation controller in storyboard
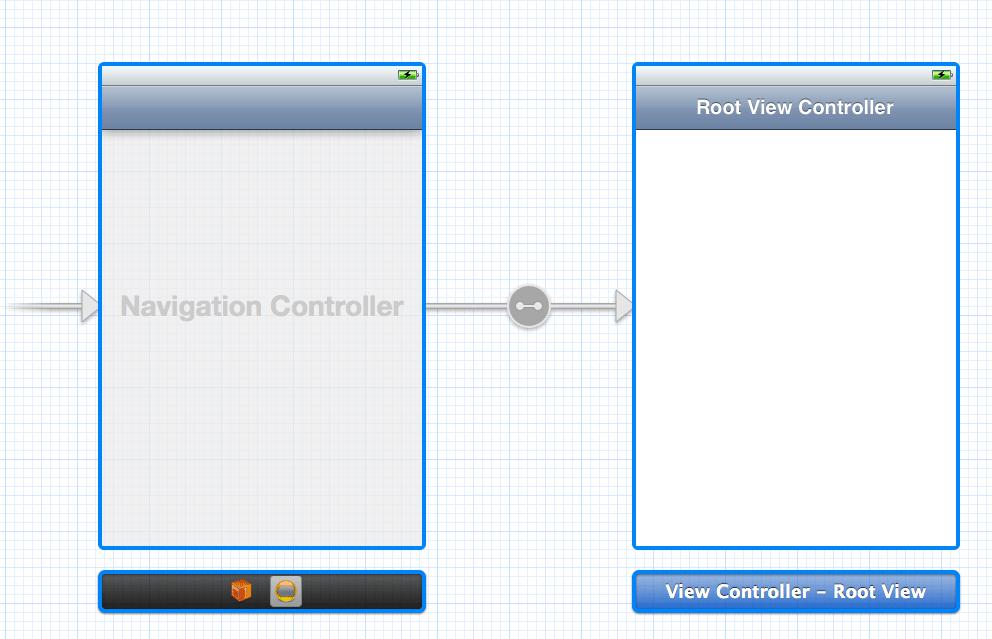
In addition to the
UINavigationController
object you asked for, the storyboard took the liberty of creating three other objects: the view of the navigation controller, a
UIViewController
, and the view of the
UIViewController
. In addition, the
UIViewController
has been made the root view controller of the navigation controller.
The two view controller instances are represented by the black bars on the canvas, and their views are shown above them. You configure the view the same as you would in a normal XIB file. To configure the view controller itself, you select the black bar.
Before we go any further, we need to tell our application about this storyboard file. Select the
Storytime
project from the project navigator. Then, select the
Storytime
target and the
Summary
tab. Locate the
Main Storyboard
field and enter
Storytime
(
Figure 24.5
). This tells
Storytime
to load the
Storytime.storyboard
file when the application launches.
Figure 24.5 Setting the main storyboard

When an application has a main storyboard file, it will automatically load that storyboard when the application launches. In addition to loading the storyboard and its view controllers, it will also create a window and set the initial view controller of the storyboard as the root view controller of the window. You can tell which view controller is the initial view controller by looking at the canvas in the storyboard file – the initial view controller has an arrow that fades in as it points to it.
Since a storyboard file supplies the window for an application, the application delegate doesn’t need to create a window. In
BNRAppDelegate.m
, remove the code from
application:didFinishLaunchingWithOptions:
that creates the window.
didFinishLaunchingWithOptions:(NSDictionary *)launchOptions
{
}
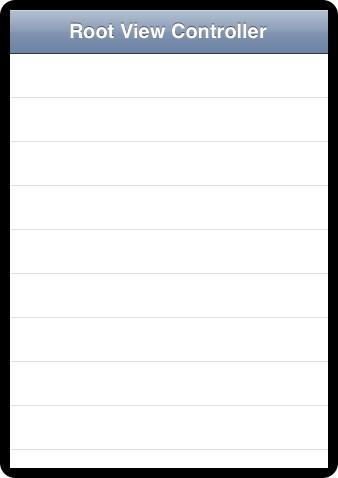
Build and run the application, and you’ll see a view of a view controller and a navigation bar that says
Root View Controller
(
Figure 24.6
). All of this came from the storyboard file – you didn’t even have to write any code.
Figure 24.6 Initial Storytime screen