Sew What! Bags: 18 Pattern-Free Projects You Can Customize to Fit Your Needs (16 page)
Read Sew What! Bags: 18 Pattern-Free Projects You Can Customize to Fit Your Needs Online
Authors: Lexie Barnes

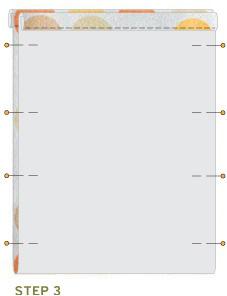
CUT YOUR FABRIC


1.
DECIDE YOUR SIZE
. Our bag will hold a standard road map, but you might want to check the size of what you plan to carry. Place your map (or whatever) on the wrong side of the fabric to measure how much you’ll need to make your bag. It’s a good idea to make the bag a little bit shorter than the map (about 2") and a bit wider for ease (
see page
15
). Then you can easily pull the map out and put it back when you’re on the go.
2.
CUT YOUR FABRIC
. Follow our measurements, or — based on your own — double the desired length of your bag and add 2" for the hemmed edges. Add 2" to the width for ease and seam allowances. Then cut a 3"-wide strap across the full width of your fabric (which is usually 45").
FOR A LONGER STRAP
Perhaps you are tall, and a 44" finished strap isn’t long enough for you. In that case, there are two sensible options: make your strap from 60"-wide fabric; or buy ¼ yard (instead of ⅛ yard) of 45" fabric for the strap, cut two strap pieces, and stitch the ends together. Then you can adjust the length to best fit your needs. (
See page
110
.)
3.
STITCH THE TOP EDGES
. Press under each top edge ½", then repeat for another ½". Pin and edgestitch. Fold the bag in half crosswise with right sides together and pin both sides.
4.
MAKE AND ATTACH THE STRAP
. Make the strap as instructed on page 42. Cut the ends at an angle and insert them between the front and back sides of the bag. The straps need to be inside the bag when you stitch, so they will be on the correct side when you turn the bag right side out. Position and pin the straps just below the folded top edges.
5.
STITCH THE SIDES
. Stitch all the way up the sides, backtacking at the ends. If your fabric is stretchy, you might want to use a narrow zigzag stitch. Otherwise, use a straight stitch and finish the raw edges as you wish (
see page
39
). Trim the seam allowances, turn the bag right side out, and press.

FABRIC IDEA
Ultrasuede is a great fabric choice for almost any bag. It’s durable, stain-resistant, and machine-washable. It’s pricey, but well worth it!

SKILL LEVEL
pro
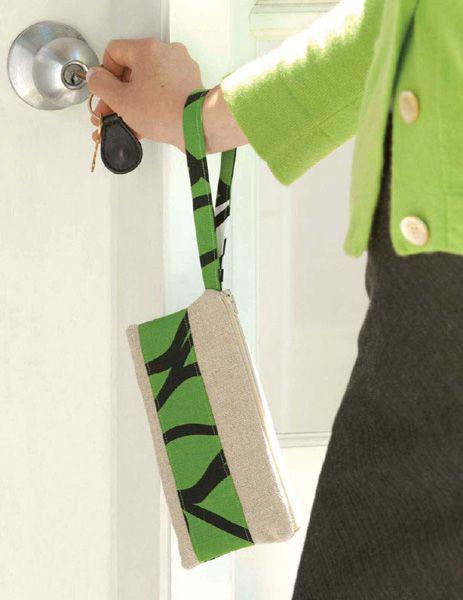
A simple, zip-top pouch can hold just about anything. Make a small one for coins, cards, or gadgets. A little bit larger, and you’ve got a lovely make-up bag. This pouch is great practice for adventurous beginners because the results are so rewarding. Plus, you can get over your fear of zippers!
OUR FINISHED SIZE:
4" × 7½", 13½" strap (optional)
WHAT YOU’LL NEED
½ yard or fabric scraps for the pouch and the lining
see page
18
)
WHAT YOU’LL DO