Happy Endings: Finishing the Edges of Your Quilt (16 page)
Read Happy Endings: Finishing the Edges of Your Quilt Online
Authors: Mimi Dietrich
Tags: #Crafts & Hobbies, #Quilts & Quilting

2.
Use a rotary cutter and a ruler to clean-cut the edges of the strip set. Crosscut the strip to make patchwork strips the width of your desired binding.
Note:
It’s best to cut scrappy binding ¼" wider than usual to allow for the thickness of all the seams around the quilt edge.
3.
Sew the strip-set segments together end to end to make enough binding to go around your quilt.
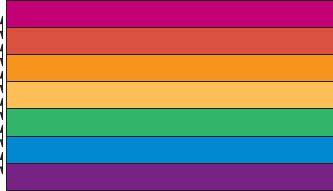
Bias Binding
Cutting the strip set on the diagonal will give your scrappy binding a spiral or candy cane effect.
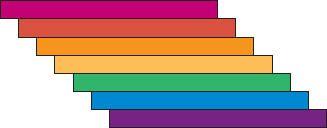
1.
Cut strips on the straight of grain and then sew them together in a stair-step fashion. Each time you add a new strip to the strip set, move the end down the width of the cut strip.
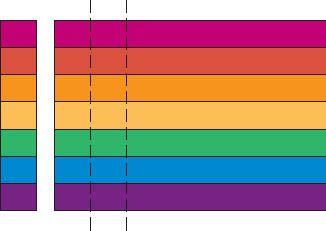
2.
Place a long rotary-cutting ruler along the diagonal stair-step edge and use a rotary cutter to cut binding strips the desired width. Be sure to align the 45° line on the ruler with one of the seam lines in the strip set so that your binding will be cut on the true bias.
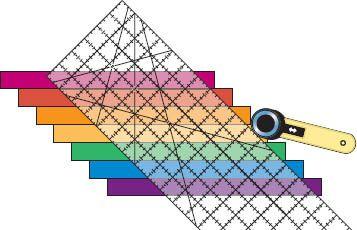
3.
Join the strip-set segments end to end to make binding long enough to go around your quilt.

Individual-Strips Method
An easy way to incorporate leftovers from your quilt top into binding is to cut individual strips from each of the fabrics you want to use. (Maybe you even have some leftover strips already cut.) Simply sew these strips together end to end, using a diagonal seam as described on
page 35
. Unlike the strip-set method, your binding will have longer lengths of each color fabric and fewer seams along the way. This type of binding requires no more effort than typical double-fold binding; you’re just substituting several colors for the typical single-color binding.

Applying Binding to a Quilt
Now that you’ve determined what type of binding you want to make, what fabric you want to use, and how to cut the strips and sew them together, you’re ready to attach the binding to your quilt. It pays to prepare the quilt edges neatly before sewing. Then you can follow the steps for applying the binding, mitering the corners, and finishing the binding.
Note:
If you plan to add a hanging sleeve to your quilt, you may want to do so before adding the binding. See “Hanging Sleeves” on
page 68
.
Preparing the Quilt for Binding
It is very important to baste the quilt edges together before attaching the binding so that the quilt top, batting, and backing can be treated as one unit. Basting stitches also stabilize the edge of the quilt to prevent stretching. It’s also important to prepare the quilt edges so that the batting will extend to the edge of the binding to fill it and give it body along the quilt edges.
M
IMI
’
S
F
AVORITE
I always machine baste around the edges of the three quilt layers before binding. It’s much easier to sew the binding to one quilt than to three separate layers.
Here’s how to baste your quilt edges:
1.
Place your quilted project on a flat surface and smooth out the top, batting, and backing. The quilt top should be face up.
2.
Pin the layers securely around the edges, placing straight pins about 3" apart through all layers.
3.
Using a walking foot or an even-feed foot (see
page 11
) and a long stitch on your sewing machine, baste ⅛" from the cut edge of the quilt top. Be careful that the layers don’t shift. (If you wish, you can baste the edges by hand.)
4.
Use a rotary cutter and a ruler to trim the batting, backing, and any excess threads even with the quilt top to create a clean edge on your quilt so that you are ready to apply the binding.
Note
: If you’re using wider binding, you may need to trim the batting ¼" or so away from the edge of the quilt so that you’ll have enough batting to fill out the folded binding.
5.
Use a 6" x 12" or 6"-square ruler to make sure that the corners are square. Trim if necessary.

Happy Ending Hint
Check the opposite sides of your quilt to make sure they are the same length. You can adjust the length of the quilt edges by tightening or loosening the basting stitches.

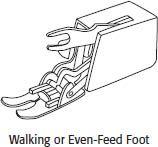
Using a Walking Foot
A walking foot, which is sometimes called an even-feed foot, is a sewing-machine attachment or built-in feature that helps feed the quilt layers under the needle at the same pace. This foot helps keep the quilt smooth and prevents the layers from shifting and puckering.
Many quilters measure the ¼" seam allowance as they sew by aligning the fabric edge with the edge of the presser foot. A walking foot is typically wider than a ¼" patchwork foot, so if you use it as a guide, your seam may be too wide. To avoid this problem, you may be able to adjust the needle position on your machine by moving the needle slightly to the right. If that’s not an option on your machine, you can place a piece of masking tape on your machine to mark the ¼" seam allowance and guide the fabric edge along the tape. Test the seam allowance on a scrap of fabric before sewing the binding to your quilt.