iOS Programming: The Big Nerd Ranch Guide, 3/e (Big Nerd Ranch Guides) (57 page)
Read iOS Programming: The Big Nerd Ranch Guide, 3/e (Big Nerd Ranch Guides) Online
Authors: Aaron Hillegass,Joe Conway
Tags: #COM051370, #Big Nerd Ranch Guides, #iPhone / iPad Programming

In
ItemsViewController
’s
tableView:cellForRowAtIndexPath:
method, you will create an instance of
HomepwnerItemCell
for every row in the table. At the top of
ItemsViewController.h
, import the header file for
HomepwnerItemCell
so that
ItemsViewController
knows about it.
In earlier implementations of
tableView:cellForRowAtIndexPath:
, you would ask the table view if it had any reusable cells first and create a brand new one if it did not. When using a XIB file to load a
UITableViewCell
subclass, the process is a little different: you register this XIB file with the
UITableView
for a given reuse identifier when the table first loads.
In
ItemsViewController.m
, override
viewDidLoad
to register
HomepwnerItemCell.xib
for the
HomepwnerItemCell
reuse identifier.
{
[super viewDidLoad];
// Load the NIB file
UINib *nib = [UINib nibWithNibName:@"HomepwnerItemCell" bundle:nil];
// Register this NIB which contains the cell
[[self tableView] registerNib:nib
forCellReuseIdentifier:@"HomepwnerItemCell"];
}
Notice that we waited until
viewDidLoad
to register the XIB. If we registered it in the designated initializer, the table view would only see this registration once. A low-memory warning, in this situation, would effectively unregister this XIB file because a new instance of
UITableView
would be created without re-registering it.
To get an instance of
HomepwnerItemCell
, all you do is ask the table view to dequeue a cell for the
HomepwnerItemCell
reuse identifier. If the table has a reusable instance of
HomepwnerItemCell
, it will return that. If it doesn’t, it will load
HomepwnerItemCell.xib
and give you an instance of the archived cell. In
ItemsViewController.m
, locate
tableView:cellForRowAtIndexPath:
and modify it like so:
cellForRowAtIndexPath:(NSIndexPath *)indexPath
{
objectAtIndex:[indexPath row]];
HomepwnerItemCell *cell = [tableView
dequeueReusableCellWithIdentifier:@"HomepwnerItemCell"];
// Configure the cell with the BNRItem
[[cell nameLabel] setText:[p itemName]];
[[cell serialNumberLabel] setText:[p serialNumber]];
[[cell valueLabel] setText:
[NSString stringWithFormat:@"$%d", [p valueInDollars]]];
return cell;
}
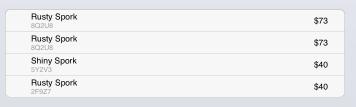
Build and run the application. Your cells should look like the cells in
Figure 15.8
.
Figure 15.8 HomepwnerItemCell in action
Let’s go back to the
UINib
class you used when loading
HomepwnerItemCell.xib
. An instance of
UINib
knows how to read a XIB file. (Remember, XIB and NIB are used interchangeably; technically, an application loads NIBs, but we work with XIBs, so it’s easier to call them that.)
An instance of
UINib
is created with the contents of a XIB file. It loads the data in that file and holds on to it as long as it lives. When it is sent the message
instantiateWithOwner:options:
, the
UINib
parses that data: all of the archived objects come alive, and all of the connections are established. (The object passed as the first argument is the
File's Owner
.)
In
Chapter 10
, you loaded a XIB file by sending the message
loadNibNamed:owner:options:
to the main
NSBundle
without ever using
UINib
. Well,
loadNibNamed:owner:options:
uses
UINib
under the hood. It creates an instance of
UINib
and sends it the message
instantiateWithOwner:options:
, relaying the options and owner arguments.
Both of these methods return an
NSArray
. This array contains all of the top-level objects in the XIB file (the ones that aren’t under a disclosure tab in the outline view of the XIB). When you register a XIB file with a table view, it scans this array for an instance of
UITableViewCell
or a subclass of it and returns it to your data source.
Since the table view just scans the XIB file for a
UITableViewCell
, it is important that you only put one instance of
UITableViewCell
in a XIB file used for this purpose. Otherwise, the table view will get confused and throw an exception.
To display an image within a cell, you could just resize the large image of the item from the image store. However, doing so would incur a performance penalty because a large number of bytes would need to be read, filtered, and resized to fit within the cell. A better idea is to create and use a thumbnail of the image instead.
To create a thumbnail of a
BNRItem
image, you are going to draw a scaled-down version of the full image to an offscreen context and keep a pointer to that new image inside a
BNRItem
instance. You also need a place to store this thumbnail image so that it can be reloaded when the application launches again.
In
Chapter 12
, we put the full-sized images in the
BNRImageStore
so that they can be flushed if necessary. However, the thumbnail images will be small enough that we can archive them with the other
BNRItem
instance variables.
Big problem, though: the thumbnail will be an instance of
UIImage
.
UIImage
doesn’t conform to the
NSCoding
protocol, so you can’t encode the thumbnail directly in an
NSCoder
. What you can do is encode the thumbnail as data (PNG format) and wrap it in an
NSData
object, which does conform to
NSCoding
.
Open
BNRItem.h
. Declare two new properties: a
UIImage
and an
NSData
. You will also want a method to turn a full-sized image into a thumbnail.
@property (nonatomic, strong) UIImage *thumbnail;
@property (nonatomic, strong) NSData *thumbnailData;
- (void)setThumbnailDataFromImage:(UIImage *)image;
@end
Synthesize these properties in
BNRItem.m
. You will eventually override the default setter and getter methods for these properties, but synthesizing automatically generates the two instances variables you need.
@synthesize thumbnail, thumbnailData;
When an image is chosen for this
BNRItem
, you will give that image to the
BNRItem
. It will chop it down to a much smaller size and then keep that smaller-sized image as its
thumbnail
. It will also create an
NSData
object that is the PNG representation of that image and set it as its
thumbnailData
. The
thumbnailData
will be archived with the
BNRItem
, and every time it is loaded from an archive, it will recreate its
thumbnail
from this data.
In
BNRItem.m
, create a getter method for
thumbnail
that will create it from the data if necessary:
{
// If there is no thumbnailData, then I have no thumbnail to return
if (!thumbnailData) {
return nil;
}
// If I have not yet created my thumbnail image from my data, do so now
if (!thumbnail) {
// Create the image from the data
thumbnail = [UIImage imageWithData:thumbnailData];
}
return thumbnail;
}
Now let’s turn to the
setThumbnailDataFromImage:
method. This method will take a full-sized image, create a smaller representation of it in an offscreen context object, and set the
thumbnail
pointer to the image produced by the offscreen context.
iOS provides a convenient suite of functions to create offscreen contexts and produce images from them. To create an offscreen image context, you use the function
UIGraphicsBeginImageContextWithOptions
. This function accepts a
CGSize
structure that specifies the width and height of the image context, a scaling factor, and whether the image should be opaque. When this function is called, a new
CGContextRef
is created and becomes the current context.
To draw to a
CGContextRef
, you use Core Graphics, just as though you were implementing a
drawRect:
method for a
UIView
subclass. To get a
UIImage
from the context after it has been drawn, you call the function
UIGraphicsGetImageFromCurrentImageContext
.
Once you have produced an image from an image context, you must clean up the context with the function
UIGraphicsEndImageContext
.
In
BNRItem.m
, implement the following methods to create a thumbnail using an offscreen context.
{
CGSize origImageSize = [image size];
// The rectangle of the thumbnail
CGRect newRect = CGRectMake(0, 0, 40, 40);
// Figure out a scaling ratio to make sure we maintain the same aspect ratio
float ratio = MAX(newRect.size.width / origImageSize.width,
newRect.size.height / origImageSize.height);
// Create a transparent bitmap context with a scaling factor
// equal to that of the screen
UIGraphicsBeginImageContextWithOptions(newRect.size, NO, 0.0);
// Create a path that is a rounded rectangle
UIBezierPath *path = [UIBezierPath bezierPathWithRoundedRect:newRect
cornerRadius:5.0];
// Make all subsequent drawing clip to this rounded rectangle
[path addClip];
// Center the image in the thumbnail rectangle
CGRect projectRect;
projectRect.size.width = ratio * origImageSize.width;
projectRect.size.height = ratio * origImageSize.height;
projectRect.origin.x = (newRect.size.width - projectRect.size.width) / 2.0;
projectRect.origin.y = (newRect.size.height - projectRect.size.height) / 2.0;
// Draw the image on it
[image drawInRect:projectRect];
// Get the image from the image context, keep it as our thumbnail
UIImage *smallImage = UIGraphicsGetImageFromCurrentImageContext();
[self setThumbnail:smallImage];
// Get the PNG representation of the image and set it as our archivable data
NSData *data = UIImagePNGRepresentation(smallImage);
[self setThumbnailData:data];
// Cleanup image context resources, we're done
UIGraphicsEndImageContext();
}
In
DetailViewController.m
, add the following line of code to
imagePickerController:didFinishPickingMediaWithInfo:
to create a thumbnail when the camera takes the original image.
didFinishPickingMediaWithInfo:(NSDictionary *)info
{
NSString *oldKey = [item imageKey];
if (oldKey) {
[[BNRImageStore sharedStore] deleteImageForKey:oldKey];
}
UIImage *image = [info objectForKey:UIImagePickerControllerOriginalImage];
[item setThumbnailDataFromImage:image];
Now that
BNRItem
s have a thumbnail, you can use this thumbnail in
ItemsViewController
’s table view. In
ItemsViewController.m
, update
tableView:cellForRowAtIndexPath:
.
[NSString stringWithFormat:@"$%d", [p valueInDollars]]];
[[cell thumbnailView] setImage:[p thumbnail]];
return cell;
}
Now build and run the application. Take a picture for a
BNRItem
instance and return to the table view. That row will display a thumbnail image along with the name and value of the
BNRItem
. (Note that you will have to retake pictures for existing
BNRItem
s.)
Don’t forget to add the thumbnail data to your archive! Open
BNRItem.m
:
{
self = [super init];
if (self) {
[self setItemName:[aDecoder decodeObjectForKey:@"itemName"]];
[self setSerialNumber:[aDecoder decodeObjectForKey:@"serialNumber"]];
[self setImageKey:[aDecoder decodeObjectForKey:@"imageKey"]];
[self setValueInDollars:[aDecoder decodeIntForKey:@"valueInDollars"]];
dateCreated = [aDecoder decodeObjectForKey:@"dateCreated"];
thumbnailData = [aDecoder decodeObjectForKey:@"thumbnailData"];
}
return self;
}
- (void)encodeWithCoder:(NSCoder *)aCoder
{
[aCoder encodeObject:itemName forKey:@"itemName"];
[aCoder encodeObject:serialNumber forKey:@"serialNumber"];
[aCoder encodeObject:dateCreated forKey:@"dateCreated"];
[aCoder encodeObject:imageKey forKey:@"imageKey"];
[aCoder encodeInt:valueInDollars forKey:@"valueInDollars"];
[aCoder encodeObject:thumbnailData forKey:@"thumbnailData"];
}
Build and run the application. Take some photos of items and then exit and relaunch the application. The thumbnails will now appear for saved item objects.