Read iOS Programming: The Big Nerd Ranch Guide, 3/e (Big Nerd Ranch Guides) Online
Authors: Aaron Hillegass,Joe Conway
Tags: #COM051370, #Big Nerd Ranch Guides, #iPhone / iPad Programming
iOS Programming: The Big Nerd Ranch Guide, 3/e (Big Nerd Ranch Guides) (55 page)

Another application you wrote could benefit from archiving:
Whereami
. In
Whereami
, archive the
MapPoint
objects so that they can be reused. (Hint: You cannot archive structures. However, you can break up structures into their primitive types....)
Let’s write some quick code to get a better understanding of the different application state transitions.
You already know about
self
, an implicit variable that points to the instance that is executing the current method. There is another implicit variable called
_cmd
, which is the selector for the current method. You can get the
NSString
representation of a selector with the function
NSStringFromSelector
.
In
HomepwnerAppDelegate.m
, implement the application state transition delegate methods so that they print out the name of the method. You’ll need to add four more methods. (Check to make sure the template hasn’t already created these methods before writing brand new ones.)
{
NSLog(@"%@", NSStringFromSelector(_cmd));
}
- (void)applicationWillEnterForeground:(UIApplication *)application
{
NSLog(@"%@", NSStringFromSelector(_cmd));
}
- (void)applicationDidBecomeActive:(UIApplication *)application
{
NSLog(@"%@", NSStringFromSelector(_cmd));
}
- (void)applicationWillTerminate:(UIApplication *)application
{
NSLog(@"%@", NSStringFromSelector(_cmd));
}
Now, add the following
NSLog
statements to the top of
application:didFinishLaunchingWithOptions:
and
applicationDidEnterBackground:
.
didFinishLaunchingWithOptions:(NSDictionary *)launchOptions
{
NSLog(@"%@", NSStringFromSelector(_cmd));
...
}
- (void)applicationDidEnterBackground:(UIApplication *)application
{
NSLog(@"%@", NSStringFromSelector(_cmd));
[[BNRItemStore sharedStore] saveChanges];
}
Build and run the application. You will see that the application gets sent
application:didFinishLaunchingWithOptions:
and then
applicationDidBecomeActive:
. Play around some to see what actions cause what transitions.
Click the Home button, and the console will report that the application briefly inactivated and then went to the background state. Relaunch the application by tapping its icon on the Home screen or in the dock. The console will report that the application entered the foreground and then became active.
Click the Home button to exit the application again. Then, Double-click the Home button to launch the dock and then touch and hold the
Homepwner
icon until it begins to jiggle. Tap the red terminate button in the icon’s upper left corner. Note that no message is sent to your application delegate at this point – it is simply terminated.
In addition to archiving and
NSData
’s binary read and write methods, there are a few more methods for transferring data to and from the filesystem. One of them, Core Data, is coming up in
Chapter 16
. A couple of others are worth mentioning here.
You have access to the standard file I/O functions from the C library. These functions look like this:
char *buffer = malloc(someSize);
fread(buffer, byteCount, 1, inFile);
FILE *outFile = fopen("binaryfile", "w");
fwrite(buffer, byteCount, 1, outFile);
However, you won’t see these functions used much because there are more convenient ways of reading and writing binary and text data. Using
NSData
works well for binary data. For text data,
NSString
has two instance methods
writeToFile:atomically:encoding:error:
and
initWithContentsOfFile:
. They are used as follows:
NSError *err;
NSString *someString = @"Text Data";
BOOL success = [someString writeToFile:@"/some/path/file"
atomically:YES
encoding:NSUTF8StringEncoding
error:&err];
if (!success) {
NSLog(@"Error writing file: %@", [err localizedDescription]);
}
NSString *x = [[NSString alloc] initWithContentsOfFile:@"/some/path/file"
encoding:NSUTF8StringEncoding
error:&err];
if (!x) {
NSLog(@"Error reading file: %@", [err localizedDescription]);
}
What’s that
NSError
object? Some methods might fail for a variety of reasons. For example, writing to the filesystem might fail because the path is invalid or the user doesn’t have permission to write to the specified path. An
NSError
object contains the reason for a failure. You can send the message
localizedDescription
to an instance of
NSError
for a human-readable description of the error. This is something you can show to the user or print to a debug console.
Error objects also have
code
and
domain
properties. The code is an integer representing the error. The domain represents the error domain. For example, not having permission to write to a directory results in error code 513 in error domain
NSCocoaErrorDomain
. Each domain has its own set of error codes, and codes within different domains can have the same integer value, so an error is uniquely specified by its code and error domain. You can check out the error codes for the
NSCocoaErrorDomain
in the file
Foundation/FoundationErrors.h
.
The syntax for getting back an
NSError
instance is a little strange. An error object is only created if an error occurred; otherwise, there is no need for the object. When a method can return an error through one of its arguments, you create a local variable that is a pointer to an
NSError
object. Notice that you don’t instantiate the error object – that is the job of the method you are calling. Instead, you pass the
address
of your pointer variable (
&err
) to the method that might generate an error. If an error occurs in the implementation of that method, an
NSError
instance is created, and your pointer is set to point at that new object. If you don’t care about the error object, you can always pass
nil
.
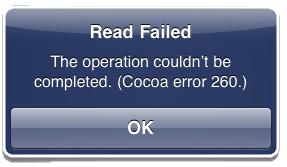
Sometimes you want to show the error to the user. This is typically done with an
UIAlertView
:
encoding:NSUTF8StringEncoding
error:&err];
if (!x) {
UIAlertView *a = [[UIAlertView alloc] initWithTitle:@"Read Failed"
message:[err localizedDescription]
delegate:nil
cancelButtonTitle:@"OK"
otherButtonTitles:nil];
[a show];
}
Figure 14.7 UIAlertView
Like
NSString
, the classes
NSDictionary
and
NSArray
have
writeToFile:
and
initWithContentsOfFile:
methods. To write collection objects to the filesystem with these methods, the collection objects must contain only
property list serializable
objects. The only objects that are
property list serializable
are
NSString
,
NSNumber
,
NSDate
,
NSData
,
NSArray
, and
NSDictionary
. When an
NSArray
or
NSDictionary
is written to the filesystem with these methods, an
XML property list
is created. An XML property list is a collection of tagged values:
"http://www.apple.com/DTDs/PropertyList-1.0.dtd">
XML property lists are a convenient way to store data because they can be read on nearly any system. Many web service applications use property lists as input and output. The code for writing and reading a property list looks like this:
[d setObject:@"A string" forKey:@"String"];
[d writeToFile:@"/some/pat/file" atomically:YES];
NSMutableDictionary *anotherD = [[NSMutableDictionary alloc]
initWithContentsOfFile:@"/some/path/file"];
When you build an iOS application project in
Xcode
, you create an
application bundle
. The application bundle contains the application executable and any resources you have bundled with your application. Resources are things like XIB files, images, audio files – any files that will be used at runtime. When you add a resource file to a project,
Xcode
is smart enough to realize that it should be bundled with your application and categorizes it accordingly.
How can you tell which files are being bundled with your application? Select the
Homepwner
project from the project navigator. Check out the
Build Phases
pane in the
Homepwner
target. Everything under
Copy Bundle Resources
will be added to the application bundle when it is built.
Each item in the
Homepwner
target group is one of the phases that occurs when you build a project. The
Copy Bundle Resources
phase is where all of the resources in your project get copied into the application bundle.
You can check out what an application bundle looks like on the filesystem after you install an application on the simulator. Navigate to
~/Library/Application Support/iPhone Simulator/(version number)/Applications
. The directories within this directory are the application sandboxes for applications installed on your computer’s iOS simulator. Opening one of these directories will show you what you expect in an application sandbox: an application bundle and the
Documents
,
tmp
, and
Library
directories. Right or Command-click the application bundle and choose
Show Package Contents
from the contextual menu.
Figure 14.8 Viewing an application bundle

A
Finder
window will appear showing you the contents of the application bundle. When a user downloads your application from the App Store, these files are copied to their device.
Figure 14.9 The application bundle

You can load files from the application’s bundle at runtime. To get the full path for files in the application bundle, you need to get a pointer to the application bundle and then ask it for the path of a resource.
NSBundle *applicationBundle = [NSBundle mainBundle];
// Ask for the path to a resource named myImage.png in the bundle
NSString *path = [applicationBundle pathForResource:@"myImage"
ofType:@"png"];
If you ask for the path to a file that is not in the application’s bundle, this method will return
nil
. If the file does exist, then the full path is returned, and you can use this path to load the file with the appropriate class.
Also, files within the application bundle are read-only. You cannot modify them nor can you dynamically add files to the application bundle at runtime. Files in the application bundle are typically things like button images, interface sound effects, or the initial state of a database you ship with your application. You will use this method in later chapters to load these types of resources at runtime.
