Joy of Home Wine Making (7 page)
Read Joy of Home Wine Making Online
Authors: Terry A. Garey
Tags: #Cooking, #Wine & Spirits, #Beverages, #General

We tried it anyway; it was wonderful. That’s how I learned that vegetable wines take longer to age. But once again, it tasted nothing like carrots!
Before you get into both blending and the more advanced reci
pes, you must learn the basic flavor notes of the single fruit and vegetable and herb wines. This takes a few years, but so what? Time is on your side. So is experimentation. You can skip back and forth between this section and the next if you like, but it’s best to make several wines from the middle section first.
Over the years I’ve come up with some wonderful surprises and some dismal failures. Watermelon was a wonderful surprise. Tangerine and brown sugar was a dismal failure.
Tastes differ. Someone else might have thought the tangerine juice wine was great.
I love the taste of sherry. My partner hates it. Anytime I end up with a sherrylike wine, I know he won’t really like it, but I will. We both love the lushness of raspberry and blueberry, but I dislike what I think of as stringy, insipid whites, and he thinks they are great.
Neither of us liked the first five-gallon batch of what we termed Pink Plonk. It was too sweet. It was too thin. It was too pink. Luckily, we had some friends who adored it. David, it turns out, likes cold duck. To him, Pink Plonk was cold duck without the bubbles. To me, the bubbles are what make cold duck marginally bearable. I still respect David as a human being, but I’ll never understand his taste in wine.
I suggest you make mostly one-gallon batches of a lot of different wines for the next couple of years, trying different fruits, vegetables, and herbs. The recipes given here are merely guidelines. Except for how you deal with the acid, most fruit wines are made the same way. Most vegetable and herb wines are made the same way. After you get the hang of it, you can range far and wide.
It’s common for home winemakers to make only one or two kinds of wine, get used to the taste, and in the process have their taste go down the drain.
“Oh yes, there goes Chauncy, the one who makes battery acid out of all those luscious yum yum berries every year. Sad case.”
You need to keep your taste buds awake and moving. OK, make LOTS of the raspberry, or apple, or rhubarb, but make other wines as well.
Taste commercial wines; you can learn a lot from the commercial wineries. I would have never tried pineapple wine if I hadn’t found some from Maui in a wine store. Zinfandel is always in the back of my mind when I make blackberry or blueberry. I’m not
trying to duplicate it, I’m just keeping a few of the flavor notes in mind.
Try to start a different wine each month. Make a heavy wine one month, and a lighter, drier wine the next. Keep track of your recipes. Your cellar will be much more interesting, and so will your tastes. Don’t toss “mistakes.” Keep them awhile to see if anything interesting happens.
When you bottle, try to bottle several gallons at once. For one thing, it’s more efficient. For another thing, you learn what the wines taste like in comparison with each other as you bottle them. Write down your impressions. Just a few words in your wine log. “Stunk like old rotting leather,” “Made me dream of a balmy summer night,” “Didn’t die, but wanted to,” are more useful than “Pretty good,” “OK,” and “Could be worse,” but any notes are better than nothing.
Invariably, there will be not quite enough for the rest of the bottle, and you will make your first steps in blending when you fill it up with the leftover Ring Tailed Wotsit. Don’t label it something cute like Mystery Wine, either. For all you know, dandelion-raspberry-mint might be pretty good. You might want to know later what it was, unlikely as it seems now.
I bottled my first batch of potato and my first batch of mint at the same time. There wasn’t quite enough potato for the fifth bottle, but there was leftover mint. With great hilarity, I topped up the fifth bottle with mint. We laughed gaily at the madness of the moment. We also labeled it.
Six months later an old friend was visiting. Proudly, I showed her my cellar. What would you like to try? I asked magnanimously.
To my chagrin she wanted to try the potato-mint. It was quite nice. You could have knocked me over with a mint sprig.
Common Causes of Failure (And Guidelines for Success):
- Using the wrong yeast. Use only fresh wine yeasts. Never use bread or beer yeast.
- Sloppy cleanliness and sanitation. Keep it clean, and keep it sanitary. It’s easy.
- Old methods and recipes. It’s OK to get ideas from old recipes, but don’t copy the methods, or even the proportions! People were doing the best they could back then, but things have changed for the better in home winemaking. Don’t use Great Uncle Jake’s Elderberry Whoopee recipe with the beer yeast and the molasses scrapings set out in the sun in an open crock for umpteen days and expect it will come out OK.
- Use only the best fruits and vegetables. A moldy berry isn’t going to taste any better in the bottle than it did before.
- Keep the secondary fermenter topped up. More on this later, but space for oxygen is space for oxidation.
- Keep the wine off the sediment. Rack at least once or twice during secondary fermentation—more, if you need to.
- Keep records! You’ll be glad later!
- Give the wine a chance. Time is our friend, remember? Don’t dump a batch unless it really has turned to vinegar, or you are now certain you hate it. Be patient!

FOLLOWING RECIPES
Follow the recipe through for at least the first time you use it.
Read the recipe all the way through before you try it. Mostly, the instructions are pretty much the same, but on some, there are variations. You don’t want any surprises halfway through. Make sure you understand what the recipe says.
Assemble all the ingredients and equipment before you start.
Make sure everything is clean and sanitized.
Follow measurements. Don’t guess.
Do the best you can, and don’t worry. This is supposed to be fun, remember?
EQUIPMENT AND ITS CARE
P
RIMARY
F
ERMENTER
You need a large container to hold both the liquid and the solids and all the froth the fermentation kicks up. You need to be able
to stir the
must
, which is the water, sugar, and fruit before fermentation has set in, and to make additions to it. You also need to be able to keep it away from the open air.

People used to use stoneware crocks as primary fermenters. Sometimes they even put a piece of cheesecloth across the top to keep the flies out. The wine turned out well often enough to make it worthwhile doing again.
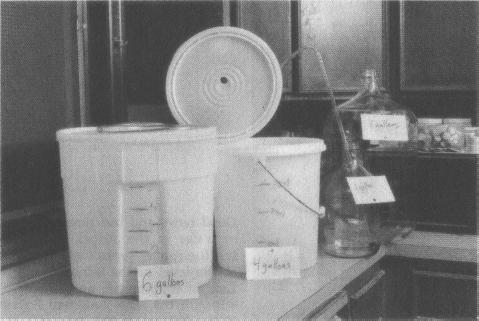
These days home winemakers mostly use six- or seven-gallon food-grade plastic bins as primary fermenters. They are easy to keep clean. They don’t weigh much. They come with lids with a handy hole the size of a small rubber bung (a bung is like a plug) so you can fit them with an air lock. You can use them for the primary fermentation of one to five gallons of wine. The wine will always be fine as long as you practice good sanitation.
An alternative that’s good for smaller batches of wine and that doesn’t take up so much room is a smaller food-grade polyethylene bin or a glass jar. You need more room than one gallon, even for one-gallon batches, because the fruit takes up more room, and some wines make a lot of foam. So an ice cream tub won’t work. You might have a friend in food service who can provide you with a small bin with a tight-fitting lid in which you can cut a hole for the bung and air lock. Bakeries and delis also have these bins and like to get rid of them.
Always make sure it’s food-grade plastic and didn’t contain vinegar or pickles. Don’t use plastic bins from construction sites, or plastic wastebaskets.
Metal is out. In one of my favorite old out-of-print winemaking books,
How to Make Wine in Your Own Kitchen
(McFadden Books, New York; (1963), Mettja C. Roate advocated using un-chipped galvanized canners as the primary fermenter.
Don’t
. Food-grade plastic wasn’t as easy to find in those days, and she was doing the best she could. Don’t use anything but glass or food-grade plastic, or maybe a new crock.
I’m lucky to have some two-gallon clear glass jars that a friend gave me. She works in a lab, where they were unused surplus. Great for small batches of wine. I believe they were going to be used for pickling pathologic specimens!
If you happen to have a nice new stoneware crock (one that has never stored vinegar, and that is free of cracks or chips) that you know has a lead-free glaze, use it if you want to. Keeping it
airtight will be a bit more difficult, since crocks don’t come with airtight lids. You could use a sheet of food-grade plastic tied down with a giant rubber band (try making one out of a cross section of an old inner tube) as the lid. You will still have to sanitize the thing, don’t forget. And it’s heavy!

A NOTE ON CLEANING: To sanitize the primary fermenter, proceed as you would for bottling or the gallon jug, although chemical means must be used. You can’t boil anything this big. Rinsing it out with boiling water alone IS NOT GOOD ENOUGH. You might get away with it once or twice, but eventually, time and Mother Nature will punish you. Either soak it in the mild bleach solution for twenty minutes (including the lid), or swish it out carefully with Campden solution. You can use sulphite crystals if you like, but you must measure them accurately; for a sanitizing solution, mix 50-60 grams per 4 liters or a gallon of water. Like the Campden tablets, this solution can be used again and again as long as it smells like sulfur.
If you use bleach, rinse the fermenter with very hot water to remove the chemical smell. Don’t forget the lid. Lids have crevices and little secret spots that mold and dirt love to settle into. You don’t have to rinse if you use a sulphite solution. If you use any other commercial formula, follow the directions.
Do all of this just before you want to start a batch of wine. It isn’t necessary or even desirable to dry the vessel out.
After the primary fermentation is finished, sanitize the fermenter right away all over again. Store it out of the way after it has dried out, with the lid on to keep out dust and arachnids. The reason for cleaning it up immediately is mold, which can grow almost anywhere. If you leave it, the least bit of food on it will grow. Yes, even on plastic. Plastic is soft. It scratches, making nice little valleys for mold spores to settle in. This goes for stoneware and glass, too: it should have no cracks and no chips.
