The Baking Answer Book (32 page)
Read The Baking Answer Book Online
Authors: Lauren Chattman
Tags: #Cooking, #Methods, #Baking, #Reference

Must-Have Pastry Bag Tips
Plain or writing.
For outlining, lettering, balls, pearls, latticework. Choose a smaller one (Wilton #5 or #6) for lettering and a larger one (#11 or #12) for pearls and larger balls.

Wilton’s #47 and #48 are versatile, making both smooth and ribbed stripes.

For shells, stars, and fleur-de-lis. A #27 and a #33 will give you some flexibility in size.
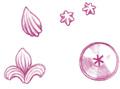
Leaf tips are fun and easy to use. These come in different styles, so choose a large and small in the style you like best.
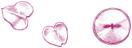
Not essential, but ruffle tips make pretty borders. They also come in different patterns, so choose a large and small that you like best.

FROSTING A LAYER CAKE, STEP-BY-STEP
To fill and frost a cake, follow these steps:
1.
Split your cake into layers (see
page 231
for instructions).
2.
Trim the domed parts of the layers so each layer is flat.
3.
Trim away about ¼ inch from the sides of each layer with a sharp serrated knife.
4.
Brush the tops and sides of the layers lightly with a pastry brush to remove any loose crumbs. Clean up the work surface after you trim and brush, so there’s less chance that crumbs will wind up on your frosted cake.
5.
Cut out a cardboard cake circle from the bottom of a box, or use a cardboard cake circle from a baking supply shop (see Resources). The circle should be about ½ inch larger in diameter than your trimmed cake layers. Dab a tablespoon of frosting on the circle and place a cake layer on top of the frosting; this will prevent your cake from sliding around as you work. You should have between ¼ andinch of the cardboard circle peeking out all around the bottom of the cake.
6.
Spread your filling over the bottom layer. If you are using the frosting to also fill the cake, it won’t matter if some oozes out the sides, but if you are using a different filling, don’t spread it to the edges of the layer — leave a ½-inch border to allow it to spread without leaking out. Place the second layer over the bottom layer, trimmed-side down, so that the flat bottom is facing up. This will give you the flattest top possible.
7.
Spoon about 1½ cups of frosting on top. Smooth it over the top with an offset spatula, running the spatula back and forth over the top of the cake to create a flat top and making sure that the frosting covers the entire layer.
8.
Carefully pick up the cake and balance it in the palm of one hand. Working over the frosting bowl, apply a thick layer of frosting to the sides of the cake. Hold the spatula upright and against the side of the cake; run the spatula around the cake, using the cardboard as your guide, to smooth the frosting. The frosting should come just to the edge of the cardboard. Holding the spatula straight up as you rotate the cake should make the frosted sides nice and straight.
9.
Run the spatula over the top of the cake to smooth the outer edges. If you are pressing any chopped nuts, chocolate, or cookie crumbs into the sides of the cake, do it now, before placing it on a cake stand or platter and before completing your decorating.
Other books
1981 - Hand Me a Fig Leaf by James Hadley Chase
The Body in the Landscape (A Cherry Tucker Mystery Book 5) by Larissa Reinhart
Saved by a Biker (Biker Erotic Romance) by Stone, Emily
How They Were Found by Bell, Matt
Paper Woman: A Mystery of the American Revolution by Adair, Suzanne
Operation Zulu Redemption: Out of Nowhere - Part 2 by Ronie Kendig
Three Tales From the World of Cotton Malone by Steve Berry
The Accidental Honeymoon by Alice Toby
Meteorite Strike by A. G. Taylor
Awoken by Alex South