The Baking Answer Book (35 page)
Read The Baking Answer Book Online
Authors: Lauren Chattman
Tags: #Cooking, #Methods, #Baking, #Reference

Once your dough is at the proper temperature, set it on a lightly floured countertop and press it into a rough circle by pushing down on it all over with the rolling pin before actually attempting to roll it out. It is easier to press a thick disk of dough into a thinner circle than it is to attempt rolling at
this point. When you have a circle measuring 6 inches or so, lightly flour your rolling pin and use even strokes to roll the dough. After every 4 or 5 strokes, slide a large offset spatula underneath the dough to loosen it from the work surface, and rotate the dough 45 degrees. Continue to roll, loosen, and turn until you have a circle big enough to cover the bottom and sides of your pie or tart pan, with enough excess to double the edge and crimp if necessary. Although adding too much flour to the dough during rolling will result in the toughening of the crust, it is important to use enough flour on the work surface and the rolling pin to prevent sticking and tearing. Too much sticking and tearing will mean that you will have to press your dough into a ball and begin again, adding even more flour to the dough than you would have if you had been more generous to begin with.
Ideally, your rolled dough should be a perfect circle. If, during rolling, it becomes misshapen, use the side of a chef’s knife to press the edges into a circle shape and continue to roll.
Q
Just as I was rolling my dough into a large enough circle to transfer it to the pan, it developed a tear down the center. Can I repair it or should I start over again?
A
With most pies and tarts, it is important to have a crust that isn’t torn or cracking, because sugary fillings will seep through the cracks, burning on the bottom of the pan during baking and causing the crust to burn. Even if fillings are unbaked, as with pastry cream–filled tart shells, it is
important to have an intact crust, as the filling will soon seep through cracks and make the bottom crust soggy.
But if your crust tears during rolling it’s not necessary to re-roll. Depending on the type of dough you are using, you can simply press together the torn part, lightly flour your rolling pin, and continue to roll, or use an extra piece of dough, cut from the edge of the circle, to patch up the tear. Place the piece over the tear and use your index finger to lightly smooth its edges into the larger piece before flouring your rolling pin and continuing to roll.
Q
How big should the dough circle be for a tart pan?
A
To be safe, roll your dough to a diameter 2 inches larger than your pan. If you are using a 9-inch tart pan, roll the dough to a diameter of 11 inches. Fit the dough into the corners of the pan by gently pressing it with your fingertips. To trim the dough, roll a rolling pin over the top of the tart pan to cut the dough right at the pan’s sharp top edge.
Q
How big should my dough circle be to fit into a 9-inch pie plate?
A
Roll your dough into a 12-inch circle, to ensure that you have enough pastry to make a generous edge. Once you have transferred the dough circle to the pie plate, trim
away all but ¾ inch of the edge, which should be enough for crimping. If you are making a top crust, roll the second ball of dough to the same 12-inch diameter, place it on top of the filled pie, and trim the bottom and top crust edges to ¾ inch at the same time, crimping them together when you are done.
Q
How do I transfer rolled dough to a pie or tart pan?
A
For pliable, sturdy doughs, use a rolling pin. Loosely fold your dough circle around the pin, lift the pin, and unroll the dough over the pan. For more crumbly, delicate doughs that might crack when folded over a rolling pin, you might try rolling out your circle on a piece of parchment paper and then sliding the dough from the parchment into the pan.
Q
How do I fit the dough into the pan?
A
When you have transferred the dough to the pan, gently press it into the bottom and sides with your fingertips. It’s important not to stretch or thin the dough when you do this or dimple it with your fingers, which may cause the dough to shrink or become otherwise misshapen in the oven. Simply make sure by touch that the dough is making contact in every spot with the pan.
Q
What are pie weights and why are they necessary?
A
While a pie or tart bakes, the filling acts as a weight on the pastry dough, holding it in place and preventing the sides from shrinking or parts of the pastry from bubbling up in places where air bubbles may have been rolled into the dough.
Some pie and tart recipes, however, call for the crust to be partially or fully baked before it is filled. In these cases, the crust needs to be weighed down with special ceramic or metal pellets (available in baking supply stores), or with dried beans (available in any supermarket, and reusable) before baking.
Blind baking
is the term used for baking a crust before filling.
Follow these steps when blind baking for a well-shaped and browned crust: First, prick the bottom of the shell all over with a fork to prevent air pockets from bubbling up during baking. Then cover the crust, including its edges, with a double layer of aluminum foil. Place the pie weights or dried beans on top of the foil. If you will be adding a filling that needs to be baked, as with pecan pie, remove the partially baked crust from the oven, carefully lift the foil and weights from the pan, fill the crust, and continue to bake. If you will be adding a filling that won’t be baked, you’ll have to remove the foil and weights and return the unfilled crust to the oven to brown once it is set and the danger of shrinking has passed.
Q
How do I crimp the edges of a piecrust?
A
When you have trimmed the crust all around so that it overhangs the edge of the pan by ¾ inch, tuck that extra dough underneath itself to form a double-thick edge that sits on the rim of the pie plate. Then you can mold the thick edge into one of several patterns.
Piecrust Patterns
For a
ridged edge
, press the tines of the fork into the edge all the way around to flatten it against the rim.
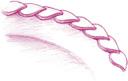
fluted edge
, pinch the edge of the crust with the thumb and index finger of one hand while pressing from the inside with the index finger of the other hand, repeating all the way around the edge.

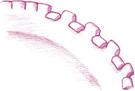
checkerboard edge
, use a scissor or paring knife to make ½-inch-deep cuts ½-inch apart into and all the way around the edge. Fold every other square over and inward to form a checkerboard pattern.
leaf edge
, re-roll the trimmed dough and use a small leaf cookie cutter or cut leaves freehand from the dough. Brush some beaten egg white onto the edge of the shell and arrange the leaves, overlapping them slightly, on the edge. Brush the tops of the leaves with more egg white.