Build Your Own ASP.NET 3.5 Website Using C# & VB (38 page)
Read Build Your Own ASP.NET 3.5 Website Using C# & VB Online
Authors: Cristian Darie,Zak Ruvalcaba,Wyatt Barnett
Tags: #C♯ (Computer program language), #Active server pages, #Programming Languages, #C#, #Web Page Design, #Computers, #Web site development, #internet programming, #General, #C? (Computer program language), #Internet, #Visual BASIC, #Microsoft Visual BASIC, #Application Development, #Microsoft .NET Framework

Building Web Applications
205
the Images folder appear in Solution Explorer, right-click the root node and choose
Refresh Folder
.
The master page is now in place. Click the
Design
button at the base of the editor
window to see a preview of the page. Does yours look like the page shown in Fig-
Figure 5.29. Viewing
Dorknozzle.master
in Design view
Note that the CSS styles don’t apply at design time, so you’ll have to hang on a little
longer to see that code in action.
Using the Master Page
It’s time for our moment of glory, when we assemble all the pieces we’ve been
building and put them to work! We’ll start by re-creating the
Default.aspx
web form,
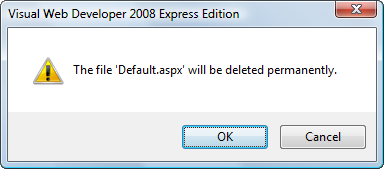
but this time, we’ll use the master page. Start by deleting your current
Default.aspx
file by right-clicking that file in Solution Explorer, and choosing
Delete
. You’ll be
warned that
Default.aspx
is about to be deleted (see Figure 5.30)
—choose
OK
. Licensed to [email protected]
206
Build Your Own ASP.NET 3.5 Web Site Using C# & VB
Figure 5.30. Deleting
Default.aspx
Click the root node in Solution Explorer, then select
File
>
New File…
(or right-click the root node in Solution Explorer and select
Add New Item…
from the context
menu).
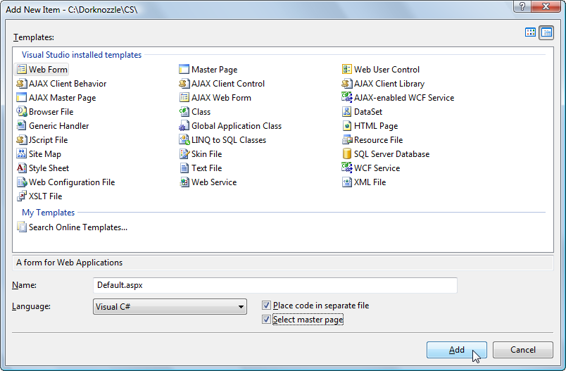
In the dialog that appears, choose the
Web Form
template, leave the default name
of
Default.aspx
as is, and make sure both the
Place code in separate file
and
Select
master page
checkboxes are checked, as shown in Figure 5.31
. Figure 5.31. Creating the new
Default.aspx
Once you click
Add
, you’ll be asked to select the master page you want to use. Choose
Dorknozzle.master
, and click
OK
.
Licensed to [email protected]
Building Web Applications
207
Our new form inherits everything from its master page, so its code is minimal:
Visual Basic
Dorknozzle\VB\14_Default.aspx
(excerpt)
<%@ Page Language="VB" MasterPageFile="~/Dorknozzle.master"
AutoEventWireup="false" CodeFile="Default.aspx.vb"
Inherits="_Default" title="Untitled Page" %>
Runat="Server">
ContentPlaceHolderID="ContentPlaceHolder1" Runat="Server">
C#
Dorknozzle\CS\14_Default.aspx
(excerpt)
<%@ Page Language="C#" MasterPageFile="~/Dorknozzle.master"
AutoEventWireup="true" CodeFile="Default.aspx.cs"
Inherits="_Default" Title="Untitled Page" %>
Runat="Server">
ContentPlaceHolderID="ContentPlaceHolder1" Runat="Server">
This file is almost exactly the same when it’s written in C#—the only differences
are the Language, AutoEventWireup, and CodeFile attributes in the Page directive.
Let’s modify the file by adding some content to the ContentPlaceHolder, and altering
the page title. Edit the file to reflect the highlighted sections here:
Visual Basic
Dorknozzle\VB\15_Default.aspx
(excerpt)
<%@ Page Language="VB" MasterPageFile="~/Dorknozzle.master"
AutoEventWireup="false" CodeFile="Default.aspx.vb"
Inherits="_Default" title="
Welcome to Dorknozzle!
" %>
Runat="Server">
Licensed to [email protected]
208
Build Your Own ASP.NET 3.5 Web Site Using C# & VB
ContentPlaceHolderID="ContentPlaceHolder1" Runat="Server">
Company News
We'll add some news later.
Company Events
We'll add company events later.
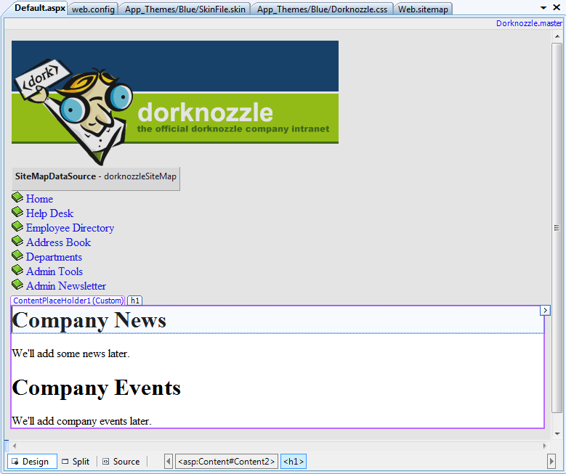
Switch to Design view to see a preview of the whole page, like the one shown in
Figure 5.32
. The master page areas will be grayed out, and only the content placeholder will be editable. By default, when you select
Debug
>
Start Debugging
or press
F5
, Visual Web Developer executes the page that’s being edited. However, if you prefer, you can set a particular page to execute whenever you start debugging. To make sure that
Default.as-
px
is the page that’s loaded when the project is executed, right-click Default.aspx
in Solution Explorer, and select
Set As Start Page
.
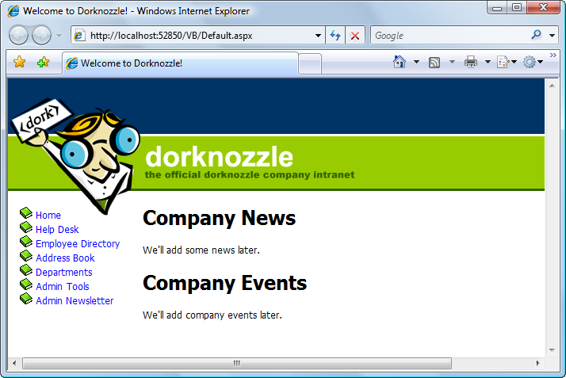
Now, execute
Default.aspx
by hitting
F5
. It should appear as per the page in
Fig-
ure 5.33, with all the CSS applied.
Figure 5.33. Welcome to Dorknozzle!
Licensed to [email protected]
Building Web Applications
209
Figure 5.32. Editing a web form that uses a master page
Extending Dorknozzle
We’ll extend the Dorknozzle site by adding an employee help desk request web
form. This form will allow our fictitious employees to report hardware, software,
and workstation problems to the help desk. The web form will be arranged into a
series of simple steps that users will work through to report their problems. The
process will include the following stages:
■ Choose from a predefined list of potential problem areas.
■ Choose from a range of predetermined subjects that are related to the problem
area.
■ Enter a description of the problem.
■ Submit the request.
As we already have a master page that defines the layout of the site’s pages, adding
a new page to the site is now a trivial task. In this example, we’ll see how simple
Licensed to [email protected]
210
Build Your Own ASP.NET 3.5 Web Site Using C# & VB
it is to add new pages to an ASP.NET web site once the structure has been created
correctly.
Create a web form in the same way you created
Default.aspx
, but this time, name it
HelpDesk.aspx
. Be sure to check both the
Place code in separate file
and
Select
master page
checkboxes. Next, modify the default code that will be generated to
reflect the edits shown below:
Visual Basic
Dorknozzle\VB\16_HelpDesk.aspx
(excerpt)
<%@ Page Language="VB" MasterPageFile="~/Dorknozzle.master"
AutoEventWireup="false" CodeFile="HelpDesk.aspx.vb"
Inherits="HelpDesk" title="
Dorknozzle Help Desk
" %>
Runat="Server">
ContentPlaceHolderID="ContentPlaceHolder1" Runat="Server">
Employee Help Desk Request
Station Number:
CssClass="textbox" />
Problem Category:
CssClass="dropdownmenu" />
Problem Subject:
CssClass="dropdownmenu" />
Problem Description:
CssClass="textbox" Columns="40" Rows="4"
TextMode="MultiLine" />
Licensed to [email protected]
Building Web Applications
211
CssClass="button" Text="Submit Request" />
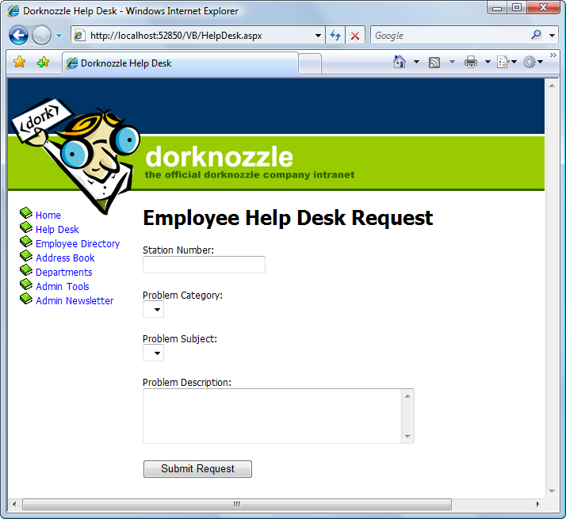
Don’t worry that the DropDownList controls don’t have items associated with
them—eventually, the categories and subjects will be retrieved from a database.
When you’re finished, save your work, execute the project, and click the
Help Desk
link from the menu. Y
ou should see the display shown in Figure 5.34
. Figure 5.34. The Help Desk page up and running
This page gives us the opportunity to test the skin file we created earlier. If you type
text into the text boxes, you’ll see that the color of the text is blue. True, this effect
could have been achieved just as easily through CSS, but in future, when you’re
working on projects that utilize more complex controls and properties, skins might
