Foundation Game Design with ActionScript 3.0, Second Edition (65 page)
Read Foundation Game Design with ActionScript 3.0, Second Edition Online
Authors: Rex van der Spuy

- Name: box
- Width: 50 px
- Height: 50 px
- Units: Pixels
- Color Model: RGB (Click the Advanced button to make this option visible if you can't see it.)
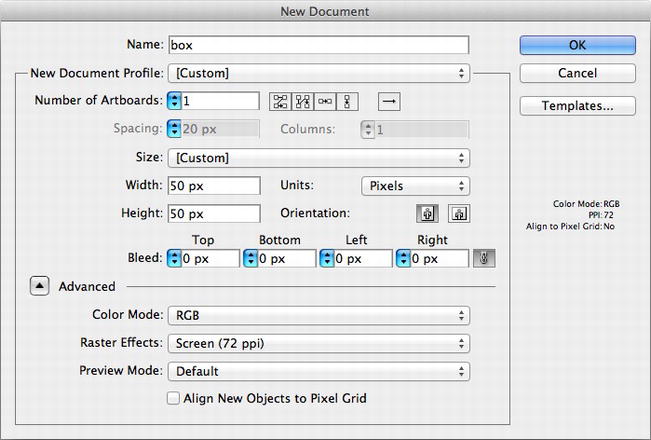
Figure 7-4.
Parameters for the new document
The width and height are specified in pixels, but those are really just numbers that apply to your finished PNG file. All your drawing will be done using vectors, which means that your illustrations can be scaled to any size if you later change your mind about how large you want your finished image to be. Illustrator has a Pixel Preview view that shows how vector drawings will look as pixels, and you'll see how to use that soon.
Also, very importantly, the Color Model needs to be RGB. RGB stands for Red, Green, and Blue, which refers to the visible light spectrum. It's a way of interpreting colors that's used on any media that projects light, like computer monitors or TV screens. It's what you should always use for games. The other color system in wide use is CMYK which stands for Cyan, Magenta, Yellow, and Key (“Key” refers to black). It's
used with printed images like books and magazines, and describes the underlying process in which inks are applied to paper.
You'll notice that the very last option is called Align New Objects to Pixel Grid. This is actually a very useful feature because it nudges your drawings into positions that exactly correspond to the underlying pixel grid. For very small images, like the ones you're making, it can sometimes be a bit frustrating to work like this because the pixels are relatively large, and your lines and shapes will be nudged around by large amounts. But for true pixel-perfect precision it's essential, so consider choosing this option at some point.
Click the OK button and you'll see a blank drawing surface called an
artboard
. Artboards are the same as the canvas in Photoshop—it's where are all your drawing happens. You can draw in the gray area around the artboard, but anything you draw there won't appear in your finished image. The gray area surrounding the artboard is a good place to experiment with techniques or drawing elements. You can copy or drag them into your finished work if you find you can use them.
If you need to make any changes to the artboard, like changing its size, click the Artboard Tool in the Tools bar (
Figure 7-5
). You can then resize the artboard or change any of its properties in the Control Panel, which runs across the top of Illustrator's workspace. (You can actually have multiple artboards in one Illustrator document, which could be useful if you're creating lots of different game graphics that share certain elements. You could copy and paste between different artboards rather than between different documents.)
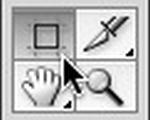
Figure 7-5.
Change the size and properties of the drawing area with the Artboard Tool.
As with Photoshop, Illustrator lets you choose different workspaces, which are customized arrangements of tools and panels. The default workspace is called Essentials, and that's the one I suggest you stick with for now. You can change the workspace by selecting Window![]() Workspace from Illustrator's main menu, or by clicking the Essentials button at the top right corner of the Control Panel. If you've a made mess of the panels by dragging them around, re-docking them in strange places, or opening and closing them, just re-select the Essentials workspace from either of these two menus and everything will reset to their original positions.
Workspace from Illustrator's main menu, or by clicking the Essentials button at the top right corner of the Control Panel. If you've a made mess of the panels by dragging them around, re-docking them in strange places, or opening and closing them, just re-select the Essentials workspace from either of these two menus and everything will reset to their original positions.
I always struggle to choose appropriate colors for my games. Happily, you can simplify your color choices by letting Illustrator choose for you from a pre-set selection of color swatches. You'll find the Swatches panel in the Panel bar on the right side of the workspace.
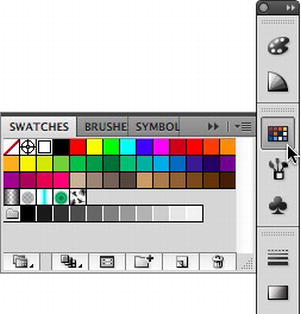
Figure 7-6.
Open the Swatches panel.
You'll see a basic selection of swatches when you open the panel, shown in
Figure 7-6
, but Illustrator actually has many other color swatch collections that are hidden away in the Swatches panel's menu.
- Click the Swatches panel's menu button at the very top right of the panel. Select Open Swatch Library. A whole list of different swatch color combinations appears. Choose any of these you like. I've chosen Kids Stuff for this project because it's a nice selection of bright, happy colors that are good for video games.
Figure 7-7
shows where to find the swatch library. The new swatches will open in their own panel.
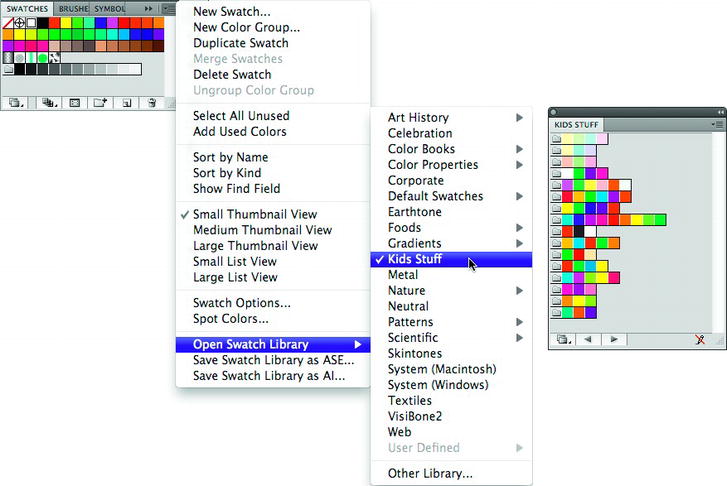
Figure 7-7.
Choose a new selection of swatches from the swatch library.
You now have a nice selection of bright saturated and pastel colors to choose from.
You're first going to draw the box's outside shape. It's a green rectangle that has an inner glow effect applied to it.
- Select the Rectangle Tool from the Tools bar (
Figure 7-8
).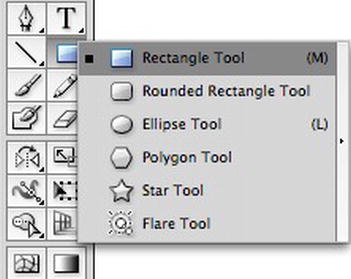
Figure 7-8.
Select the Rectangle Tool. - Click the foreground color selector in the Tools bar and then click a green swatch. Set the stroke (outline) color to none. (Do this by selecting the stroke color selector in the Tools panel and then clicking the small button with a red stripe through it. The stroke color should have a matching red stripe through it if you've done this successfully.)
Figure 7-9
shows what the foreground and stroke colors in the Tools bar should look like.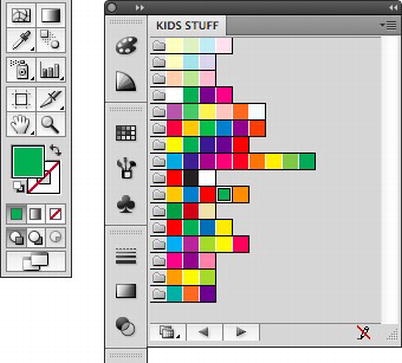
Figure 7-9.
Choose a green foreground color and set the stroke color to none. - Hold down the left mouse button and Shift key simultaneously and drag from the very top left corner of the artboard to the very bottom right corner. A solid green square will fill the entire artboard, as shown in
Figure 7-10
. Holding down the Shift key while dragging with the Rectangle Tool lets you make perfect squares.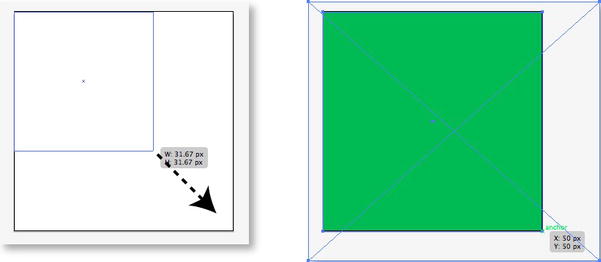
Figure 7-10.
Click and drag to draw a green rectangle. - Make sure the rectangle is still selected. (If it isn't, re-select it with the black arrow tool.) Select Effect
 StylizeInner Glow. The Inner Glow window will open to let you configure the effect. Make sure the Preview option is selected and configure the effect with the following settings: