Foundation Game Design with ActionScript 3.0, Second Edition (69 page)
Read Foundation Game Design with ActionScript 3.0, Second Edition Online
Authors: Rex van der Spuy

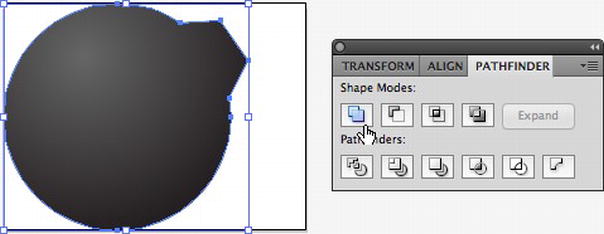
Figure 7-34.
Unite the shapes using the pathfinder panel.
When you unite shapes like this, the bottom shape takes on the shading quality of the top shape. You'll notice that the tapered rectangle now blends seamlessly with the black radial gradient of the circle that was covering it. You can use the Pathfinder menu to subtract a shape from another as well. Do some experimenting with it when you have some time and you'll see how useful it can be for making complex compound shapes.
The next step is to make the bomb's fuse. You're going to do this by drawing a path with the Pen Tool. Illustrator's Pen Tool works exactly like the one in Photoshop, so review that section in
Chapter 2
if you're unsure of how to use it. You'll be switching between the black arrow, white arrow, and Convert Anchor Point Tool constantly while drawing and reshaping paths, so it's really useful to use the following keyboard shortcuts:
- Black arrow (Selection Tool): V
- White arrow (Direct Selection Tool): A
- Convert Anchor point: Shift+C
- And, while you're at it, you might as well learn the shortcut for the Pen Tool itself: P
(The shortcut keys for the black and white arrows are easy to remember because the letters A and V look a bit like arrows.)
Use these tools to draw the bomb's fuse.
- Draw a curved path that looks something like
Figure 7-35
. (Make sure that you don't have a fill or stroke color selected while you do this so that it will be easier to concentrate on drawing the path precisely.)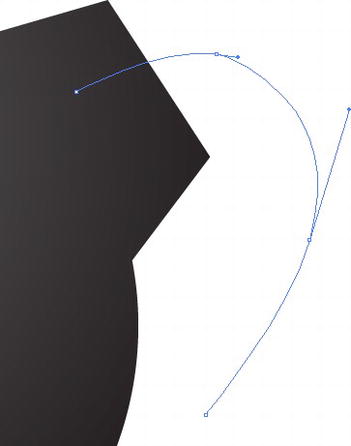
Figure 7-35.
Use the Pen and Arrow Tools to draw a path for the fuse. - Select a dark brown stroke color.
- Open the Stroke panel. Set the weight to 0.25. This would normally be an impossibly narrow width for a line, but because your bomb graphic is so small you'll see that it's going to be quite appropriate. (Normally you would set a line weight between 1 and 5 pixels.) The Stroke panel lets you set all the properties of lines and outlines, and it lets you do useful things with your lines like add arrowheads or change the line style.
Figure 7-36
shows where to find the Stroke panel and what it looks like.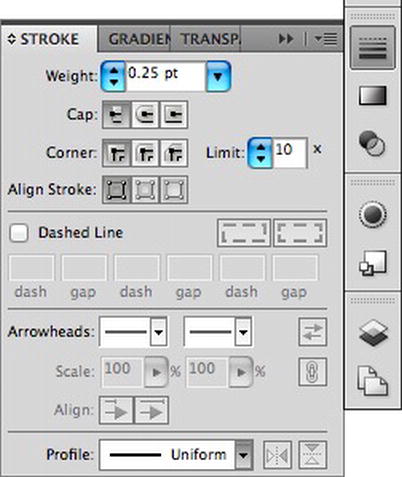
Figure 7-36.
The Stroke panel lets you change all of a line's properties.You're now going to add an artistic brush stroke to the path you've made.
- Open the Brushes panel, as shown in
Figure 7-37
.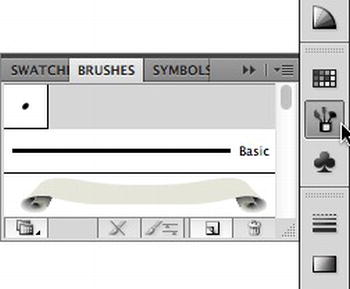
Figure 7-37.
The Brushes panel lets you choose a brush style for your lines. - You're going to load the Artistic Ink brush set, which is hidden away in the Brushes menu. Click the menu button at the very top right corner of the Brushes panel. Select Open Brush Library
 Artistic
 Artistic Ink. This will open the Artistic Ink brush set as a new panel.
 - Choose the Tapered Round brush from the Artistic Ink set, as shown in
Figure 7-38
. You'll see the brush style applied to the path you drew, and you should end up with an image that looks a bit like
Figure 7-39
.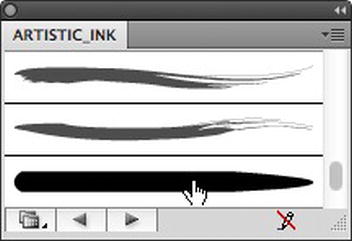
Figure 7-38.
Choose an artistic brush style for the bomb's fuse.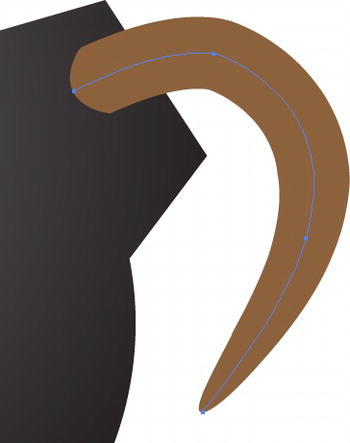
Figure 7-39.
The brush style is applied to the path. - You need to move the fuse behind the bomb shape. Make sure the fuse is still selected and choose Object
 Arrange
 Send to Back from the main menu. (You can also right-click on it and choose Arrange
 Send to Back from the option menu or hold down Shift+Ctrl+[ in Windows or Shift+Command+[ in OSX.) The fuse will now be positioned behind the bomb, as shown in
Figure 7-40
.
Figure 7-40.
Use the Send To Back command to position the fuse behind the bomb shape.The last step is to add a spark to the end of the fuse. You'll use the Star Tool to do this.
- Select the Star Tool from the Tools bar (
Figure 7-41
). You'll find it in the same button set as the Rectangle and Ellipse tools.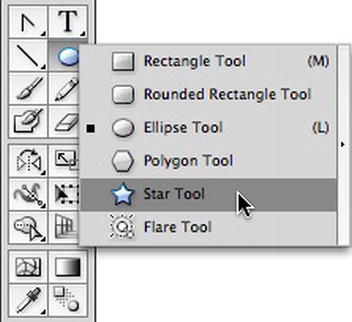
Figure 7-41.
The Star Tool lets you draw stars.
