Foundation Game Design with ActionScript 3.0, Second Edition (70 page)
Read Foundation Game Design with ActionScript 3.0, Second Edition Online
Authors: Rex van der Spuy

- The Star Tool does what it says on the tin: you can draw stars with it! Click and drag to draw a star shape, but before you release the left mouse button, press the up and down arrow keys on the keyboard. This adds or removes points on the star. Release the left mouse button when you're happy with the number of points.
- Give the star a radial gradient fill. Make the center of the gradient yellow and the outside red. Position the star over the end of the fuse and scale it so that the size looks right.
Figure 7-42
shows what you might come up with.
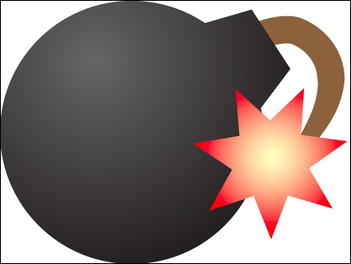
Figure 7-42.
Add a spark to the fuse with the Star Tool.
You could improve this effect by adding a Gaussian Blur from the Effects![]() Blur menu, but in this case the graphic is going to be so small it won't make any difference in the way that it appears on the stage in the final game.
Blur menu, but in this case the graphic is going to be so small it won't make any difference in the way that it appears on the stage in the final game.
Because it is such a small image, you need to make sure that that all the pixels are staying within the artboard's borders and that everything is properly aligned. Select View![]() Pixel Preview to see what the actual pixels of your image will look like. Illustrator does a decent job translating vectors into pixels, but it won't ever be as good as your own eye. You might find that bits of the image are sticking over the edge of the artboard, like the spark in Figure 4-43. If they are, nudge them back in. (You can use the arrow keys on the keyboard to do this very precisely. If you hold down Shift while pressing the arrow keys, you can move the object in larger increments.) Use Pixel Preview as an opportunity to reposition or reshape anything else that doesn't look quite right. When you're working with small graphics, which most game graphics will be, it's a good idea to switch on Pixel Preview intermittently during the design process to catch small issues like this quickly.
Pixel Preview to see what the actual pixels of your image will look like. Illustrator does a decent job translating vectors into pixels, but it won't ever be as good as your own eye. You might find that bits of the image are sticking over the edge of the artboard, like the spark in Figure 4-43. If they are, nudge them back in. (You can use the arrow keys on the keyboard to do this very precisely. If you hold down Shift while pressing the arrow keys, you can move the object in larger increments.) Use Pixel Preview as an opportunity to reposition or reshape anything else that doesn't look quite right. When you're working with small graphics, which most game graphics will be, it's a good idea to switch on Pixel Preview intermittently during the design process to catch small issues like this quickly.
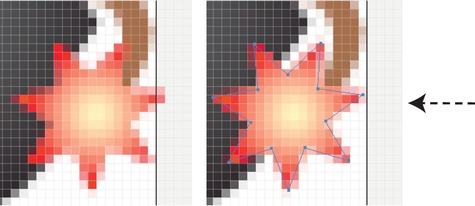
Figure 7-43.
Use Pixel Preview to reposition, realign, or reshape any odd looking shapes.
Lastly, save the file and create the PNG image.
- Select File
 Save As and find an appropriate spot on your computer to save the file.
 - Select FileSave For Web and Devices. Save the file as a PNG file.
Let's learn a few more useful Illustrator techniques by creating a simple game character.
The game character is made out of a few basic shapes, and you'll be able to use it as a starting point for your own ideas about how to make characters for your games.
- Create a new Illustrator document with a width and height of 50 by 50 pixels. Give it the document the name of character.
- Use the Ellipse Tool to draw a slightly flattened ellipse. Give it a light-blue-to-dark-gray radial gradient. Move the gradient's midpoint so that it's about 85% to the left. This ellipse is going to be the character's body. Position it so that its bottom edge is at the bottom of the artboard. Give it a black stroke color of 1pt.
Figure 7-44
shows what this should look like.
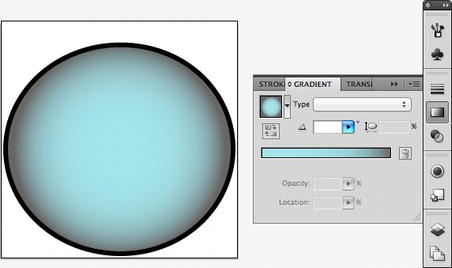
Figure 7-44.
Draw the character's body with the Ellipse tool.
The game character needs a pair of shiny metallic antennae. In the next few steps, you're going to make the first antenna out of two components, group the components together, and attach it to the body.
- First, draw a small, elongated oval. You can draw this in the gray drawing area beyond the edge of the artboard so you have some space to work.
In the Swatches panel, click the menu button in the panel's top right corner. Select Open Swatch Library
GradientsMetals. This opens a panel of gradients that simulates the way light reflects off of different types of metals. Choose the Steel Radial gradient as a fill color for the oval. Set its stroke color to none.
Figure 7-45
illustrates what the oval shape should now look like.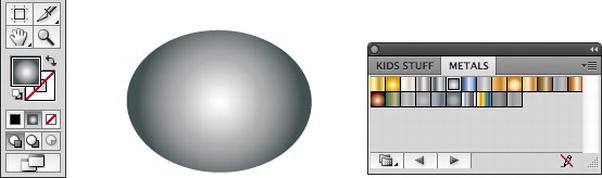
Figure 7-45.
Draw an oval and fill it with a metallic gradient.The Swatches Library has a wide range of different gradient pre-sets like this that you'll certainly find lots of use for when coloring your game objects. Spend some time exploring it when you have a chance.
- Select the Gradient Tool. Use the gradient annotator to move the gradient so that the white highlight is in the oval's top left corner. Flatten the gradient so that it's the same shape as the oval, but just slightly smaller. Do this by dragging the small black circle that's on the dotted line that defines the gradient's area. You can see this in
Figure 7-46
.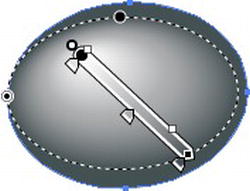
Figure 7-46.
Distort the gradient so that it's about the same shape as the oval.Draw a slightly angled tapered rectangle. Use the Convert Path Tool to curve its base. It should look a bit like
Figure 7-47
. This will become the antenna's base.
Figure 7-47.
Draw the antenna's base.Set the new tapered rectangle's stroke color to none. Select the Eyedropper Tool and click the center of the oval you made in step 5. The tapered rectangle will now be filled with the same gradient as the oval, as you can see in
Figure 7-48
.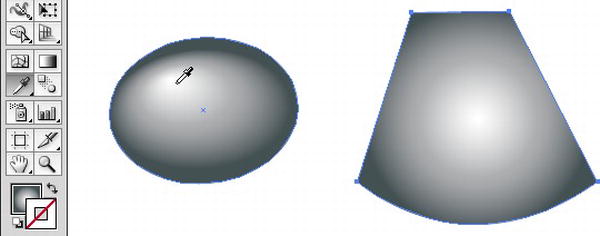
Figure 7-48.
Use the Eyedropper Tool to fill the base of the antenna with the same gradient as the oval. - Select the Gradient Tool and reposition the gradient on the tapered rectangle so that its center is just above its base. Make it slightly wider and longer as well. You can see the result in
Figure 7-49
.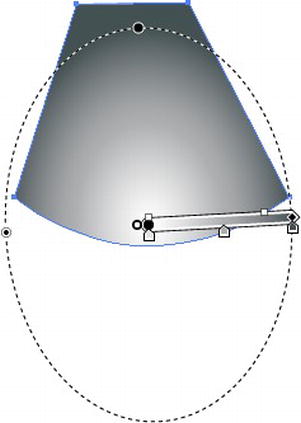
Figure 7-49.
Reposition the gradient on the antenna's base.Move the oval above the rectangle's tapered end and bring it to the front with the Object
ArrangeBring to Front command. Select both shapes and group them together (Select ObjectGroup from the main menu.)
Figure 7-50
shows the result.
Figure 7-50.
Group the two components of the antenna together so that you can move them as a single unit.You now have a nice metallic antenna you can stick onto your character's body.
- Position and rotate the grouped antenna so that it's angled away from the body at the top left corner of the artboard. You may want to switch on Pixel Preview while you're positioning it to make sure that no stray pixels cross the artboard's boundary. Tweak the size and scale of the antenna until you're happy with the way it looks attached to the body. Remember, you can edit any of the grouped shapes individually if you need to by double-clicking them and entering isolation mode.
Figure 7-51
shows the end result.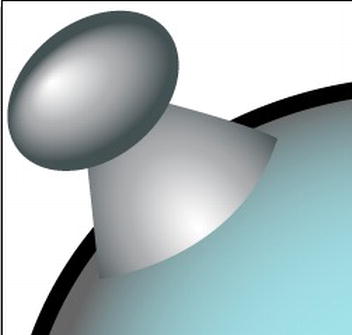
Figure 7-51.
Attach the antenna to the body.