Foundation Game Design with ActionScript 3.0, Second Edition (72 page)
Read Foundation Game Design with ActionScript 3.0, Second Edition Online
Authors: Rex van der Spuy

Figure 7-59
. The character's eyes
At the moment the character looks a bit too serious. You should give it something to smile about.
- Draw an elongated ellipse centered just below the eyes. Give it a 1 pt black stroke outline and a pink fill color, as shown in
Figure 7-60
.
Figure 7-60
. Draw a pink ellipse with a black outline. - Make sure it's selected, and choose Effect
 WarpArc from the main menu. The Warp Options window will open. Set the following options:
- Style: Arc
- Horizontal
- Blend: -17%
- Style: Arc
Click the OK button when you're done and the ellipse will be distorted into the shape of a smile, as you can see in
Figure 7-61
.

Figure 7-61
. Use the Arc Warp effect to make the character smile.
Illustrator has a large number of warp effects and you can use them to transform simple shapes into very complex ones very quickly and easily.
Give your character some hair by very simple adding three triangles between the antennae.
- Select the Polygon Tool from the Tools bar. The Polygon Tool occupies the same button set as the Rectangle and Ellipse tools. You can use it to make polygons with any number of sides by pressing the up or down arrow keys. Click and drag to create a polygon, but before you release the mouse button, press the down arrow key. Release the mouse button when the polygon becomes a triangle.
- Give the triangle a black fill color, and position it between the two antennae and behind the body, as shown in
Figure 7-62
. Size it so that it fits neatly.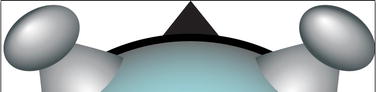
Figure 7-62
. Use the Polygon Tool to draw a black triangle. - Copy this triangle and use the EditPaste in Back command to paste the duplicate behind the original. Move it to the left of the first triangle and rotate it so that it's properly aligned with the curvature of the body. Make another copy of the triangle and position it to the right of the first. Your character will end up with a spikey haircut, like that in
Figure 7-63
. Switch on Pixel Preview to make sure that any of the triangle points aren't overlapping the artboard.
Figure 7-63
. Your character's new haircut
You're almost done! You just need to give your character some feet.
You'll draw the shoes with the Pen Tool and give them a simple dark-to-light linear gradient.
- Use the Pen Tool to draw to roughly define the shape of the left shoe (
Figure 7-64
).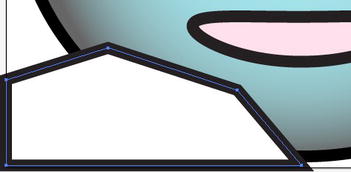
Figure 7-64
. Draw a basic path. - Use the Convert Anchor Point Tool to round the edges (
Figure 7-65
).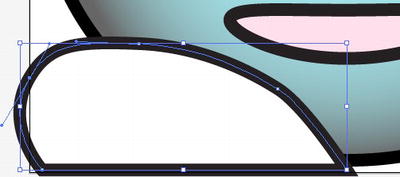
Figure 7-65
. Round the edges. - Give the shoe a white-to-gray linear gradient fill.
- Use the black arrow to resize, scale, or reposition the shoe so that it fits neatly inside the left half of the artboard. Confirm this using Pixel Preview (
Figure 7-66
).
Figure 7-66
. Fine-tune the size and position of the shoe using the black arrow in Pixel Preview mode. - If everything looks good, make another copy of the shoe. Then select ObjectTransformReflect from the main menu to flip over the new copy of the shoe. Move it to the character's right side.