Foundation Game Design with ActionScript 3.0, Second Edition (76 page)
Read Foundation Game Design with ActionScript 3.0, Second Edition Online
Authors: Rex van der Spuy

You know that all the game objects are classes. To use them in the game you need to make an object from the class and add it to the stage. Thecharacter,background,andgameOverobjects are made like this:
public var character:Character = new Character();
public var background:Background = new Background();
public var gameOver:GameOver = new GameOver();
Five objects are made from the Bomb class and 14 are made from the Box classes. Here's the abbreviated code:
public var bomb1:Bomb = new Bomb();
…
public var bomb5:Bomb = new Bomb();
public var box1:Box = new Box();
…
public var box14:Box = new Box();
Yes, it's a long list of code, but almost four times less to write than if you weren't using classes. In future chapters you'll see how to make this code much more compact.
You now have to useaddChild()to add the objects to the stage, and then set their x and y positions. To do this you would usually write something like this:
stage.addChild(character);
character.x = 225;
character.y = 150;
That would work just fine in this game, except that this time around you've got 22 objects, not just three or four. You don't want to have to write 66 lines of code to do this—what a boring chore that would be! It would be much better if you could reduce it down to one line per object. Of course you can!
I've created a custom method for this game calledaddGameObjectToStage. Here's how to use it to add one of the game objects to the stage:
addGameObjectToStage(character, 50, 50);
The method takes three parameters: the name of the object, the x position, and the y position.
You'll find the method's function definition about three quarters of the way down the program listing in theTimeBombPanicapplication class.
public function addGameObjectToStage
  (gameObject:Sprite, xPos:int, yPos:int):void
{
  stage.addChild(gameObject);
  gameObject.x = xPos;
  gameObject.y = yPos;
}
It adds the objects to the stage and assigns them the x and y positions that you gave them in the method arguments.
A small technical detail that you should notice is that the method's function definition types the incominggameObjectin its parameter as a Sprite.
gameObject:Sprite
However, all the game objects in this game are typed as Character, Background, Box, GameOver, and Bomb. None of them are typed as Sprite. But remember that when you created the game object classes, they all extended the Sprite class, like this:
public class Character extends Sprite
This means that Sprite is the parent class. By typing objects to their parent class in method parameters, you can make the method very general so that it works for all objects that share the same parent class.
Think carefully about any bits or repetitive code you might have in your game programs and you'll often find you can write a custom method like this to do the grunt work for you.
In this game you'll notice that the character can't cross the border of squares around the playing field's perimeter, as illustrated in
Figure 7-77
.
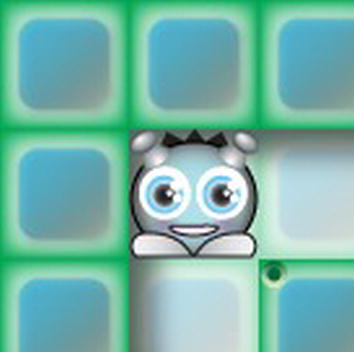
Figure 7-77
. The character can't cross the playing field border.
Because you designed the background graphic yourself, you know that there's nothing physically blocking the character from crossing this border—it's just an image. But it definitely looks like a solid border. This
illusion was very easy to create. All the code did was reduce the stage boundary code by 50 pixels on each axis, in effect making the stage 50 pixels smaller on each side. Here's the if statement from theenterFrameHandlerthat does this, with the modified stage boundaries highlighted:
if (character.x <
50
)
{
  character.x =
50
;
}
if (character.y <
50
)
{
  character.y =
50
;
}
if (character.x + character.width > stage.stageWidth
- 50
)
{
  character.x = stage.stageWidth - character.width
- 50;
}
if (character.y + character.height > stage.stageHeight
-50
)
{
  character.y = stage.stageHeight - character.height
- 50;
}
The playing field's border width is 50 pixels, so all the code needed to do was compensate for this in both the x and y axes.
Time Bomb Panic uses the sameCollisionclass that I introduced in
Chapter 6
. The only difference in this game is that theCollision.blockmethod is called 14 times in theenterFrameHandler—once for each box. Here's the abbreviated code that does this:
Collision.block(character, box1);
…
Collision.block(character, box14);
It couldn't be easier. It works well, but in
Chapter 10
you'll look at a more efficient way of handling collisions between multiple objects using a
for loop
so that you don't have to type out the same line of code 14 times.
It's the job of thebombsDefusedvariable to count the number of bombs the character has collected. It's created and initialized to 0 in the class definition at the start of the game.
public var bombsDefused:uint = 0;
TheenterFrameHandlerchecks for collisions between the character and the bombs. There's one if statement for each of the five bomb objects. When the character collides with a bomb, the bomb's visible
property is set to false. That's what essentially removes the bomb from the game. ThebombsDefusedvariable is then increased by 1, and another line of code checks if the game has ended. Here's the if statement that checks for a collision with the first bomb:
if(character.hitTestObject(bomb1) && bomb1.visible == true)
{
  bomb1.visible = false;
  bombsDefused++;
  checkGameOver();
}
There are many ways to remove an object from a game, but making it invisible is the simplest. However, you should be aware that even though you can't see an object on the stage anymore, it's still there. That means that if the character collides with a bomb, and the bomb's visible property is set to false, that won't prevent the character from colliding with it again. It just means that the character would be colliding with an invisible bomb rather than a visible one.
You can't allow this, so you need an extra check in the if statement to make sure that the character only collides with visible bombs.
if(character.hitTestObject(bomb1)
&& bomb1.visible == true)
{…
If any bomb is not visible, it means that it's already been defused, and this if statement is ignored.
After updating thebombsDefusedvariable, the last thing these if statements do is call thecheckGameOvermethod:
checkGameOver();
This method's job is to find out if the game is finished, and you'll soon see how it works.
A brand new feature of this game is that it uses a timer to count the number of seconds that have elapsed from the start. If ten seconds pass and the player hasn't defused all the bombs, the player loses the game.
Let's first look at how a timer works in a very focused example program, and I'll then show you how a timer is used in Time Bomb Panic.
In the chapter's source files you'll find a project folder called UsingATimer. Open and compile it. It counts seconds from 0 to 10. When it reaches 10, the counting starts again.
Figure 7-78
shows what you'll see.

Figure 7-78
. Counting seconds from 0 to 10
TheUsingATimerapplication class uses a timer to update a text field. Here's the entire program. I've highlighted all the code that specifically relates to making and using a Timer object.
package
{
  import flash.display.Sprite;
  import flash.text.*;

import flash.events.TimerEvent;
  import flash.utils.Timer;
  public class UsingATimer extends Sprite
  {

//The Timer object
    public var timer:Timer;
    //The Text objects
    public var output:TextField = new TextField();
    public var format:TextFormat = new TextFormat();
    public function UsingATimer()
    {

//Initialize the timer
      timer = new Timer(1000);
      timer.addEventListener(TimerEvent.TIMER, updateTimeHandler);
      timer.start();
      //Set the text format object
      format.font = "Helvetica";
      format.size = 200;
      format.color = 0x000000;
      format.align = TextFormatAlign.CENTER;
      //Configure the output text field
      output.defaultTextFormat = format;
      output.autoSize = TextFieldAutoSize.CENTER;
      output.border = true;
      output.text = "0";
      //Display and position the output text field
      stage.addChild(output);
      output.x = 200;
      output.y = 100;
    }
    public function updateTimeHandler(event:TimerEvent):void
    {
      output.text = String(timer.currentCount);
      //Reset and restart the timer when it reaches 10
      if(timer.currentCount == 10)
      {
        timer.reset();
        timer.start();
      }
    }
  }
}
To use timers in your programs, you first need to import theTimerandTimerEventclasses.
import flash.events.TimerEvent;
import flash.utils.Timer;
Timers are objects, so you need to create them in the same way you create other objects. First, declare the timer variable in the class definition.
public var timer:Timer;
Then turn it into a Timer object in the constructor method by using thenewkeyword.
timer = new Timer(1000);
TheTimerclass requires one argument, which is a number that represents milliseconds. (One millisecond represents 1/1000th of a second. One thousand milliseconds, as in this example, equal one second.)
Timers in AS3.0 work by triggering an event at regular intervals. In this example, you want to trigger an event to fire every second. The event's job is to update the output text field on the stage by one. To set this in place, however, you need to add aTimerEventevent listener to the newtimerobject that you just created.
timer.addEventListener(TimerEvent.TIMER, updateTimeHandler);
Next, you need to use theTimerclass'sstartmethod to actually start the timer working.
timer.start();
Thetimerobject now triggers theupdateTimeHandlerevent handler every second.
public function updateTimeHandler(event:TimerEvent):void
{
  output.text = String(timer.currentCount);
  //Reset and restart the timer when it reaches 10
  if(timer.currentCount == 10)
  {
    timer.reset();
    timer.start();
  }
}
Timerobjects have a property called currentCount that tells you how many times the timer event has fired since it started. TheupdateTimeHandlercopies the value of currentCount to the output text field on the stage.
output.text = String(timer.currentCount);
You can use currentCount as done here: to display the number of times the event has been triggered. The if statement uses currentCount to check whether ten seconds have elapsed; if they have, it calls theTimerclass'sresetandstartmethods: