Foundation Game Design with ActionScript 3.0, Second Edition (36 page)
Read Foundation Game Design with ActionScript 3.0, Second Edition Online
Authors: Rex van der Spuy


Keep this chart nearby because you'll be using many of these operators very frequently in the projects to come.
The code that checks whether the character has moved too far down the stage may be a little trickier to comprehend:
if(character.y< 300)
{
  character.y += 15;
}
It's basically saying, “Let the character move 15 pixels down the stage, while its y position is less than 300”. That means that if the character's y position is equal to or greater than 300, the character won't move.
But where did the number 300 come from? We know that the top of the stage has a y position of 0, and the bottom of the stage has a y position of 400. If we want to stop the character from moving beyond the bottom of the stage, shouldn't we use 400?
Not in this case, we have to use 300 and here's why:
Here are two important facts to remember about our game character:
- Its y position is measured from its top left corner,
- It's 100 pixels tall.
That means when its feet reach the bottom of the stage, its top left corner will still be 100 pixels above the bottom of the stage. To accurately stop its feet from crossing the bottom of the stage, we have to stop moving it when its top left corner is at a y position of 300. That's the stage height, subtracted by the character's height. If we stop it at 400, the character's entire body will already have disappeared. Test this in your program and see!
When we look at setting stage boundaries in
Chapter 5
, we'll examine this issue in much more detail.
There's so much fun you can have playing around with Sprite properties. The next thing we'll do is tear a page out of
Alice in Wonderland
and use thescaleXandscaleYproperties to make the character grow and shrink in size:
- Carefully add the following new code in bold to the GameWorld.as file:
package
{
  import flash.net.URLRequest;
  import flash.display.Loader;
  import flash.display.Sprite;
  import flash.events.MouseEvent;
  [SWF(width="550", height="400",
    backgroundColor="#FFFFFF", frameRate="60")]
  public class GameWorld extends Sprite
  {
    //All the variable declarations...
    public function GameWorld()
    {
      //All the code that creates, displays
      //and positions the objects...
      //Add the button listeners
      upButton.addEventListener(MouseEvent.CLICK, upButtonHandler);
      downButton.addEventListener
        (MouseEvent.CLICK, downButtonHandler);
      growButton.addEventListener
        (MouseEvent.CLICK, growButtonHandler);
      shrinkButton.addEventListener
        (MouseEvent.CLICK, shrinkButtonHandler);
    }
    public function upButtonHandler(event:MouseEvent):void
    {
      if(character.y> 0)
      {
        character.y -= 15;
      }
    }
    public function downButtonHandler(event:MouseEvent):void
    {
      if(character.y< 300)
      {
        character.y += 15;
      }
    }
    public function growButtonHandler(event:MouseEvent):void
    {
      character.scaleX += 0.1;
character.scaleY += 0.1;
}
public function shrinkButtonHandler(event:MouseEvent):void
{
character.scaleX -= 0.1;
character.scaleY -= 0.1;
}
}
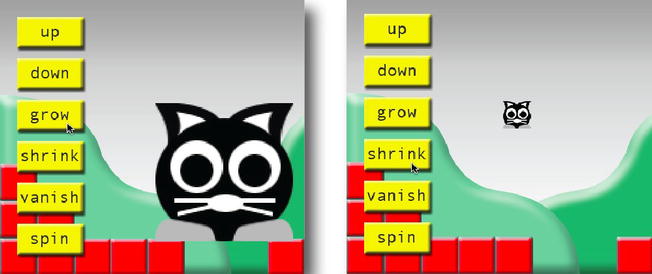
} - Compile the program, then click the grow and shrink buttons. You can now change the size of the character, as shown in
Figure 3-42
.

Figure 3-42.
Click the grow and shrink buttons to change the size of the cat.
You'll notice that the character changes size from its top left corner. That's because the top left corner is where its registration point is. It would look more natural if the character grew and shrank evenly from its center. At the end of this chapter, I'll show you how to center a Sprite's registration point to achieve just such an effect.
The basic functionality ofgrowButtonHandlerandshrinkButtonHandleris identical to that used for the up and down buttons. But instead of using theyproperty, you're using thescaleXandscaleYproperties to scale the character horizontally and vertically. You need to use both these properties together to scale it evenly. If you use only one, sayscaleX, the character will become very fat around the middle without growing in height at all. (try it and see!)
In fact, now that you know you can change two properties simultaneously, you can also try this with the x and y properties. To move the character up and down the stage diagonally, you can change the event handlers for the up and down buttons so that they look like this:
public function upButtonHandler(event:MouseEvent):void
{
  if(character.y> 0)
  {
    character.y -= 15;
    character.x += 10;
  }
}
public function downButtonHandler(event:MouseEvent):void
{
  if(character.y< 300)
  {
    character.y += 15;
    character.x -= 10;
  }
}
Try it!
ThescaleXandscaleYproperties use values that refer to a ratio of the object's scale. That means that all objects have a value of 1 at their original size. If you want to double the size of the object, you need to give it ascaleXandscaleYvalue of 2. In the new code you've added, you're increasing or decreasing the cat's scale by 0.1 each time the button is clicked, and that's a change of 10% of its original size.
It's interesting to contrast thescaleXandscaleYproperties with theheightandwidthproperties. They both modify the size of an object, but theheightandwidthproperties use pixel values. Let's make a few small changes togrowButtonHandlerandshrinkButtonHandlerto test it. We'll make it more interesting by using different numbers for height and width, so that the character doesn't change size evenly on all sides.
- Make the following changes to
growButtonHandlerandshrinkButtonHandlerby replacing the original code with the code in bold:public function growButtonHandler(event:MouseEvent):void
{
character.height += 25;
character.width += 15;
}
public function shrinkButtonHandler(event:MouseEvent):void
{
character.height -= 25;
character.width -= 15;
} - Compile the program.
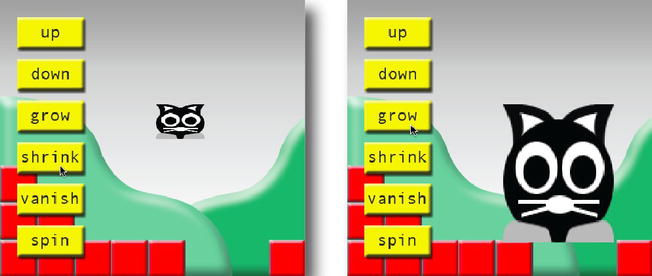
Click both the grow and shrink buttons a few times, and you'll notice that they gradually stretch and flatten the character, as you can see in
Figure 3-43
. This is because, although the character is exactly 100 pixels high and 100 pixels wide, the directives are adding a different number of pixels for both the height and width. If you supply exactly the same values for height and width, it will grow and shrink evenly in both dimensions.

Figure 3-43.
Change height and width by different increments to flatten and stretch a square object.
The next little trick uses thevisibleproperty to make the character disappear. Thevisibleproperty is a little different from the others you've looked at so far because it uses
Boolean
values. Boolean values are values that can be only true or false. This allows you to use a bit of programming sleight-of-hand to make a
toggle button
. You'll be able to switch (or
toggle
) the cat's visibility on and off with only one button.
- Add the following new code in bold to the GameWorld.as file:
package
{
import flash.net.URLRequest;
import flash.display.Loader;
import flash.display.Sprite;
import flash.events.MouseEvent;
[SWF(width="550", height="400",
backgroundColor="#FFFFFF", frameRate="60")]
public class GameWorld extends Sprite
{
//All the variable declarations...
public function GameWorld()
{
//All the code that creates, displays
//and positions the objects...
//Add the button listeners
upButton.addEventListener(MouseEvent.CLICK, upButtonHandler);
downButton.addEventListener
(MouseEvent.CLICK, downButtonHandler);
growButton.addEventListener
(MouseEvent.CLICK, growButtonHandler);
shrinkButton.addEventListener
(MouseEvent.CLICK, shrinkButtonHandler);
vanishButton.addEventListener
(MouseEvent.CLICK, vanishButtonHandler);
}
public function upButtonHandler(event:MouseEvent):void
{
if(character.y> 0)
{
character.y -= 15;
}
}
public function downButtonHandler(event:MouseEvent):void
{
if(character.y< 300)
{
character.y += 15;
}
}
public function growButtonHandler(event:MouseEvent):void
{
character.height += 15;
character.width += 15;
}
public function shrinkButtonHandler(event:MouseEvent):void
{
character.height -= 15;
character.width -= 15;
}
public function vanishButtonHandler(event:MouseEvent):void
{
character.visible = false;
}
}
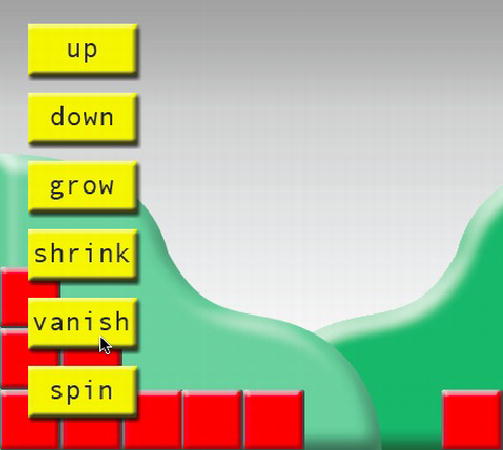
} - Compile the program and click the vanish button. The cat will disappear.
Figure 3-44
shows what you… won't see!

Figure 3-44.
Make an object disappear by setting its visible property to false.
The directive that accomplished this disappearing act was this line in thevanishButtonHandler:
