Happy Endings: Finishing the Edges of Your Quilt (2 page)
Read Happy Endings: Finishing the Edges of Your Quilt Online
Authors: Mimi Dietrich
Tags: #Crafts & Hobbies, #Quilts & Quilting

Choosing a Happy Ending
for Your Quilt
Happy Endings
has taken me on a wonderful journey through the world of quilting. I have written other books, taught classes to delightful groups in fabulous places, and met quilters from all over the world. As it turned out,
Happy Endings
was really only a beginning!
As you browse through the pages, you’ll find “Happy Ending Hints” to guide you to success. There are border techniques to help you achieve flat, straight edges on your quilts. If you sew borders on your quilt properly, the edges of your quilt will not ripple and your binding will be neat. And some techniques are labeled with “Mimi’s Favorite,” to indicate the techniques I use most often in finishing my quilts. So please don’t tuck this book away on the shelf! Put it in a special place in your sewing area, right next to your sewing machine, so that you’ll have the information at hand each time you’re ready to stitch borders or bindings on a new quilt.
Quilters love to choose fabric colors, textures, and prints to create new designs for our quilts. We find a wonderful peace in quilting the layers of soft fabric. But many of us hastily complete the last steps of the quiltmaking process—finishing the edges. Many books, magazines, and patterns simply say, “Bind the quilt edges.”
Happy Endings
gives you choices and easy-to-follow, step-by-step directions so that this stage of making your quilt can also be creative.
As you plan your quilt, consider the technique that will frame your design. There are many methods for finishing the edges of your quilted project, for encasing the batting and cut edges of the front and back of the quilt. The style of your quilt may determine the appearance of your final border. The quilt’s purpose may determine the durability of your finishing method. Your time and available fabric may also be a factor as you complete your quilt. If you are planning to enter your quilt in a show, you will be looking for the perfect happy ending. This book will help you make an appropriate choice for the finishing touch on your special quilt. Whether you choose a quick front-to-back finish, use the back of the quilt to create self-binding, make your own binding, or add special effects, may all of your quilts have “happy endings”!
Mimi Dietrich

Border and
Binding Terms
A quick reference to commonly used quiltmaking terms
.
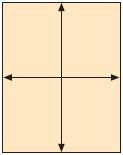
Fabric Grain
Straight grain:
The straight threads that run the length (lengthwise grain) or width (crosswise grain) of the fabric. The lengthwise grain has no stretch, and the crosswise grain has a little stretch.
Bias:
True bias is measured at a 45° angle to the lengthwise and crosswise threads in the fabric. Fabric has the greatest stretch when cut on the true bias.
Borders
Borders:
Strips of fabric framing the interior portion of a quilt. Borders can be whole strips of fabric, pieced patchwork, or appliquéd strips.
Overlapped corners:
When borders are applied to opposite edges of your quilt, usually to the sides first, then to the top and bottom, they will overlap in the corners.
Mitered corners:
Borders that are stitched together in the corners with a diagonal seam extending from the corner of the quilt design to the outer corner of the finished quilt.
Multiple-fabric borders:
Borders made using two or more fabrics.
Binding
Binding:
Fabric strips stitched to the edges of a quilt and folded over to encase the raw edges of the quilt top, batting, and backing.
Single-fold binding:
A single layer of fabric folded over the edge of the quilt. Also called
traditional binding
.
Double-fold binding:
Fabric folded in half to make a double layer of binding on your quilt. Also called
French binding
.
Stitches
Blind stitch:
A nearly invisible, small hand stitch used to attach the folded edge of the binding to the back of the quilt and finish the mitered corners. Also called
appliqué stitch
.
Slip stitch:
A nearly invisible, small hand stitch that works well on any straight area, such as binding or quilt sleeves. Also called
ladder stitch
.
Tools and
Supplies
You need basic quilting supplies to finish your quilt. You probably have most of these supplies in your sewing room
.
Sewing machine:
Make sure your sewing machine is in good working order. If you haven’t used it in a long time, treat it to a professional cleaning and oiling. Make sure you have a sharp needle with no bumps or burrs on it.
Walking foot or even-feed foot:
This sewing-machine attachment helps feed the quilt layers under the needle at the same pace. It works in tandem with the feed dogs. The walking foot is particularly helpful for basting the edges of your quilt and applying binding.
Thread:
Use all-purpose sewing thread to attach the borders and binding to your quilt.
Needles:
Short needles (called
Betweens
) are used for hand quilting. Longer needles (Sharps or milliners) are used for hand stitching and finishing touches.
Pins:
Use long straight pins to pin the borders to your quilt. Use safety pins to baste your quilt before machine quilting.
Tape measure:
Use a metal or plastic tape measure to accurately measure your quilt.
Masking tape:
Use 1"-wide masking tape to hold mitered-border corners in place while you sew them.
Scissors:
Use a good, sharp pair of comfortable shears to cut fabric accurately. A small pair of embroidery scissors comes in handy for hand sewing.
Rotary cutter:
This cutting tool has a round razor-like blade. Use it with a ruler and mat to cut fabric straight. The blade is extremely sharp and should be used with great care.
Rotary-cutting rulers:
There are a variety of heavy acrylic rulers in different sizes that you can use with the rotary cutter. Use a 6" x 12" or 6" x 24" ruler to cut strips for borders and bindings. Use a square ruler to square up mitered borders.
Cutting mat:
You need a surface made for cutting fabric with the rotary cutter. This mat protects your table and helps keep the rotary blade sharp.
Iron:
Use a good steam iron to press seams and to press the fold in the binding.
Low-loft batting:
A thin batting makes it easier to control the quilt layers as you sew the binding on your quilt.
Binding clips:
Use these clips (which are actually hair clips) to hold your quilt binding firmly in place while you hand stitch the back.

Basic Border
Techniques
When you have completed the quilt blocks and stitched the quilt top together, borders add a finishing frame to your quilt. They complement your quilt, much like the matting and frame on a painting
.
Measuring Your Quilt for Borders
Even if you’re making a quilt from a pattern or project book that gives border measurements, it’s important to measure your completed quilt top before you cut your borders. If you’re making a large quilt or a quilt with many patchwork pieces, the sides of your quilt top may vary in size from the stated measurements because everyone pieces a little differently. For this reason, it’s always a good idea to cut the borders to match the actual measurements of your quilt top.
M
IMI
’
S
F
AVORITE
This is it—the most important border tip in the book! Always measure the quilt through its center to determine the cut length of the border strips. A center measurement is more accurate because the edges of the quilt may stretch. Measuring through the center also helps avoid rippled borders in the finished quilt. Careful measuring techniques will result in smooth, even borders on your quilt!
Cutting Border Strips
Always cut borders on the straight grain of the fabric, never on the bias. Bias edges stretch out of shape easily. Cut your borders using a rotary cutter and a long ruler or use a pair of sharp scissors. To make the best use of your yardage, follow these tips for cutting borders:
If your border length is 20" or less, cut two borders at a time across the folded fabric width.