Help Me! Guide to iPhone 6: Step-by-Step User Guide for the iPhone 6 and iPhone 6 Plus (32 page)
Read Help Me! Guide to iPhone 6: Step-by-Step User Guide for the iPhone 6 and iPhone 6 Plus Online
Authors: Charles Hughes
Tags: #Encyclopedias

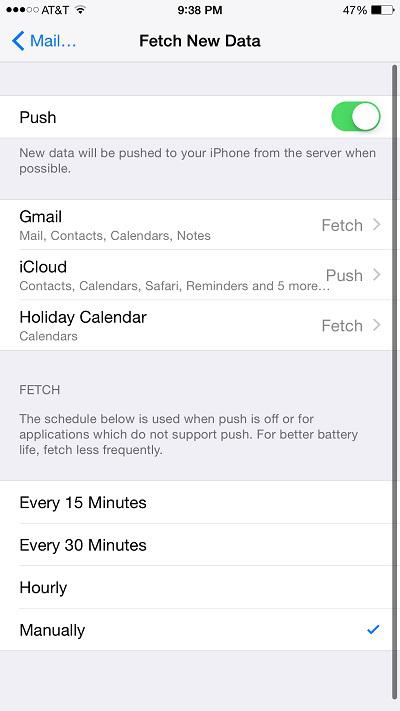 Figure 15: Fetch New Data Screen
There are various options that change the way your Mail application works. Touch the icon, and then touch
Mail, Contacts, Calendars
to change one of the following options:
-
Preview
- Choose the number of lines of an email message to preview in the Inbox.
-
Show To/Cc Label
- Choose whether to hide the 'To' and 'Cc' labels and show only addresses.
-
Swipe Options
- Changes the swipe action used to flag an email, or mark an email as 'Unread'.
-
Flag Style
- Choose the type of shape to use (color or shape) when flagging an email.
-
Ask Before Deleting
- Choose whether to display a confirmation before deleting an email.
-
Load Remote Images
- Choose whether to load images in an email automatically.
-
Organize by Thread
- Choose whether to group all emails with the same contact as a conversation.
- Always Bcc Myself
- Choose whether the email application sends a copy of each email to your own email address for your records.
-
Increase Quote Level -
Choose whether to increase the left margin when replying to or forwarding an email.
The iPhone 6 and 6 Plus have the ability to display the email Inbox in landscape view. This view allows you to view the list of emails on the left, and the content of the currently selected email on the right. To view the Email screen in landscape view, you must first set the Display Zoom to 'Standard'. If your phone is already is in 'Standard' zoom, just hold your phone horizontally while it is upright. The Landscape Inbox appears, as shown in
Figure 16
. Otherwise, refer to
Setting the Display Zoom
to learn how.
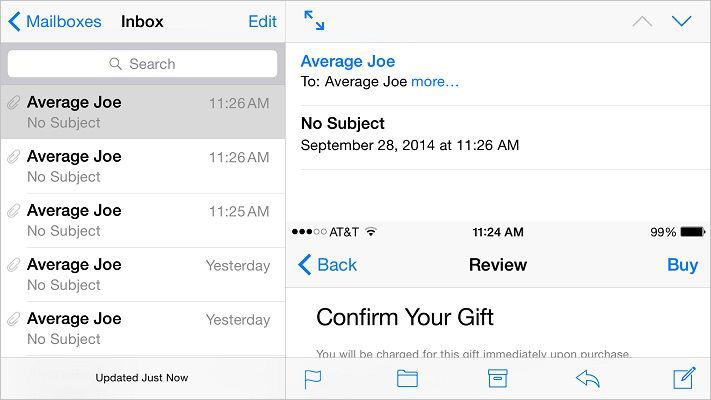 Figure 16: Landscape Inbox
________
Go to top
|
Back to Table of Contents
Table of Contents
1. Signing In to an iTunes Account
2. Signing In to a Different iTunes Account
3. Editing iTunes Account Information
4. Searching for an Application to Purchase
5. Buying an Application
6. Using Wi-Fi to Download an Application
7. Switching Between Applications
8. Closing an Application Running in the Background
9. Organizing Applications into Folders
10. Reading User Reviews
11. Changing Application Settings
12. Deleting an Application
13. Sending an Application as a Gift
14. Redeeming a Gifted Application
15. Turning Automatic Application Updates On or Off
In order to buy applications, you will need to have an iTunes account. To set up a new iTunes account:
1. Touch the icon. The Settings screen appears, as shown in
Figure 1
.
2. Scroll down and touch
iTunes & App Store
. The iTunes & App Store Settings screen appears, as shown in
Figure 2
.
3. If you already have an Apple ID, enter your Apple ID and password, and touch
Sign In
. Otherwise, navigate to
https://appleid.apple.com/account
using your computer's Web browser to register for an Apple ID.
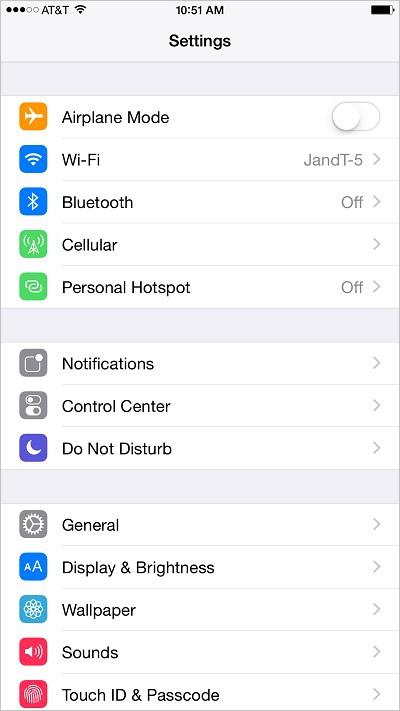 Figure 1: Settings Screen
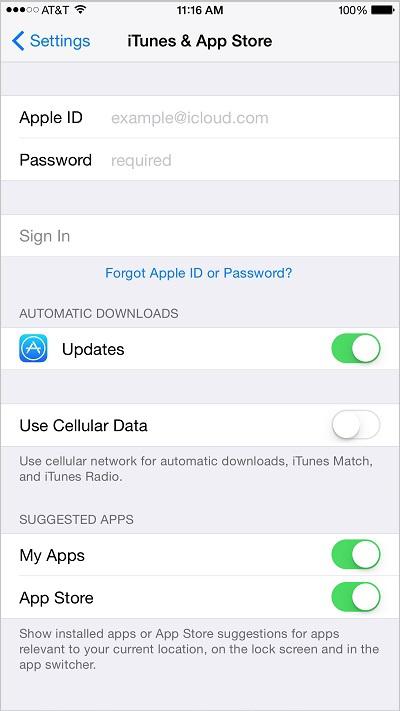 Figure 2: Store Settings Screen
If more than one person uses your phone, you may wish to sign in with an alternate Apple ID. Only one Apple ID may be signed in at a time. To sign out and sign in to a different iTunes account:
1. Touch the icon. The Settings screen appears.
2. Scroll down and touch
iTunes & App Store
. The iTunes & App Store Settings screen appears. If someone is signed in to their iTunes account on the phone, their email appears at the top of the screen.
3. Touch the email address at the top of the screen. The Apple ID window appears, as shown in
Figure 3
.
4. Touch
Sign Out
. The account is signed out.
5. Touch
Apple ID
. The virtual keyboard appears.
6. Enter your registered email address and password.
7. Touch
Sign In
. The account is signed in, and the owner's email is shown at the top of the iTunes & App Store screen.
 Figure 3: Apple ID Window
You must keep your account information up to date in order to purchase applications from the iTunes Application Store. For instance, when your billing address changes or your credit card expires, you must change your information. To edit iTunes account information:
1. Touch the icon. The Settings screen appears.
2. Scroll down and touch
iTunes & App Store
. The iTunes & App Store Settings screen appears. If someone is signed in to their iTunes account on the phone, their email appears at the top of the screen.
3. If you are not already signed in, enter your registered email and password, and touch
Done
. You are signed in.
4. Touch your email at the top of the screen. The Apple ID window appears.
5. Touch
View Apple ID
. The Account Screen appears with your personal account information.
6. Touch a field to edit it, and then touch
Done
. The new information is saved.