Windows Server 2008 R2 Unleashed (227 page)
Read Windows Server 2008 R2 Unleashed Online
Authors: Noel Morimoto

to 4GB. The default location for the staging folder will be located in the target share folder
in a hidden directory named c:\Apps\DfsrPrivate\Staging, if the target is located in
c:\Apps as an example. The staging folder and its 4GB limit is unique to each target on
each server.
Determining the Replication Topology
Windows Server 2008 R2 DFS provides a number of built-in replication topologies to
choose from when an administrator is configuring replication between DFS folder targets
or replication group members; they’re described next. As a general guideline, it might be
prudent to configure DFS Replication connections and a schedule to follow current Active
Directory site replication topology connections or the existing network topology when the
organization wants true multimaster replication.
ptg
Hub and Spoke
A hub-and-spoke topology is somewhat self-descriptive. A single target is designated as the
replication hub server, and every other target (spoke target) replicates exclusively with it.
The hub target has two replication connections with each spoke target: sending and receiv-
ing. A hub-and-spoke topology requires three or more servers, and when the hub target is
unavailable, replication updates stop between all replication members. Windows Server
2008 R2 introduces the ability to specify more than one hub when creating a hub-and-
spoke replication topology. In previous releases, this required creating a custom topology.
Full Mesh
Using a full mesh topology, each target has a connection to every other target in the repli-
cation group. This enables replication to continue among available replication members
when any member becomes unavailable. Because each member has a connection to every
other member, replication can continue with as few as two replication members. Using
this topology with read/write replication sets can lead to data conflicts if data is being
changed in multiple sites so this topology should be used with caution.
No Topology and Custom Topology
During the creation of a replication group, one of the topology options is the No
Topology option. Selecting this option enables an administrator to create a custom replica-
tion topology after the replication group is created. A custom topology allows an adminis-
trator to define specific replication connections for each target. This option can be useful
if an organization wants to define one-way replication for centralized backup or to opti-
mize read-only replicated folders. Also, this can be most useful when creating a topology
for a network that is connected using different speed WAN links or each connection needs
to have a specific schedule and bandwidth setting.
Installing DFS
1155
Replication Schedule and Bandwidth Throttling
Windows Server 2003 R2, Windows Server 2008, and Windows Server 2008 R2 DFS
Replication support scheduling replication, as well as restricting the amount of bandwidth
a replication connection can utilize. In the original version of DFS that came with
Windows 2000 and the initial release of Windows 2003, administrators were limited in
their replication scheduling options and forced to limit replication to after hours for large
data sets as opposed to trickling data replication all day long using only a portion of the
wide area network (WAN) link between sites. For large data sets that will initially replicate
across the WAN, the initial replication connections can be configured to run limited band-
width during business hours and full bandwidth after hours until replication has
completed and restrictions can be removed if desired.
To install DFS, an administrator of a file server on the network needs to install the File
System role and select the necessary DFS-related role services. Also, when the DFS role
services are selected, the necessary DFS tools will be installed as part of the installation. To
install the DFS services, please refer to the steps detailed in the “Adding the File Services
Role” section earlier in this chapter, but on the Select Role Services page, select Distributed
ptg
File System, DFS Namespaces, and DFS Replication. When installing the DFS services, a
new namespace can be created. Skip namespace creation during installation to ensure a
successful installation and create the namespace later to ensure proper configuration.
Creating the DFS Namespace and Root
When creating a DFS namespace, the administrator requires local Administrator group
access on each of the servers hosting the namespace, and if a domain namespace is
selected, the administrator also requires domain-level permissions because the domain-
namespace information is stored in Active Directory.
28
A DFS namespace root requires a file share. When the DFS root is created, the name can be
matched to an existing file share name or a custom name can be selected. The wizard
searches the specified server for an existing file share matching the DFS root name; if it
does not locate one, the wizard can create the share as part of the process.
As a best practice, the file share should be created and have share and NTFS permissions
configured prior to the DFS namespace creation. One thing to keep in mind, though, is
that the share name must match the DFS namespace name. Preconfiguring the NTFS
permission will help simplify troubleshooting and administration of the namespace.
To create a file share for a DFS root, follow the steps outlined in the “Managing Folder
Shares” section earlier in this chapter.
Before attempting to create a new DFS namespace, if the DFS services have just been
installed, ensure that the DFS services are running. In addition, for the DFS Management
console to appear in Server Manager, all instances of Server Manager might have to be
closed and reopened before following the proceeding steps.
1156
CHAPTER 28
File System Management and Fault Tolerance
To create a DFS namespace and root, follow these steps:
1. Log on to the Windows Server 2008 R2 system with an account with local server
administrator privileges. If a domain DFS namespace and root will be created, ensure
that the account has the necessary permissions to the DFS-Configuration container
in Active Directory.
2. Pre-create the share and set share and NTFS permissions on the servers and shares
that will host the DFS namespace root.
3. Click Start, click All Programs, click Administrative Tools, and select DFS
Management.
4. Select the Namespaces node, and in the Actions pane, click on the New
Namespace link.
5. When the New Namespace Wizard opens, type in the name of the server that will
host the namespace, and click Next.
6. On the Namespace Name and Settings page, type in the name of the share previ-
ously created, and click Next.
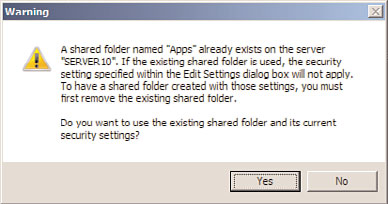
7. A pop-up window opens, asking whether the existing share should be used, as
shown in Figure 28.21. Click Yes to use the previously configured share.
ptg
FIGURE 28.21
Using an existing share for the DFS namespace.
NOTE
The initial DFS root name must match the name of the file share created previously. If
the share does not exist, the wizard will prompt you to create a file share from an exist-
ing folder or a new folder. Although the wizard can simplify the process by automating
this task, it does not provide a method of configuring NTFS permissions.
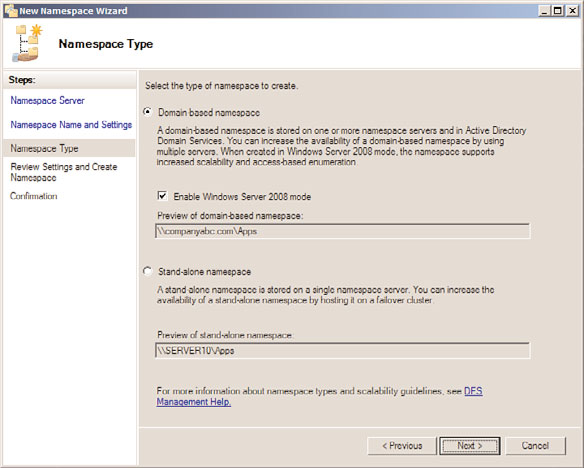
8. On the Namespace Type page, to create a domain-based namespace, select the appro-
priate option button and check the Enable Windows Server 2008 Mode check box to
enable scalability and allow for access-based enumeration within the namespace, as
shown in Figure 28.22.
9. On the Review Settings and Create Namespace page, review the namespace settings
and if everything looks correct, click Create to start the namespace creation.
Installing DFS
1157
FIGURE 28.22
Creating a Windows 2008 mode domain-based namespace.
ptg
10. On the Confirmation page, if the result status is reported as a success, click Close to
complete the process. If the creation failed, select the Errors tab to review the issues,
repair the problems, and attempt the namespace creation again.
Adding an Additional Namespace Server to a Domain-Based Namespace
After a domain namespace has been successfully created, it is a best practice to add an
28
additional server to host the namespace. To add an additional server to an existing
domain-based namespace, perform the following steps:
1. Log on to the Windows Server 2008 R2 system with an account with local server
administrator privileges. If a domain DFS namespace and root will be configured,
ensure that the account has the necessary permissions to the DFS-Configuration
container and child objects in Active Directory.
2. Pre-create and set NTFS permissions on the servers and shares that will host the DFS
namespace root.
3. Click Start, click All Programs, click Administrative Tools, and select DFS
Management.
4. Select the Namespaces node, and then double-click the Namespaces node to expose
the existing namespaces.
5. If the desired namespace does not appear, in the Actions pane, click on the Add
Namespaces to Display link and follow the steps to search for and add an existing
namespace to the console view.
1158
CHAPTER 28
File System Management and Fault Tolerance
6. Select the desired existing namespace, and in the Actions pane, click on the Add
Namespace Server link.
7. Type in the name of the server, and click OK to continue.
8. If the share already exists, click OK on the pop-up window to use the existing share
and existing share permissions. If the share does not exist, it will be created under
c:\DFSRoots\ by default.
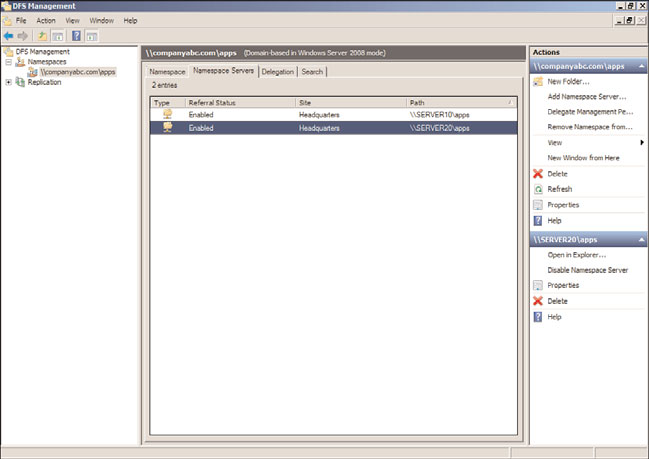
9. In the tasks pane, select the Namespace Servers tab to verify that the additional
namespace server was successfully added, as shown in Figure 28.23. Also note that at
the top of the pane, it shows that the namespace is a domain-based in Windows
Server 2008 mode.
ptg
FIGURE 28.23
Verify the successful addition of a namespace server.
Creating a DFS Folder and Replication Group
Creating a DFS folder is similar to creating the DFS root. A folder can be created to target
existing shares or folders beneath shares, or a new share can be created on the desired