Microsoft Visual C# 2005 Express Edition: Build a Program Now! (11 page)
Read Microsoft Visual C# 2005 Express Edition: Build a Program Now! Online
Authors: Patrice Pelland
Tags: #General, #Computers, #C♯ (Computer program language), #Programming Languages, #C#, #Microsoft .NET Framework, #Computer Books: Languages, #Computer Graphics, #Application software, #C# (Computer program language), #Programming, #Microsoft Visual C# .NET, #Microsoft Visual C♯ .NET, #Electronic books, #Game Programming & Design, #Computing: Professional & Programming, #C (Computer program language), #Computers - Languages, #Programming Languages - C#, #Programming & scripting languages: general


Your screen should now look like the
one in Figure 3-13.
Figure 3-13
Customize window with Start Without
Debugging selected
Now you must add the command to the main toolbar. To do that, drag Start Without Debugging from the Commands area and drop it onto the main toolbar to the right of the
Both figures have the “before”
Start Debugging button. (Figure 3-14 shows a before and after view of this process.) When
on the left and the “after” on the
finished, click Close in the Customize dialog box.
right, overlapping the before.
Figure 3-14
Before and after customizing the tool-
bar with the Start Without Debugging
command.
40
Microsoft Visual C# 2005 Express Edition: Build a Program Now!
CSX_chapter3.indd 40
CSX_chapter3.indd 40
10/24/05 3:03:25 PM
10/24/05 3:03:25 PM
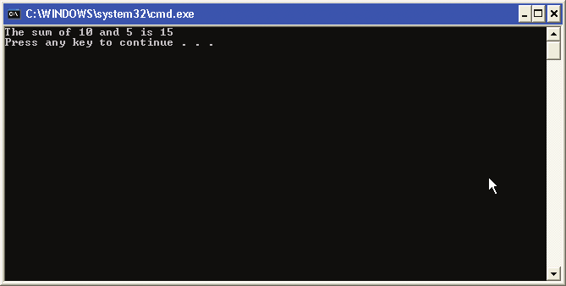
To make sure the customization worked, click
the new icon on the Debug menu or the toolbar.
(Or, use the keyboard shortcut Ctrl+F5.) You
should see a command prompt window with the
expected output, which is the string: “The sum of
10 and 5 is 15.” You should also see the message
“Press any key to continue . . .” as shown in
Figure 3-15.
As you probably realized by now, the effect
of the new command is to add the “Press any
key to continue…” and pause the execution after
the last instruction is executed. Press any key to
close the command prompt window and return
Figure 3-15
to the IDE. When you’re done, you can close the project by going to File/Close Solution.
Command prompt window with the
expected result and a message indi-
You'll be prompted to save or discard your changes. Click Save, and then if the name and
cating a paused execution
location are fine, click Save again in the Save Project dialog box.
Creating a Windows Application
You've just built a console application. The next
step is to develop the same application as a
Windows application.
TO BUILD A WINDOWS APPLICATION
When creating the console application, you saw
1 the New Project dialog box. Open it again by
going to the File menu and selecting
New Project . . .
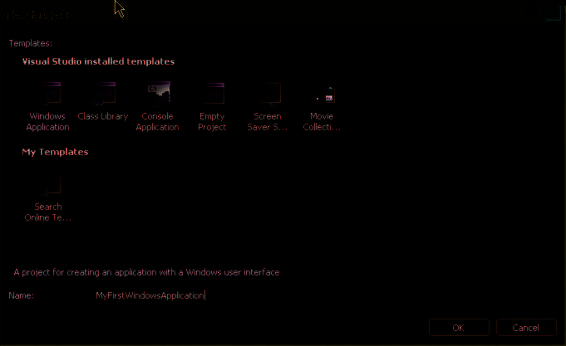
This time, select
Windows Application
from the
Templates section and type in
MyFirstWindowsApplic
ation
. Make sure your screen looks like the one in
Figure 3-16 and then click
OK
.
Figure 3-16
Creating a Windows application using
the New Project dialog box
Chapter 3: Creating Your First Application
41
CSX_chapter3.indd 41
CSX_chapter3.indd 41
10/24/05 3:03:26 PM
10/24/05 3:03:26 PM
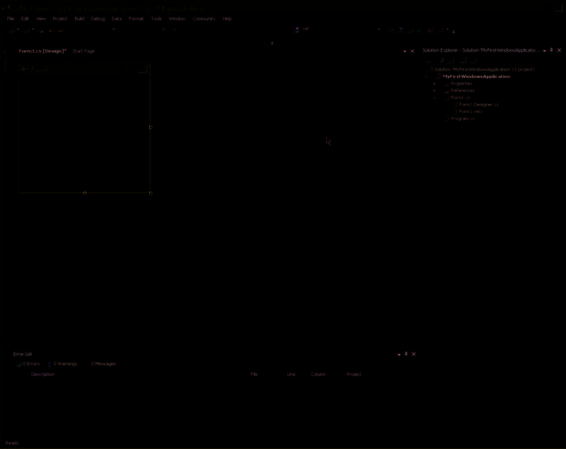
You’ll immediately see that the result of this operation is quite different for the Windows application process than it was for the console application process. You should see the Windows Form Designer as displayed in Figure 3-17.
Figure 3-17
IDE with the Windows Form Designer
and an empty form
On the left side of the IDE, move your mouse over the Toolbox tab to open the Toolbox window. Click 2 the plus (+) sign next to the Common Controls. You’ll see a
list of form controls that are often seen in a Windows application.
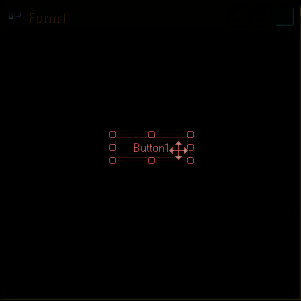
Select the Button control and drag it onto the Designer surface.
You should get a form that looks like the one in Figure 3-18.
Figure 3-18
Windows Form Designer surface
with a Button control
42
Microsoft Visual C# 2005 Express Edition: Build a Program Now!
CSX_chapter3.indd 42
CSX_chapter3.indd 42
10/24/05 3:03:27 PM
10/24/05 3:03:27 PM
Maybe you don’t realize it but at this moment you already have a full and valid Windows application without having written a single line of code. The application doesn’t do anything very useful at this point, but it works! You can easily verify this by running the application. Just hit
F5
and see for yourself. This is part of the “magic” and the beauty of using the Visual Studio® IDE environment for programming instead of using a text editor like Notepad. Visual Studio writes a lot of code for you, and in Chapter 5, we’ll take a look at
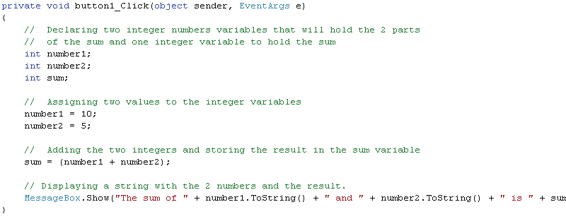
Figure 3-19
some of the activity that’s taking place behind the scenes to make it appear like “magic.” When finished,
Button-click method with the code
click the Close button on the form to
from our previous example
return to the IDE.
Double-click the button on the
3 designer surface. You’ll get the
familiar source code window but with
different content this time. For now,
type or copy the code under the Static
void Main(string [ ] args) from the console application you created previously in the Button1_Click method as shown
in Figure 3-19. (You’ll learn more about
this method and the whole process
behind the double-click in Chapter 4.)
In the source code, find the words
4 Console.WriteLine and replace them with the words
MessageBox.Show
. Then build and execute the application by hitting
F5
.
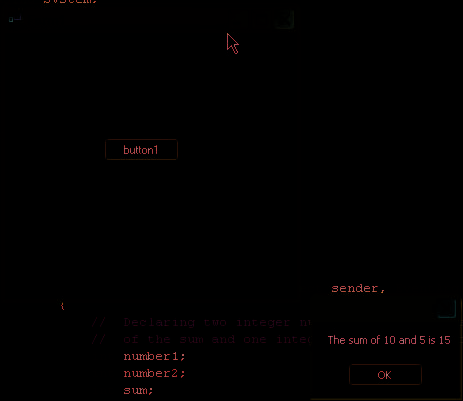
When the form comes up, click the button and you’ll see the result of your 5 application: a message box with the same string you’ve seen in the console application. It should look like Figure 3-20. Click
OK
in the message box and then quit the program by clicking the
Close
button on the main form.
Figure 3-20
Output of MyFirstWindowsApplication
Chapter 3: Creating Your First Application
43
CSX_chapter3.indd 43
CSX_chapter3.indd 43
